420 DA Thread

I’m trying to replace holding tank pickup tube and pump out hose. Anyone got part numbers and a vendor?
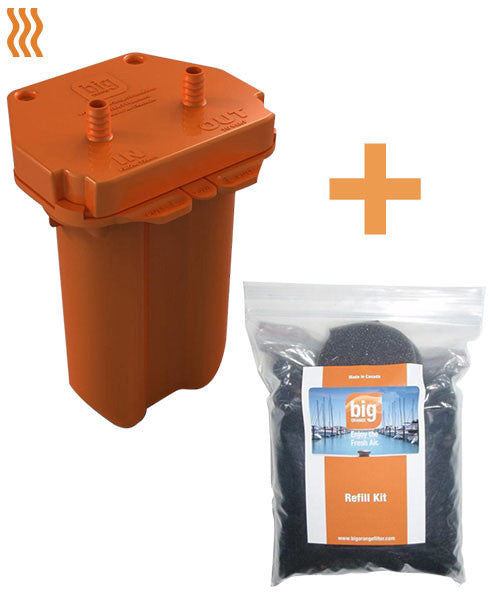
Hello my friend, you can try big orange filter also. It will help you get rid of false smell and also it has largest capacity container which take your all headache for more than a year. No chemical has been used in building this so it is a sustainable solution.

Big_Orange_OEM_1800x1800.jpg
Big_Orange_Original_filter_Package_1800x1800.jpg
 
My fresh water pump stopped working yesterday. I have a 2004 420 Sundancer. The pump I have is a Shurflo 3.5 GPM that says it supplies 40 PSI. The closest one I see is a Shurflo 4.0 that supplies 55 PSI. Has anyone installed one of these or is that too much pressure for the fresh water system?
 
Here is the forward unit…. More then enough cooling

View attachment 147501

A few questions about this replacement unit for the forward berth......

1. The water inlet and outlet ports appear to be on the blower side of the unit. What's involved in rerouting/extending the existing hoses to reach them? (The 6k BTU Citimarine unit appears to have the ports in the same location as the existing unit)

2. Since the salons forward vent on the port side is connected to the AC unit under the forward berth, is this 6k BTU unit large enough to offer ample air to the berth, shower, head and the forward salon ducts, knowing the factory unit is 7k BTU?
 
How to pull out salon sofa? Wanted to vac the gaps and tried to pull out with no luck. Did not see anything obvious.
 
Lift up the BACK cushion. There are pins that hold it in place. When lifted the pins will come out of holes and you can then remove the cushion. The bottom rolls forward when the salon table is removed. Note: you do not have to remove back cushion to roll the seat out.
 
Hello
I don’t know about you guys but I would have someone come out to clean out all the components to my air conditioning systems. He is out of the picture now so I thought I would try myself. Here’s my questions.

1. What exactly am I cleaning? I know I should check on the strainer, and supposedly filters that are on the compressors themselves? What about the thru hole outlets? My salon ac doesn’t pump out as much as the master, so I think it’s clogged.

2. Where is all of this located? My boat is 2007 44. I know where my units are, not sure about strainers and any other access points that are necessary.

3. What are your procedures and products that you use?

Much appreciated.
 
Sea strainers are in the bilge. 2 large ones in the center are your port and starboard main engine. The other 2 are generator and air conditioner pump. All 4 should be checked somewhat regularly for clogged/filled strainer baskets. 3 engines and AC system all depend on good flow of sea water for cooling. The procedures for all of your questions are available in a variety of places, the easiest being YouTube. Educate yourself on these procedures and you will be a happier captain.
 
Sea strainers are in the bilge. 2 large ones in the center are your port and starboard main engine. The other 2 are generator and air conditioner pump. All 4 should be checked somewhat regularly for clogged/filled strainer baskets. 3 engines and AC system all depend on good flow of sea water for cooling. The procedures for all of your questions are available in a variety of places, the easiest being YouTube. Educate yourself on these procedures and you will be a happier captain.

so you only deal with the strainers? I don’t mind researching how exactly to do it, I just don’t know know if anything else is required or recommended.
 
so you only deal with the strainers? I don’t mind researching how exactly to do it, I just don’t know know if anything else is required or recommended.
Each unit will have a mesh air filter that should be removed and cleaned with just water from a hose, there is also an air filter behind the vent in the aft cabin below tv. Also each unit has a drain pan with a small drain hose, good idea to get a can of compressed air and blow those lines out so pans don’t overflow in real humid conditions.
 
@NickHadel On my 2004 420, the AC discharges were on the Port side. I assume that is the same for your 44. From time to time, when I had a Port-side-to tie up, I would take a dock water hose to backflush the AC lines. What I did was shut the AC units down by turning off the breakers. I would then CLOSE the seacock for the AC cooling water. I would take off the lid to the sea strainer. Then, with a hose hooked up to dock water, and a towel to make something of a half assed seal, I would run dock water from the AC water hull discharge fittings back through the AC unit and into the bilge. I would let it run like this until the bilge pump discharge (also on the Port side) ran clear. It would take 3 or 4 times. The first time its pretty brown. Repeat on the other discharge port.

Jaybeaux
 
A few questions about this replacement unit for the forward berth......

1. The water inlet and outlet ports appear to be on the blower side of the unit. What's involved in rerouting/extending the existing hoses to reach them? (The 6k BTU Citimarine unit appears to have the ports in the same location as the existing unit)

2. Since the salons forward vent on the port side is connected to the AC unit under the forward berth, is this 6k BTU unit large enough to offer ample air to the berth, shower, head and the forward salon ducts, knowing the factory unit is 7k BTU?

I installed the DTU10 in the forward berth. As you mentioned the hoses were connected on the opposite side of the unit but I just extended the hoses and they connected to the unit with no problem.. The additional BTU's upfront have been much better..
 
I came down to the boat to find hot water dribbling out of my city inlet connection.
I just shut off the hot water heater and am running it dry to confirm it’s not just not just water in the line that’s been heated up from the 92 degree temperature.
Regardless of the temperature, there should be any water coming out of that inlet.
Probably a bad city inlet valve, right???
 

Attachments

  • IMG_9147.jpeg
    IMG_9147.jpeg
    115.9 KB · Views: 77
One recommendation…. Have them put the different colors on separate roles. You will not be able to make the bend up to the bow if they’re on one 5-1/2” role.
 
** DROP DOWN TV ISSUE / LINEAR ACTUATOR REMOVAL UPDATE**

As I posted a couple weeks ago, my drop down TV would no longer retract. I identified the linear actuator as the problem, but due to where it was in the ceiling just to the left of where the TV drops down, I couldn't get it removed. I finally got it removed today!!!

1) View attachment 72769 To get access to where the actuator was, I had to remove the screws which were holding in the black recessed wood compartment that the TV folds into. Unfortunately the screws holding it in are screwed in from the semi-inaccessible ceiling side. I had to buy a special screwdriver from Japan to get most of the screws out. The remaining screw could not be unscrewed because there was a metal bracket right behind it and there was not room for the screw to come out. I finally had to drill out the area around the screw. I made a little bit of a mess and will have to patch it up later. Luckily since it's up in the ceiling it's not very noticeable.

2) View attachment 72770 - Once unscrewed, the compartment backing didn't have enough clearance to be completely removed - but I was able to slide it a few inches to the back and side so I had better access to access the bolts holding in the actuator.
3) View attachment 72771 - The back end of the actuator is held in with a single bolt. You will need a small Allen wrench to hold one end if the bolt steady, while taking a regular wrench to the far side to loosen and remove the nut. This all requires gymnastics and bending my arms and wrists in directions I didn't realize they could go. Once the nut was off I needed vice grips to pull the bolt out.
4) View attachment 72772 - The moving end of the actuator is also held in with a single bolt. You will also need an Allen wrench (one size up from the back side) and a regular wrench (also one size up) to remove the nut, and then vice grips to pull out the bolt. There are also spacers on the bolt that will fall out once the actuator comes free of the swing down TV assembly.
5) View attachment 72773 - There is a blue wire and green wire attached to the red and black actuator lead wires. Unfortunately (and stupidly) I didn't make note of whether red went to green or blue before I disconnected the wires.
6) View attachment 72774 - Success! The linear actuator removed from the ceiling and placed on the counter. It's larger than I was expecting.
7) View attachment 72775 - In an effort to figure out whether green or blue was positive, I unscrewed the rocker switch that controls the TV going up or down from the wall. I noted these wires were black and blue. I noted when I pushed the switch I heard a "clicking" somewhere in the cabin - so figured there was some sort of relay/controller between the switch and the motor.
8) View attachment 72776View attachment 72777 - I found the controller behind the salon sofa (near where the Stereo amps / Sirius tuner / etc are located). The controller is an Intellitec model 00-00193-100 Slide Out Room Contrl Low Current. Note the green and blue wires attached to the "Motor" terminals - no polarity is noted - perhaps because the motor has to reverse depending on which direction the TV is going.
9) View attachment 72778 - As I mentioned in an earlier post, the replacement actuator costs over $500. The labels on the actuator state that there are no user serviceable parts inside. I figured I had nothing to lose - so tried to take it apart. Looks like whatever attaches the gear to the stroke came loose. At first I thought I could tighten with an Allen wrench - but now I am not sure. I'm going to contact the manufacturer Duff Norton and see if there is a repair option. I will post further updates!
 

Forum statistics

Threads
113,198
Messages
1,428,393
Members
61,105
Latest member
MShaun19
Back
Top