The galley faucet oh man good luck with that... let us know how you do it I want to replace mine eventually... its nice having this weather isn't it?
Navigation
Install the app
How to install the app on iOS
Follow along with the video below to see how to install our site as a web app on your home screen.

Note: This feature currently requires accessing the site using the built-in Safari browser.
More options
You are using an out of date browser. It may not display this or other websites correctly.
You should upgrade or use an alternative browser.
You should upgrade or use an alternative browser.
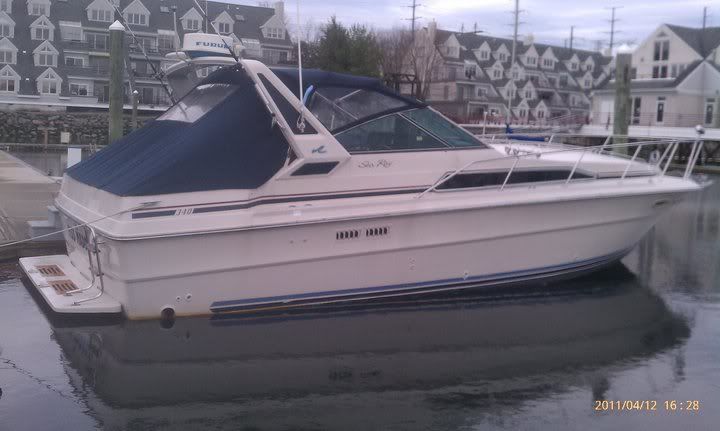
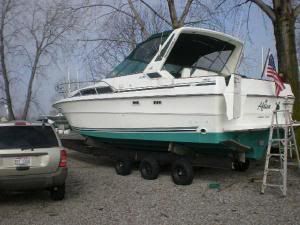
1989 340 DA Refit... Take a look

Ka1oxd
New Member
- Nov 19, 2009
- 1,071
- Boat Info
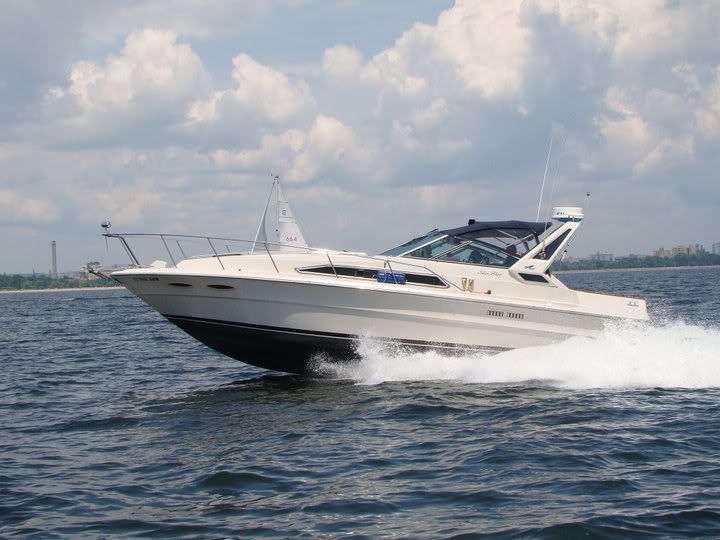
- 1988 Sea Ray 340 Sundancer
- Engines
- 7.4l inboards
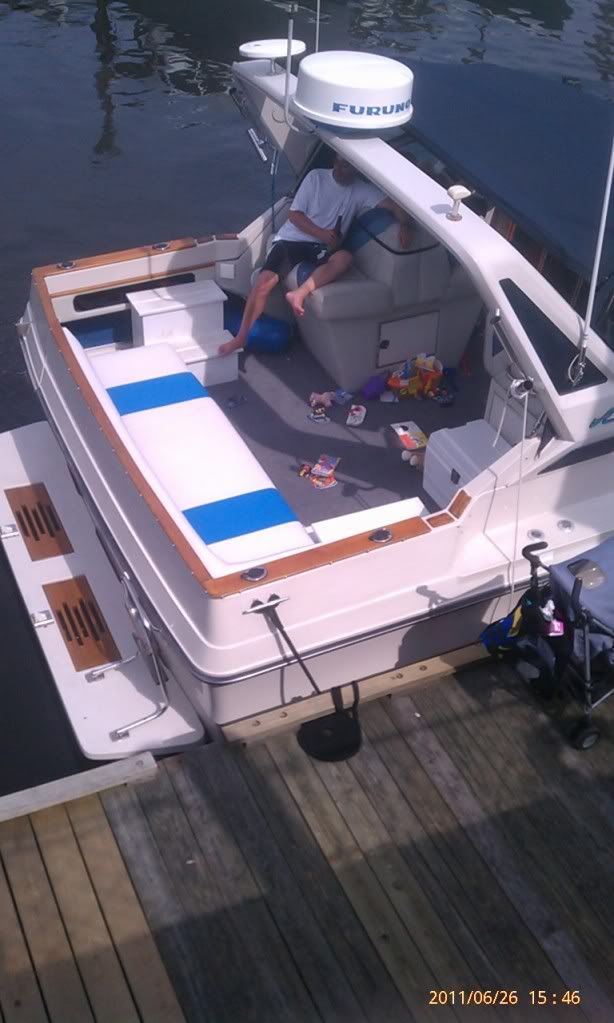
I will be taking pictures today after I clean up from the mess of the headline. The Admiral stayed out of the boat until yesterday. $29 for chemicals, $9 for rags, Admiral's face, priceless!
tmal2
Member
- Feb 14, 2009
- 116
- Boat Info
- 1989 340EC
- Engines
- Twin 7.4L Mercruisers with Hurth transmissions
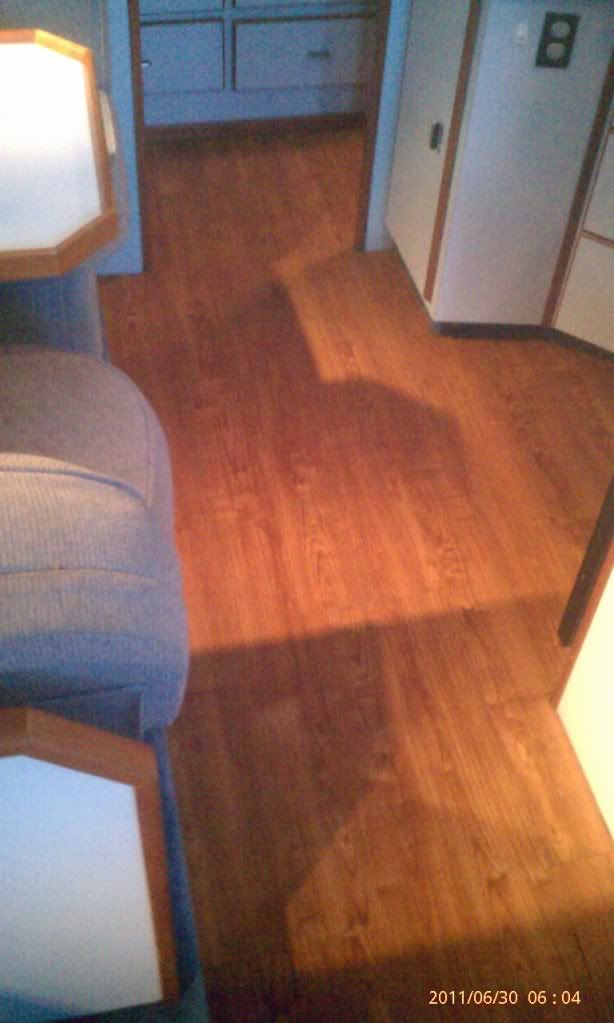
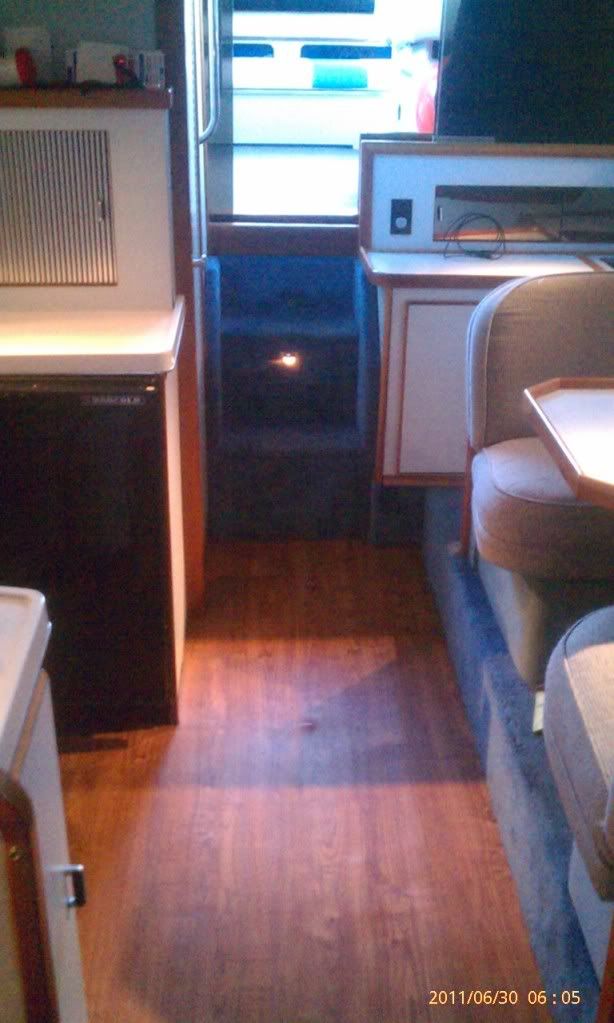
Jason, thanks for the update. I finished getting the glue off the ceiling today. Tomorrow, I am going down to clean up the mess I made, then go after the water leak from the galley faucet or the line that runs to it. lets see where I have to trace back to. Thanks for the update. I might poke around the stairs to see if I can find the hidden screws.
James, in reading through your blog and checking out your boat site I see you're tackling the same problem that many Searay owners of that generation have. The leak above the galley. Were you ever able to find the actual cause of the leak? I know you mentioned and old hole that was not sealed properly by the previous owner but I wasn't sure if that was your actual problem.
I've got a 1989 340 EC and have the same leak. I've been going nuts trying to find the source of the leak with no luck at all. It seems to be right where the horn wiring comes through the deck but I've resealed that numerous times with no luck. I really don't want to pull the boat apart like you have if I don't have to but I'm running out of options. What are you using for the new headliner material?
I was in your neck of the woods to help a friend bring a boat back to RI last spring. We were right next door to you at Yankee Boatyard. We brought a Searay 370 Sedan back to Warwick. 3s A Charm was the name of the boat. Maybe you remember it.
Last edited:
300SR
New Member
- Mar 3, 2011
- 264
- Boat Info
- 1989 340 Sundancer All Raymarine electronics
- Engines
- Twin GM 454's
I did mine with gold delta. Take the Icemaker out and get to it. The salt ate it up. Don't want that job again. I'll pass the tools!!
rszarka
Member
- Mar 19, 2011
- 982
- Boat Info
- 1999 Sea Ray Sundancer 540
- Engines
- Twin Detroit Diesel 8v92TA
Pyro: I am so impressed with the work that you have done on your boat! The woodwork is simply amazing, I would kill to have that on my boat!
You really really have a talent for this! IMO wood work like that so adds to the beauty and value of a boat!
I saw someone asked about the grill in the head, you custom made that right? Heck you could easily sell those on here I bet you everybody would be ordering them from you!
The stairs the floor everything is just great! Now I know what I want for my boat lol unfortunately I don't have your talent and can not do it myself so have to fly my friend Pyro to Australia to do wood work on my boat lol
Your boat is a real beauty Pyro congratulations, must be hard having a winter season where you have to put her away for six months, is that how long it lasts?
Where do you live if you don't mind my asking? Looks cold with the boats being trailered and shrink wrapped! Are you a carpenter or did you just set your mind to the task and learn the wood working to do your upgrades. Actually nix that question there's no way someone without experience could do that lol
Thanks for sharing and looking forward to more posts!
Rob
Ka1oxd
New Member
- Nov 19, 2009
- 1,071
- Boat Info
- 1988 Sea Ray 340 Sundancer
- Engines
- 7.4l inboards
Capt Tim, I am having fun with this. No I do not remember the name, but probably saw the boat on the water since all three marinas are separated only from the docks not being connected. I just update the web site with the details of what I have completed this weekend. I have found a couple of my problems. The leak with the headliner is found. 3 months of being out of the water and being covered where no water is hitting above the rub rail, the holes in the pictures are still wet and weeping. I also had water coming into the in-floor storage in the cabin. Lost of water. I am now working on trying to figure out where this is coming from.
Jason, I put some of the pictures up that I took today. 300SR maybe right to remove the icemaker to gain access to the faucet. It is very tight in there.
Jason, I put some of the pictures up that I took today. 300SR maybe right to remove the icemaker to gain access to the faucet. It is very tight in there.
Rob Ill pm you with some info. Believe it or not I had never done anything like the floor before. I am how ever pretty handy and love problem solving *its my calling in life I think*. It took me three months working weekends atleast 8 to 10hr days to get it done. I had a table saw,chop saw, and a jig saw all set up on the back deck. My dock mates were unhappy if I would start before 10 because it sounded like a lumber yard...
James. Wow man I new that job would be tight but whoa... thanks for the info and pictures...
Oh I had the conversation about removing the ice maker and crawling in the cubby? Don't remeber who it was now... I was diagnosed with CRS disorder a year or so ago..
James. Wow man I new that job would be tight but whoa... thanks for the info and pictures...
Oh I had the conversation about removing the ice maker and crawling in the cubby? Don't remeber who it was now... I was diagnosed with CRS disorder a year or so ago..
tmal2
Member
- Feb 14, 2009
- 116
- Boat Info
- 1989 340EC
- Engines
- Twin 7.4L Mercruisers with Hurth transmissions
Capt Tim, I am having fun with this. No I do not remember the name, but probably saw the boat on the water since all three marinas are separated only from the docks not being connected. I just update the web site with the details of what I have completed this weekend. I have found a couple of my problems. The leak with the headliner is found. 3 months of being out of the water and being covered where no water is hitting above the rub rail, the holes in the pictures are still wet and weeping. I also had water coming into the in-floor storage in the cabin. Lost of water. I am now working on trying to figure out where this is coming from.
I must have missed something. Where was the water coming from that was staining the headliner?
Not sure if this will help you or not but I once got to the boat on a Friday night only to find my under floor storage filled 3/4 of the way with water. Turns out I left the water pump on all week and the inlet line to the ice maker had a pinhole (and I do mean pinhole. I couldn't even see the hole but did see water mist in the air if the light hit it right) in it. With my water tank full, the small hole in the line and a lot of time all the water ended up in the storage area. I'm guessing 40 gallons worth. What a mess.
I still get dampness in there every now and then when it rains. I've never found where the water is coming from.
Hey Capt. Tim, I believe that the windshield wiper wires come down through this same area? Is that maybe your issue. if not then when was the last time you rebedded your windshield? Im sure James could give you more specifics but this is what comes to my mind... The only two holes I can think of is the horn ( which you took care of) and the wires for wipers... Hope this helps man...
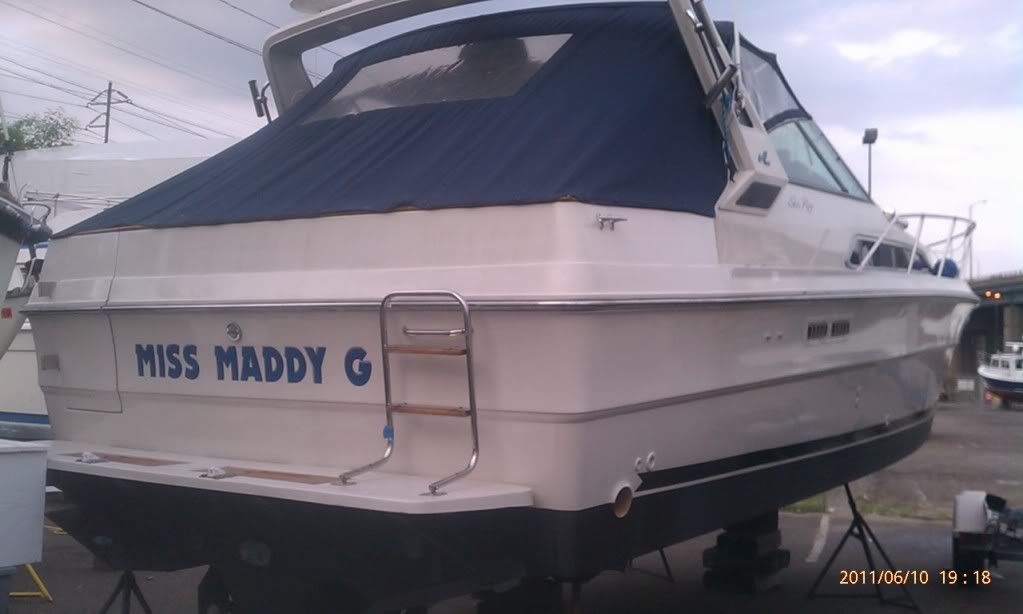
Miss Maddy G
Member
Capt. Tim,
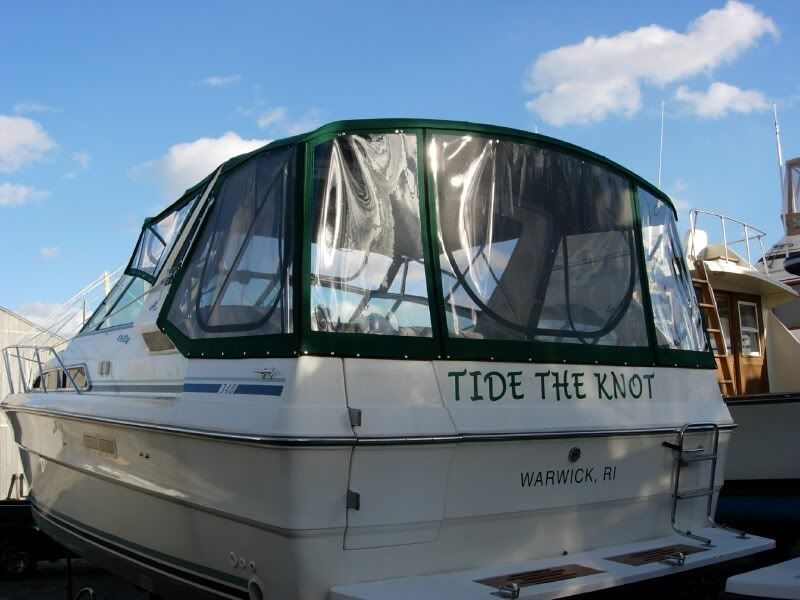
Tell me more about your canvas. Your's is the exact one I would like to get in navy. I love the 3 compartments wtih the zippers port and starboard above the windsheild. Currently, my canvas snaps straight to my winshield and goes back about 6 inches shy of the radar arch. I still have plenty of room but I would love to open it up the way you did. The positive air flow must be awesome above your heads. Can you tell me who you used and cost? Thanks!
Tell me more about your canvas. Your's is the exact one I would like to get in navy. I love the 3 compartments wtih the zippers port and starboard above the windsheild. Currently, my canvas snaps straight to my winshield and goes back about 6 inches shy of the radar arch. I still have plenty of room but I would love to open it up the way you did. The positive air flow must be awesome above your heads. Can you tell me who you used and cost? Thanks!
Miss Maddy G
Member
Hey guys,
Your boats look great! I have the express cruiser and have made similiar improvements. New headliner, allure wood floor, new bench seat in the cockpit, took off old pinstipes above rub rail and replaced the twin boot stripe with a solid black.
I will try to post some pics.
tmal2
Member
- Feb 14, 2009
- 116
- Boat Info
- 1989 340EC
- Engines
- Twin 7.4L Mercruisers with Hurth transmissions
Capt. Tim,
Tell me more about your canvas. Your's is the exact one I would like to get in navy. I love the 3 compartments wtih the zippers port and starboard above the windsheild. Currently, my canvas snaps straight to my winshield and goes back about 6 inches shy of the radar arch. I still have plenty of room but I would love to open it up the way you did. The positive air flow must be awesome above your heads. Can you tell me who you used and cost? Thanks!
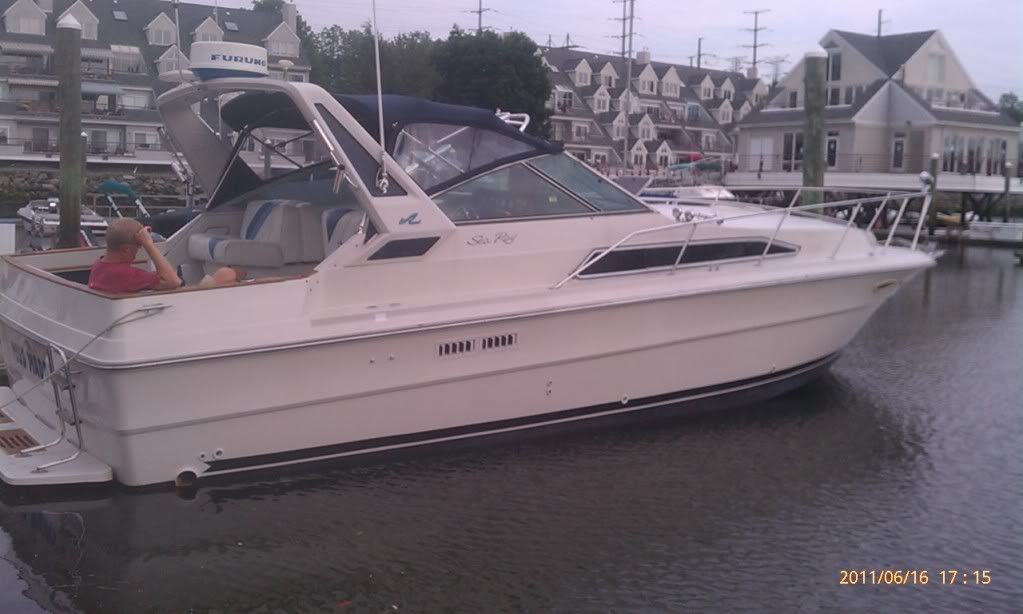
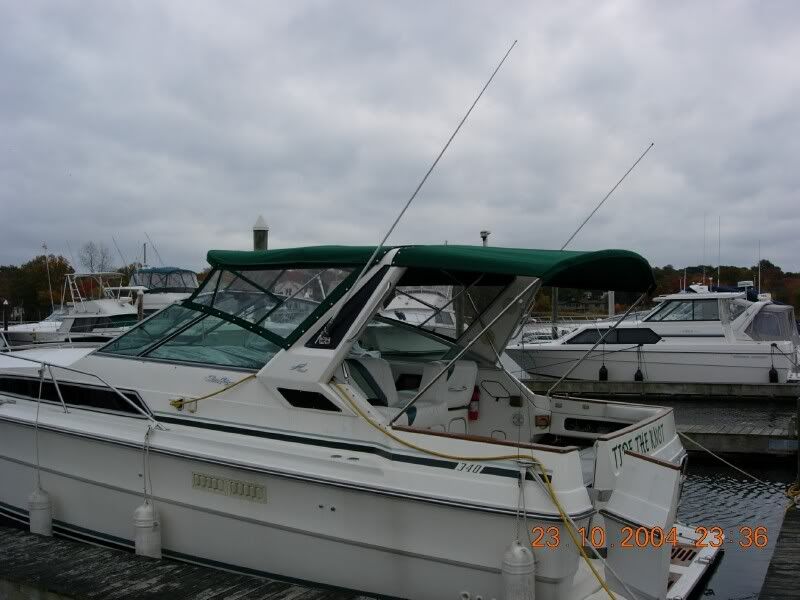
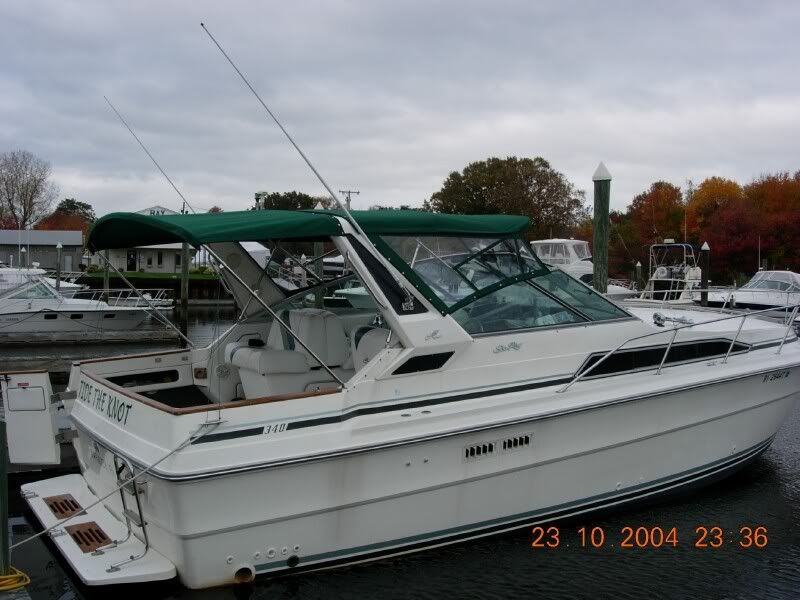
Miss Maddy G, Thanks for the compliments. When I bought my boat I had the same design you have. I met with a local canvas guy and we bounced ideas off each other till we ended up with the final product. One thing I would really suggest is integrating the arch into the design. Both the forward and aft canvas snap to the top of the arch and the look is amazing. I love it.
Raising the forward section at the windshield has given me a lot more visibility and ventilation.
I had this work done in 2005, the year after I bough the boat and I have not had a single regret. The camper back has made the outside deck space so much more usable. Whether it's getting out of the sun, wind or rain the entire back of the boat is usable.
I paid roughly $3500 back in 2005 and I know I got a good price because there was a lot of work involved. I really have no idea what it would cost today. I would suggest contacting a local canvas person as see what they have to say. Don't go cheap on materials because you do get what you pay for. I used Sunbrella and Strataglas and have not been disappointed at all. Even after 7 years of use everything is still in good shape and performing as I would expect.
Last edited:
Miss Maddy G
Member
Miss Maddy G, Thanks for the compliments. When I bought my boat I had the same design you have. I met with a local canvas guy and we bounced ideas off each other till we ended up with the final product. One thing I would really suggest is integrating the arch into the design. Both the forward and aft canvas snap to the top of the arch and the look is amazing. I love it.
Raising the forward section at the windshield has given me a lot more visibility and ventilation.
I had this work done in 2005, the year after I bough the boat and I have not had a single regret. The camper back has made the outside deck space so much more usable. Whether it's getting out of the sun, wind or rain the entire back of the boat is usable.
I paid roughly $3500 back in 2005 and I know I got a good price because there was a lot of work involved. I really have o idea what it would cost today. I would suggest contacting a local canvas person as see what they have to say. Don't go cheap on materials because you do get what you pay for. I used Sunbrella and Strataglas and have not been disappointed at all. Even after 7 years of use everything is still in good shape and performing as I would expect.
Tim,
Thanks for getting back to me so quickly. I sure will start pricing it out. The best part of the express cruiser is the cockpit and when my canvas goes back on a 45 the entire cockpit is useless. Thanks again!
tmal2
Member
- Feb 14, 2009
- 116
- Boat Info
- 1989 340EC
- Engines
- Twin 7.4L Mercruisers with Hurth transmissions
Hey Capt. Tim, I believe that the windshield wiper wires come down through this same area? Is that maybe your issue. if not then when was the last time you rebedded your windshield? Im sure James could give you more specifics but this is what comes to my mind... The only two holes I can think of is the horn ( which you took care of) and the wires for wipers... Hope this helps man...
Thanks for the input. I think I'm gonna have to start pulling things apart to find the source. I know this was a common problem on these boats. I guess I was hoping someone here would know exactly what the problem was and how to fix it. I don;t mind fixing problems I'm aware of. I HATE trying to figure out what the problem is in the first place. :smt119
My canvas is attached at the arch as well... Love it...
Have a friend with a 84 340EC and had his redone this past fall. He had all of the stainless in place all they replaced was the glass and the canvas and it was $4,200...
Oh Maddy G... Boat looks great... thank you for posting pictues...
tmal2
Member
- Feb 14, 2009
- 116
- Boat Info
- 1989 340EC
- Engines
- Twin 7.4L Mercruisers with Hurth transmissions
Tim,
Thanks for getting back to me so quickly. I sure will start pricing it out. The best part of the express cruiser is the cockpit and when my canvas goes back on a 45 the entire cockpit is useless. Thanks again!
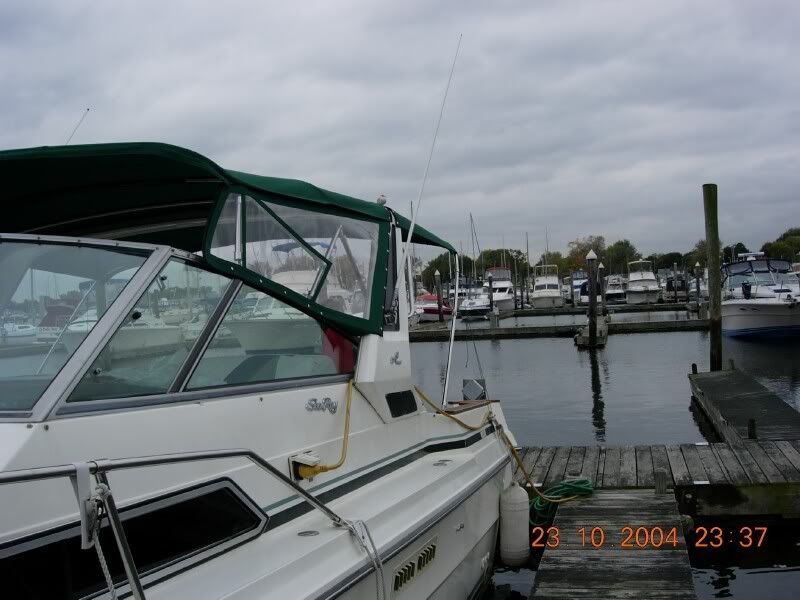
Good luck Cap. I'm sure you'll find someone that can build what you're looking for. I've got pictures from when the work was being done. I'll post them if I can find them. Feel free to print them up and show them to your canvas person.
tmal2
Member
- Feb 14, 2009
- 116
- Boat Info
- 1989 340EC
- Engines
- Twin 7.4L Mercruisers with Hurth transmissions
Tim,
Thanks for getting back to me so quickly. I sure will start pricing it out. The best part of the express cruiser is the cockpit and when my canvas goes back on a 45 the entire cockpit is useless. Thanks again!
Here's some pics I took while the work was being done. I guess I had it done at the end of 2004. These pics were taken while the actual work was being done. As you can see, when he started the boat was in the water and when he finished I was on the hard. Yes, it takes a while so don't get frustrated.:wow:

Miss Maddy G
Member
Gents,
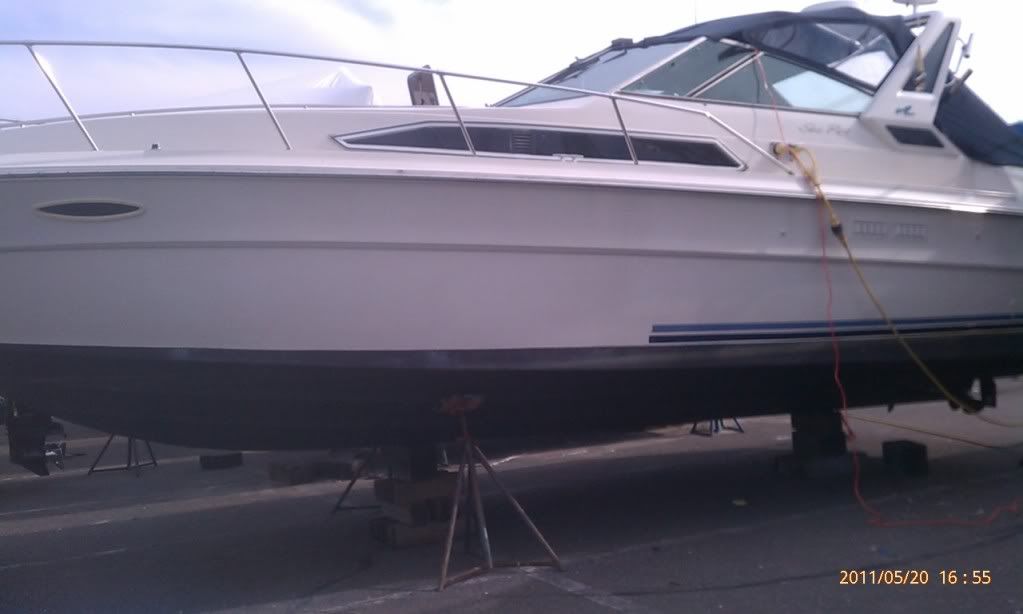
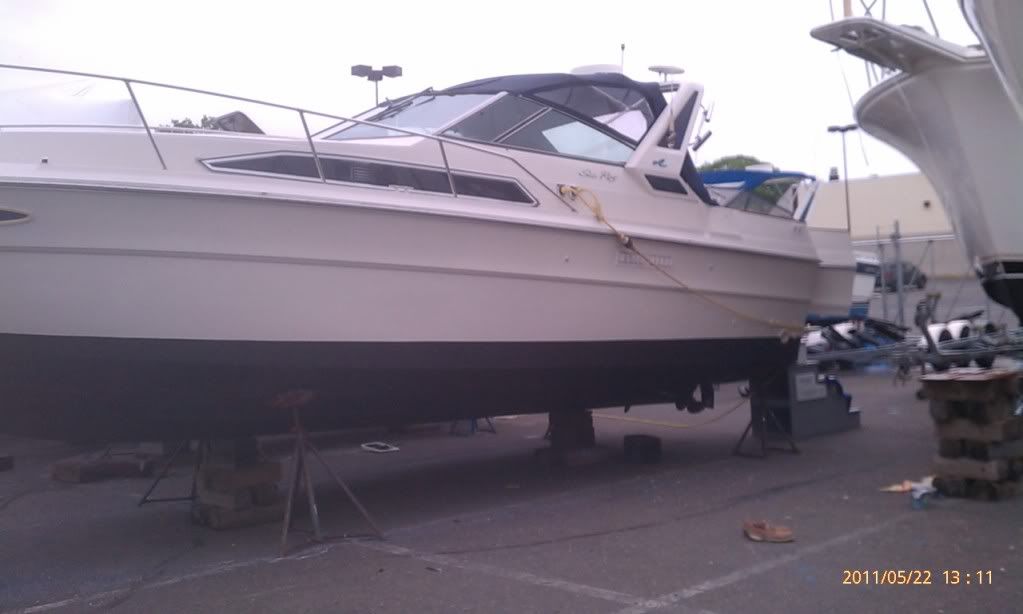
Thanks for the pics and the info. I also wanted to let you guys know that I raised the bottom paint to run through the middle of the exhaust. My scum line was on my gelcoat towards the stern. I simply removed the double boot stripe and moved the bottom paint up to run parallel with what would have been the top of the bottom boot stripe. I hope this makes sense, but if you look at the pics you will notice that towards the stern there is just an inch of bottom paint exposed compared to the gelcoat turning that nasty scum line color.
Thanks for the pics and the info. I also wanted to let you guys know that I raised the bottom paint to run through the middle of the exhaust. My scum line was on my gelcoat towards the stern. I simply removed the double boot stripe and moved the bottom paint up to run parallel with what would have been the top of the bottom boot stripe. I hope this makes sense, but if you look at the pics you will notice that towards the stern there is just an inch of bottom paint exposed compared to the gelcoat turning that nasty scum line color.
Last edited:
tmal2
Member
- Feb 14, 2009
- 116
- Boat Info
- 1989 340EC
- Engines
- Twin 7.4L Mercruisers with Hurth transmissions
Gents,
Thanks for the pics and the info. I also wanted to let you guys know that I raised the bottom paint to run through the middle of the exhaust. My scum line was on my gelcoat towards the stern. I simply removed the double boot stripe and moved the bottom paint up to run parallel with what would have been the top of the bottom boot stripe. I hope this makes sense, but if you look at the pics you will notice that towards the stern there is just an inch of bottom paint exposed compared to the gelcoat turning that nasty scum line color.
I raised my waterline 2 years ago. I didn't go quite as high as you but I probably should have. I still get scum when I'm loaded down with fuel, water and drinks. :grin:
The ole bottom paint manuver... check... people still think its sinking by the lines though...:huh: