58 Sedan Bridge Official Thread

SOUTH BAY STRAINERS

Has anyone removed the internal basket strainers for the main engines and replaced with external "South Bay" strainers?

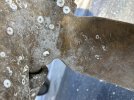
Our Parts Manual says we have 3" thru-hulls, 3" seacocks, and 2½" "pick-ups" (external scoops).

8 491217 SEACOCK, BRZ 3"FPT
9 490250 THRU-HULL, BRZ 3"
10 186502 PICK-UP, BRZ WATER INTAKE 2.5" (SCOOP ONLY)

I'm looking at the idea of removing the internal basket strainers, and replacing the function with external Groco APHS Series strainers.

https://www.groco.net/products/raw-water-strainers/hull-strainer/aphs-series

Their Service Sheet for strainers maybe suggests our external scoops are actually Groco's SC-2500s (given the Sea Ray Parts Manual description), and the ratio of open screen area to 2½" pipe (max) is 1.35. (Which seems to be less than ideal, given we have 3" thru-hulls?)

If I changed to external APHS-3000 strainers, the ratio of open screen area to 3" pipe (as we have) would be 3.31. That seems to me to be an improvement in water flow...

But my real reason for considering all this is to maybe be able to slightly declutter the forward end of the engine room. That assumes I could remove the "criss-cross" arrangement that connects the starboard thru-hull to the port engine strainer basket... and vice versa...

Then I could also see adding an inline service valve, such as I already have on the AC intakes, to be used for winterizing:

https://www.groco.net/products/valves-seacocks/accessories/ssc-series-service-adaptor

I've also read that a) the "South Bay" strainers are also a good idea for AC intakes too, and b) it's not a great idea for genset intakes without some care about pushing too much water through. I could see replacing internal basket strainer for both ACs, and leaving the genset as is...

What do we think about the whole idea, the minor details, etc.?

-Chris
I ran "South Bay" strainers (named I believe from their use on Long Island's Great South Bay to avoid fouling from the tremendous amounts of eel grass we see, but I digress. I've always left the strainer and baskets in use as well. I don't think I've ever seen South Bay strainers used in lieu of the traditional strainer and basket arrangement, though I don't know of a reason you couldn't. YMMV
 
I ran "South Bay" strainers (named I believe from their use on Long Island's Great South Bay to avoid fouling from the tremendous amounts of eel grass we see, but I digress. I've always left the strainer and baskets in use as well. I don't think I've ever seen South Bay strainers used in lieu of the traditional strainer and basket arrangement, though I don't know of a reason you couldn't. YMMV


Thanks, Brian. Yes, I've seen "Great South Bay" and eelgrass in the same sentence. Not sure I know what eelgrass is. :)

Reading on other fora suggests its more common to have one or the other, external or internal, both not necessary. I have no experience with externals, though...

-Chris
 
"INDIRECT" ROPE LIGHT REPLACMENT, MASTER HEAD

Not high on my "to do" list of fixes, but...

Has anyone done it? How to reach the connection/plug-in end? Does the whole cabinet come out? (I see 6 horizontal screws inside, 3 on either side of the doors...)

I've been gradually working on changing the rope lights under our master bed, looks like these are going to work out OK:

https://www.1000bulbs.com/product/174242/PLT-10319.html

Note: 120VAC, Warm White, and LED.

Note also 1/2" (marked 13mm) and FYI they fit (tightly) in the mounting "tube" (?) under the master berth, even though the SR Part Manual cites "3/8" flex" for five of these in various locations:

9 1044528 LIGHT, FLEX 3/8" N/ATTACHMENT TAB 110V

The 12' version is a bit too short, and the 18' version is a bit too long, but... cutting the 18' version to 15' and installing a new (smaller) end cap may work out.

The listing says they're not intended to be cut or spliced, but that apparently only means you lose UL certification for indoor/outdoor installations. (The text for the 150' versions of the same brand -- cuttable every 3' -- touch on that point..)

-Chris
It’s actually pretty easy. You need to gently pry off the wood panel to the right hand side of the mirror. It’s glued on with the typical Sea Ray rubberized glue (almost like hot glue). Start at the bottom and slowly work your way up. Once removed, you’ll reveal a second panel with screws holding it on. Unscrew and you’ll reveal the cavity behind the vanity. Clearly, you’ll see the rope light and plug/socket. Replace the rope light and put it all back together then glue the wood panel back on.
 
It’s actually pretty easy. You need to gently pry off the wood panel to the right hand side of the mirror. It’s glued on with the typical Sea Ray rubberized glue (almost like hot glue). Start at the bottom and slowly work your way up. Once removed, you’ll reveal a second panel with screws holding it on. Unscrew and you’ll reveal the cavity behind the vanity. Clearly, you’ll see the rope light and plug/socket. Replace the rope light and put it all back together then glue the wood panel back on.

Got it, thanks!

Had to deal with that kind of glue when we replaced the washer/dryer. Goop.

-Chris
 
I just got my boat hauled to do a bottom job before I head south for the winter and I noticed my props had some pitting, which I was told was from cavitation has anyone else experienced this issue and determined what the root cause was.
IMG_1461.jpeg
IMG_1460.jpeg
 

Attachments

  • IMG_1458.jpeg
    IMG_1458.jpeg
    4.6 MB · Views: 52
  • IMG_1459.jpeg
    IMG_1459.jpeg
    3.1 MB · Views: 49
I just got my boat hauled to do a bottom job before I head south for the winter and I noticed my props had some pitting, which I was told was from cavitation has anyone else experienced this issue and determined what the root cause was. View attachment 150609View attachment 150610
Doubt cavitation - the props really don't turn fast enough to cause a Delta P that cavitation needs.
That looks to be a casting defect. A good prop shop can grind it out and braze it up.
These pics are my port prop - electrolysis. Caused by the garbage scow that was in the slip next to me. Your's could be an advanced case of electrolysis.
IMG_5445.jpg
IMG_5444.jpg
 
Doubt cavitation - the props really don't turn fast enough to cause a Delta P that cavitation needs.
That looks to be a casting defect. A good prop shop can grind it out and braze it up.
These pics are my port prop - electrolysis. Caused by the garbage scow that was in the slip next to me. Your's could be an advanced case of electrolysis.View attachment 150614View attachment 150615
Very possible I was in a marina with a sailboat with a metal hull that had major electrical issues maybe had some stray current. When I left that marina my zincs lasted much longer.
 
I just got my boat hauled to do a bottom job before I head south for the winter and I noticed my props had some pitting, which I was told was from cavitation has anyone else experienced this issue and determined what the root cause was. View attachment 150609View attachment 150610
The original 29 x 37 props had that problem. Sea Ray replaced them with a 30 x 33‘s. Do you still have the 29‘s by 37‘s?
 
Im
The original 29 x 37 props had that problem. Sea Ray replaced them with a 30 x 33‘s. Do you still have the 29‘s by 37‘s?
Very possible I was in a marina with a sailboat with a metal hull that had major electrical issues maybe had some stray current. When I left that marina my zincs lasted much longer.
Prop guy confirmed today that the pitting was from cavitation.
 
Im


Prop guy confirmed today that the pitting was from cavitation.
I remember reading about this cavitation issue years ago on here. Thinking it was a couple of big dancers that regularly did some long runs. AKA "head south for the winter". I also think @carterchapman is on it with the fix, not that I know the numbers but I do remember it being a significant change and maybe adding some cup.
 
So my dockmate’s 2005 58DB had 29x35 when he bought it, so I bet the PO just had the originals pitched down from 37 to 35 in lieu of buying 30x33s.

What are yours?
 
I just left the prop shop and I have the 28 inch props if anyone knows of a set of 30 inch props for sale please advise
 

Forum statistics

Threads
113,182
Messages
1,428,064
Members
61,088
Latest member
SGT LAT
Back
Top