268 weekender transom rot (contains high resolution pics)

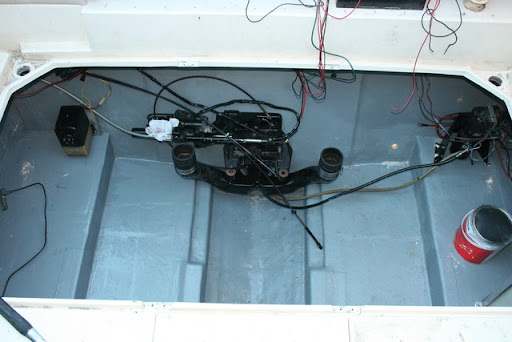
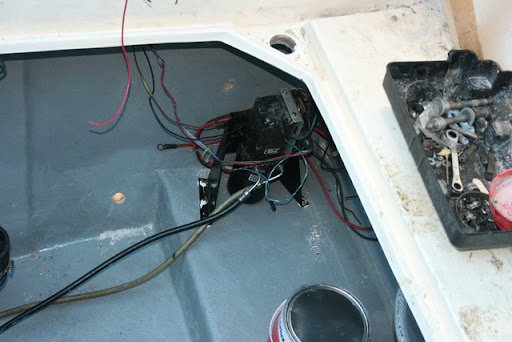
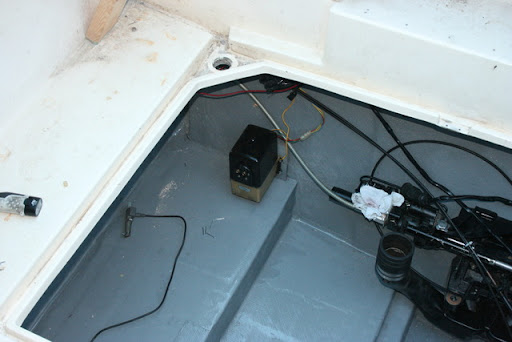
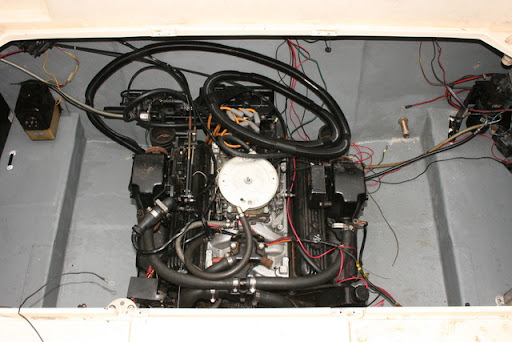
The box's I wouldn't worry about it would be getting the water past the stringers to the drain plug. Like I said before I am not real sure how Sea Ray is doing it but I am going to look tomorrow since I have go get inside to get the snow off of the tarp.
 
The drainage is more than just about the wood rotting, your foam can get soaked and then add weight to the boat.
 
Hey Lime,
I was looking at your photos of your restoration progress and noticed you took the interior side panels off. How do those get removed? I don't see any screws or anything to hold them on. Mine are in need of replacement.
Keep up the good work!
 
Once i get all the bulkheads finished and top of the shelves made up i will decide about drainage. The way i look at it currently the boat lasted 23 years without drainage holes. But if the boat is done right there should be no water getting into those area to begin with.
Lime 4X4, I just went out to knock the snow off and looked at mine the only way I can see that water got in to the Flotation would be the through bolts & screws IE Trim Tab's & Swim platform supports. The stringers are totally different than my Formula so forget what I said earlier mine were wide open. But if you did put a drain towards the Stern it would give you a warning if something was leaking just an idea.
 
Mooner my panels were held in with nuts. If u reach up under the panel u will feel them. The rear panel is held in with 2 nuts. The panels in the middle are held in with nuts that are located in the side pockets. Plus i also had screws holding mine in that were accessed from the outside. My screws were located between the color change seams. The lower middle one is held by alum brackets that screwed to the hull. Just remove the center section and there is 4 on the top and 4 on the bottom. Hope that helps. My intial project was to replace the exterior panel vinyl and wood.
Daddubo My only concern of putting holes in my stringers is if water is laying in the bilge i really don't want it wicking into the foam. The stringers are layed out that when water gets into the bilge it sits between the 2 stringers. I was thinking of maybe putting in sealable access plugs.
 
Well if you seal every thing up real good inside and out then I think you would be good to go. Have you looked into any exterior (under water) caulk?
 
Just an update. Progress is still being made. Got all the bulkheads and shelving cut. Also got the gastank supporting shelf made. Did make a design change thou. The boat originally had 2 flat shelves on each side of the engines. Batteries where located there. I made them slightly sloped toward the engine. so that water would drain into the bilge better. I'm planning on moving the batteries to the outer shelves. Also relocating the freshwater tank and hot water heater to the mid berth storage compartment. Hopefully getting some of the weight out of the stern will help with it planning faster
 
Finally got all the supplies needed to start the fiberglass phase.

here are the stringers and shelving being installed
img_8216.resized.jpg


img_8211.resized.jpg


and no the heater wasn't on
img_8210.resized.jpg


img_8348.resized.jpg


1st layer og 1708 biaxle cloth
img_8804.resized.jpg


img_8803.resized.jpg


tieing the transom fiberglass onto the shelves and stringers
img_8812.resized.jpg


2nd full layer of cloth
img_8818.resized.jpg


img_8819.resized.jpg


and this is what happens when u mix too much epoxy and u forget about it..lol Was actually smoking before it burned thru the plastic container
img_8821.resized.jpg
 
Yes it will be done by 4th of july at the latest. We go down to the chesapeake bay area for the fireworks
 
The transom was tabbed in with 2 layers of 1708 biaxle tape Plus 2 full layers of 1708 cloth covering the whole transom. I think that is plenty strong. Used 3 layers of 1708 cloth on the floor (bilge). Used whole pieces from one side of the boat to the other. I think i tied the stringers and shelves in pretty good. I also layed an additional 3 layers of cloth directly below the engine. The original glass was almost an inch thick there.
 
Engine will be in this weekend and on the water the week after
Finally light at the end of the tunnel..lol

img_9116.resized.jpg


img_9117.resized.jpg


img_9118.resized.jpg


img_9119.resized.jpg
 
Very nice! Great job - and you'll be on the water much sooner than you originally thought.
 
engine installed.electric fuel pump wired,battery switch installed and blower wired

img_9121.resized.jpg


img_9122.resized.jpg


img_9123.resized.jpg


img_9124.resized.jpg
 
With that aluminum intake I hope you will be installing a heat exchanger for closed loop cooling, especially if your'e in salt water.
Great looking job and an enormous amount of work on your part.
 
The manifold is just a regular vortec dual plane i got off ebay for 10 bucks. Converting to closed cooling is next on the list. I boat mostly in fresh water occ we go to the upper chesapeake bay for a couple of days a year.
 
Tomorrow 04/03/2010 will be the moment of truth...lol She is put back together enough to splash her in the lake just to make sure i have no other issues
 

Forum statistics

Threads
113,173
Messages
1,427,900
Members
61,086
Latest member
MrWebster
Back
Top