1978 srv-200 repair project

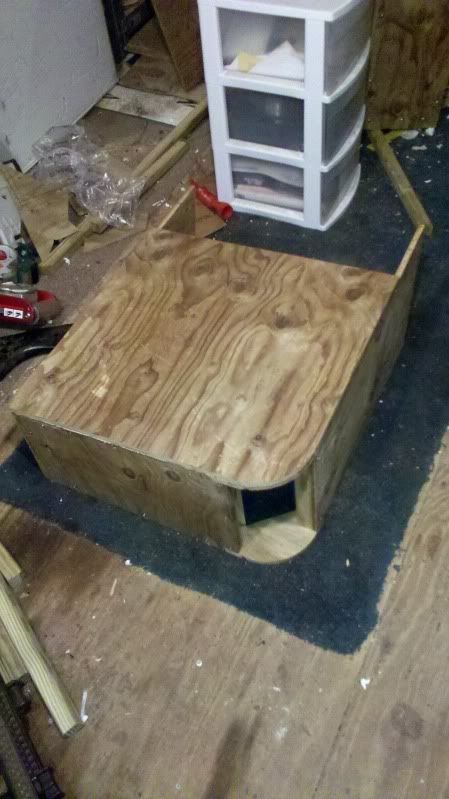
So right now I'm trying to find a similar vinyl at the local upholstery place that will come close to the color of my seats. The vinyl from VEADA is pretty expensive so I'm trying to go the cheap route on this, but still get a marine vinyl. I just got the sample piece in today from VEADA, so I can take that to the upholstery place instead of the whole seat.

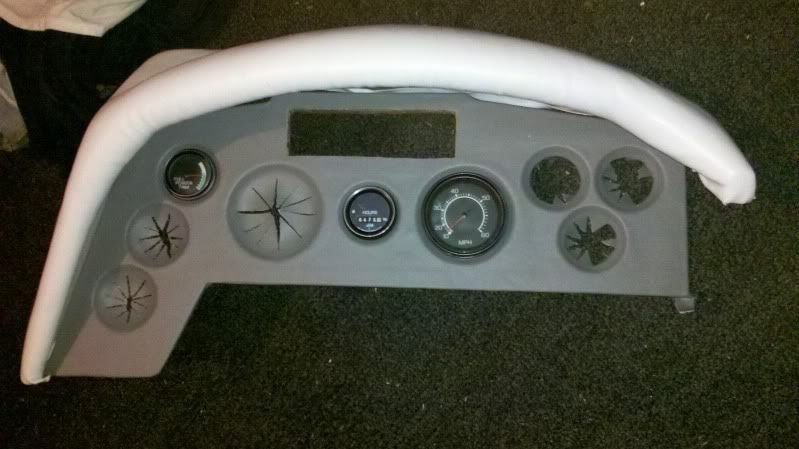
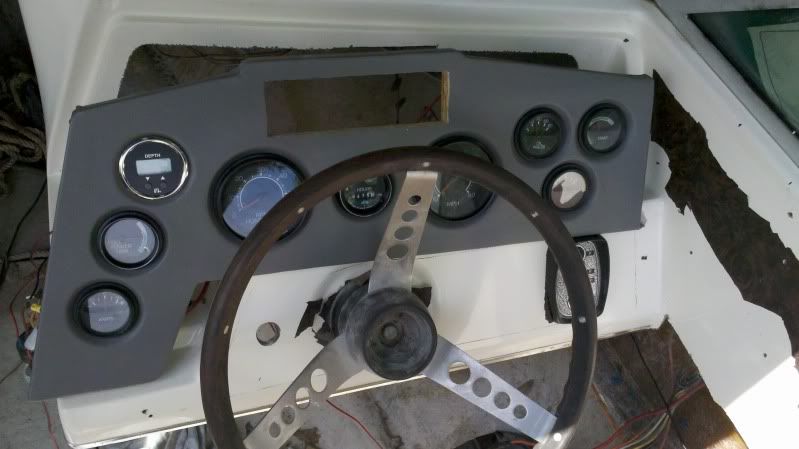
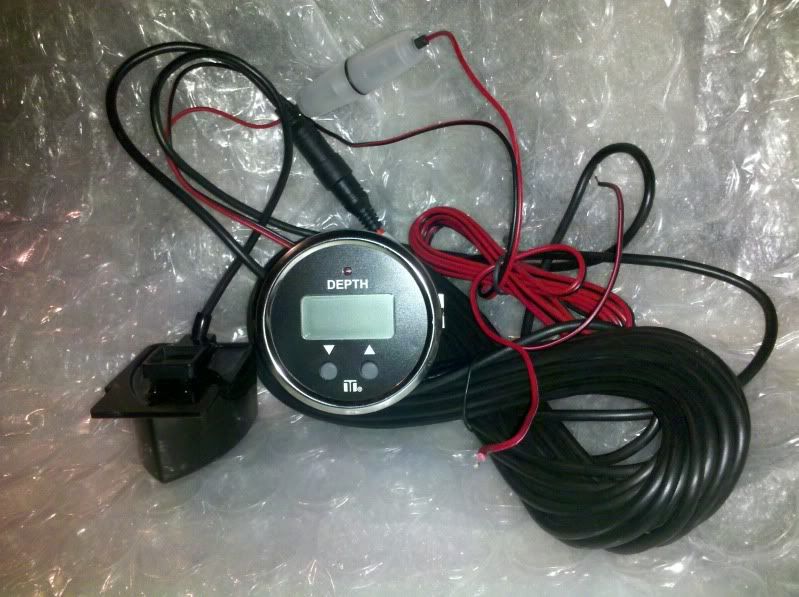
Also I finally got my depth gauge and transducer in. Took me a while to get one that I wanted and would sort of match the other gauges. Can't go wrong with teleflex and I got it at a good price also. Transducer will be glued to the hull under the engine if it reads correctly right there.
2011-10-07_18-08-26_245.jpg


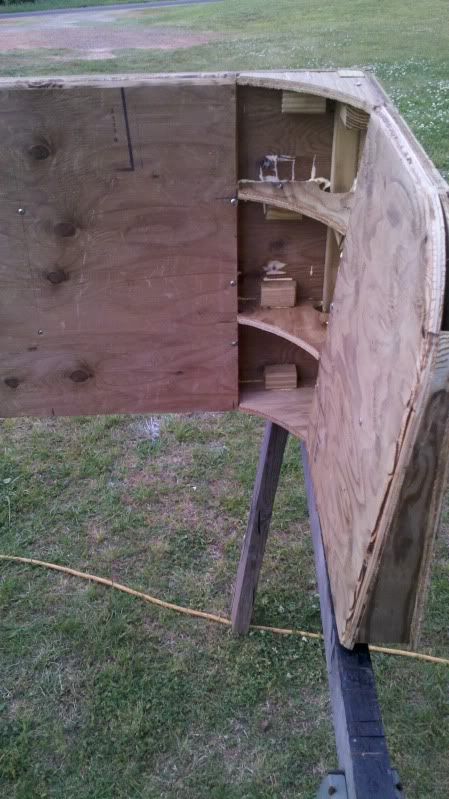
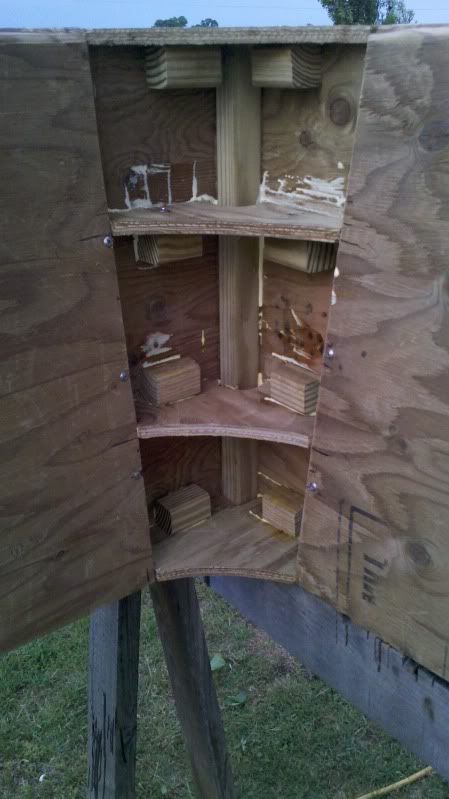
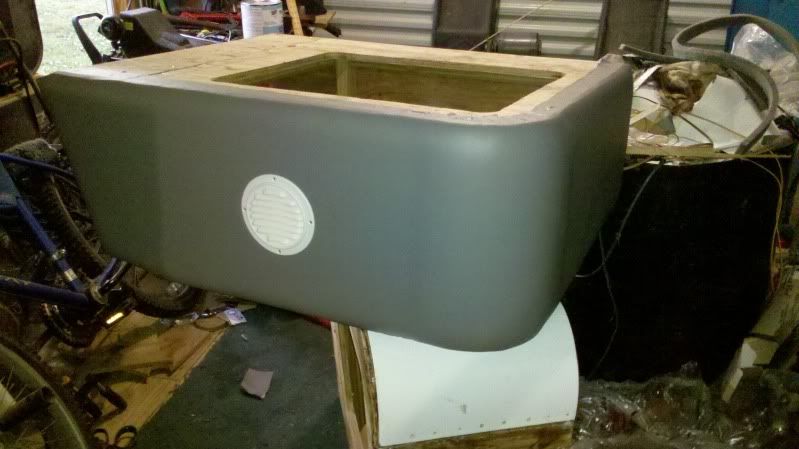
I also bought some reinforced filler, so I can build up the lows on the gauge pieces and finally get that finished. I've been slacking with working on the boat lately so maybe some more will be done soon.
 
Okay, so I'm back. It's that time of weather to start working on this again, and I'm getting close to water-ready.

I've been building the seats for a couple weeks now, a little bit at a time.There are no templates or anything that I'm going by. It's purely my imagination and ideas from boats that came in the shop.

So starts out with the wood. I went with marine grade plywood that is used for pontoon decking - suppose to be a 50 year warranty on this stuff. I bought 3/4" sheet for the sun deck and seat bottoms, 1/2" to build the seats and side panels with, and 2x2 treated rail posts for the framing. I still have to fiberglass the rounded corners on the seat base to enclose it. The base has plastic furniture feet on the bottom to raise it off of the floor to allow water to pass.

I wanted the seats to be somewhat comfortable, so I angled the seat bottom and back. It's somewhat reclined and should support you more than just a straight up and down seat. Back seat consists of two seat bases, one removable seat bottom in the center, and a full seat back that goes from the port to starboard and wraps around towards the front.

I forgot to take pics of the building process, so all you get is the partly finished product.

2012-04-21_20-11-29_623.jpg

2012-04-21_20-13-11_859.jpg

2012-04-21_20-13-59_476.jpg

2012-04-21_20-14-37_533.jpg


I should have more finished within the week, so maybe I can start updating this more.
 
I have an 82 srv200 that I purchased this early spring. Your boat seat frames look pretty sturdy, sure they are better than anything you could
purchase aftermarket.
 
I have an 82 srv200 that I purchased this early spring. Your boat seat frames look pretty sturdy, sure they are better than anything you could
purchase aftermarket.

Yup, that was the plan. I want a solid seat that will last a long time.

Finished up some stuff today. I just need to make some corner braces on the seat back, and then smooth it up so foam can lay over top. Oh, and drill some large holes in everything to allow the foam to breathe if it does get wet.

Added a top to the seat bases. A storage hole needs to be cut out though.
2012-04-22_19-07-24_673.jpg


The seat back has angled supports glued in and ready to add another piece of wood on top so foam can lay on it.
2012-04-22_19-33-20_116.jpg

2012-04-23_21-29-55_741.jpg


Back board added and sides in place.
2012-04-23_21-31-24_523.jpg

2012-04-23_21-33-13_470.jpg

2012-04-23_21-33-33_712.jpg


I still need to cut out boards for the seat cushions, but this may be on hold until I get the seat back upholstered, so I don't have any gaps or clearance issues.
 
Last edited:
So, the other day I sanded down the gauge cluster "hood" and applied foam to it today. Then, finally wrapped in vinyl (the best I could). Basically everything will have a layer of foam on it to cover up imperfections and just to have something soft to lean against.
Foam:
2012-04-24_19-09-57_444.jpg

2012-04-24_19-09-47_966.jpg

Vinyl wrapped:
2012-04-24_19-52-41_866.jpg

2012-04-24_19-52-00_425.jpg

2012-04-24_19-52-29_1.jpg


Wrapped the gauge cluster piece also:
2012-04-24_19-54-59_992.jpg


Hopefully tomorrow I can have the edges and holes in the seats routed/cut and apply foam and vinyl to the parts that don't need to go to the upholsterer.
 
Excellent work! I just started on my 82 260 DA a couple of weeks ago..., wished I had your skills! Can't wait for another update.


Sent from my iPhone using Tapatalk
 
Thanks!

Well didn't get much finished today..had other things going on.

Glued and screwed the board onto the seat back. Pulled out all the clamps for this one:
2012-04-25_19-19-14_908.jpg


Also rounded the edge of the seat base with my router, and cut a slot for the seat hinges to slide into. No pics of this, but should have some tomorrow.
 
Today's progress:

Cut holes in the seat bases for storage, rounded the edge of seat that will be shown, slots for the hinges, and cut holes for the vents.
2012-04-27_20-43-34_89.jpg

2012-04-27_20-43-43_521.jpg

2012-04-27_20-47-45_378.jpg

2012-04-27_20-44-36_890.jpg

2012-04-27_20-44-54_91.jpg


Tomorrow I will be working out the issues with the wiring and get everything up and running engine/trim wise.
 
Well I didn't get anything done that I wanted to over the weekend, so hopefully next weekend.

Anyways, finish one corner of the seat today. This should sturdy it up, and give me a nice rounded shape.
2012-04-30_19-27-16_335.jpg

2012-04-30_19-27-22_649.jpg
 
Finished up the other corner of the seat back. Got the fiberglass sheet that I'm going to use to form the corners and the seat base corners..progress on that maybe tomorrow.

Installed some led lights on my trailer yesterday. Pics of this, and the other things, probably tomorrow also.

Took it today to get the wiring worked out, trim working, and to crank it up. This is really the first time I heard it run for more than one second.
Couldn't get the video to flip up right..sorry...but it's more of ear candy then anything.
\/ \/ \/ CLICK THE PICTURE \/ \/ \/
 
Last edited:
Added my fiberglass sheets to the rounded section in my seat base today. Very happy with the shape and very strong.

The fiberglass sheet I used is the stuff that campers are covered with on the exterior. Very thin stuff..maybe 1/16th of an inch. Very pliable, so it was perfect for this.

I took a 80 grit disc and roughened up one side of the fiberglass sheet so that fresh fiberglass/resin will stick better. I laid a piece over the corner of the seat base, and screwed it down so I could mark it and cut it down to size.
2012-05-04_17-52-57_390.jpg

Inside:
2012-05-04_17-53-11_125.jpg


Once I had the right size, take screws back out, apply resin and fiberglass strips to the mating surface, then screw down the sheet. Once it cured, I took the screws out and knocked all the edges down with 36 grit disc.
2012-05-04_19-19-00_387.jpg

2012-05-04_19-03-20_656.jpg


Now I need to buy some stainless t-nuts and install those for my seat hinges before I apply foam and vinyl to the seat base.
 
I bought some stainless tee nuts and glued them in. You can't tell by the pic, but the glue foams up and there is a 24 hour wait for the glue to cure fully. I can then sand it down so I can apply foam/vinyl.
2012-05-05_12-56-39_587.jpg


Tidied up the wires behind the gauges and re-installed them in the cluster that I made.
2012-05-05_16-14-04_975.jpg


Still working out some bugs with the hydraulics and wiring. Trim works now, but leaks down when it is all the way up, and it goes down very slowly when trimmed down. I've tried going up and down, up and down, many times and it hasn't got much better. If anyone has some tips on this, please let me know.
 
Received my switch panel for the contura style switches. Switches should be here in a week.
2012-05-07_22-25-10_294.jpg
 
You are doing a great job. Keep the pics comming. Excited to see the end results. I am sure you are ready to be on the water too. Good luck.
 
You are doing a great job. Keep the pics comming. Excited to see the end results. I am sure you are ready to be on the water too. Good luck.

Thanks for the support.

I wanted to update this more often than i have , but i dont have much time to work on it.

I should have updates on the base/storage part by friday.
 
Had a rainy day, so I had time to do a little something in my building.

Covered one of the seat bases. I need to trim it up, staple and add some underlining and welt on the rest of the bare wood.
2012-05-08_20-02-21_500.jpg

2012-05-08_20-02-02_235.jpg
 
Thanks!

I might have the other side finished today, and then I'll feel like it's almost finished.

The upholsterer is booked up right now though, so I'm going to go ahead and install carpet and run the boat with my two helm seats until she has time to do the rear.
 

Forum statistics

Threads
113,247
Messages
1,429,229
Members
61,125
Latest member
Bassinbradw
Back
Top