1978 srv-200 repair project

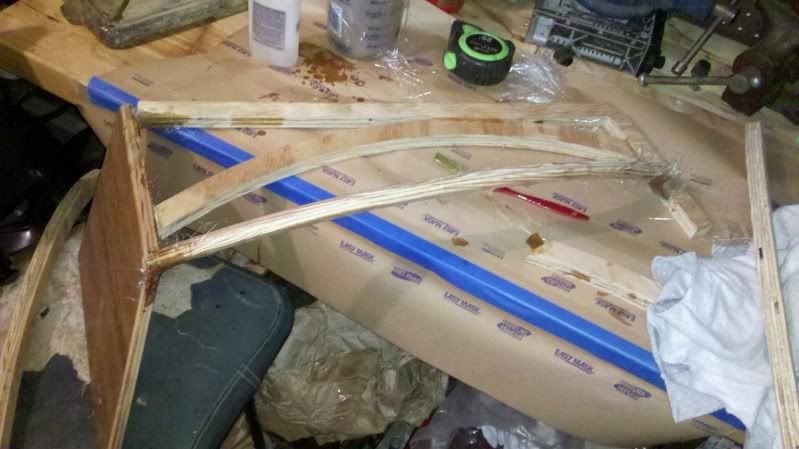
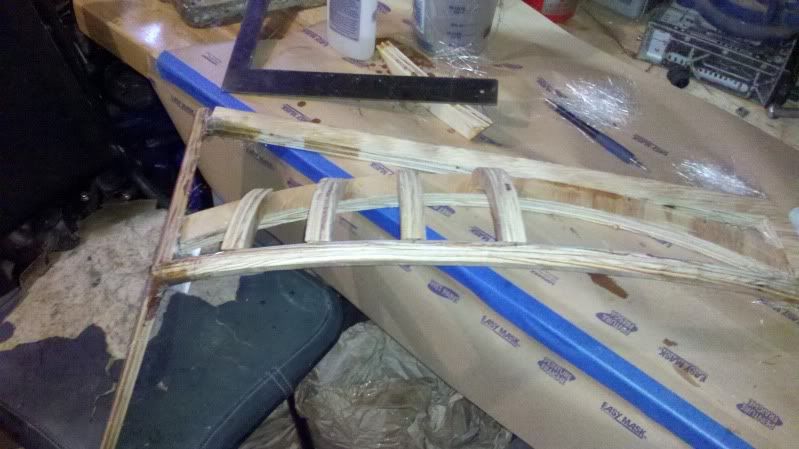
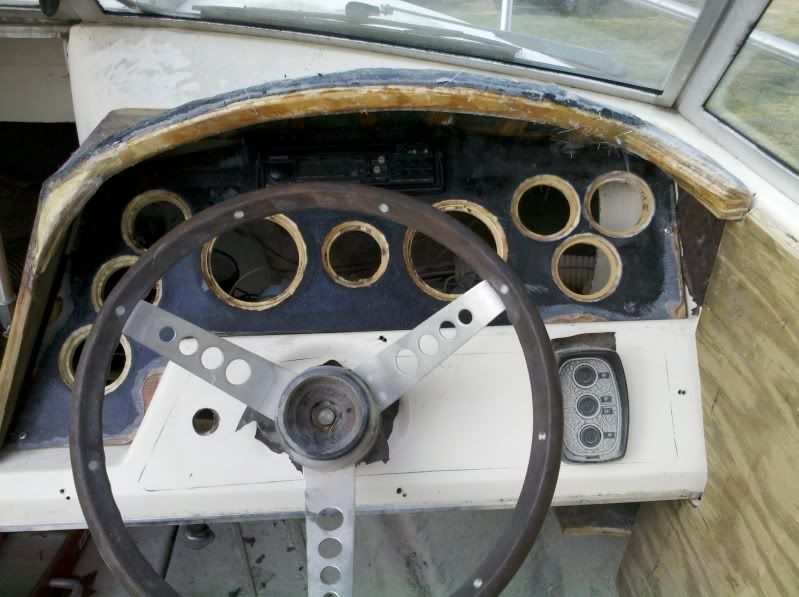
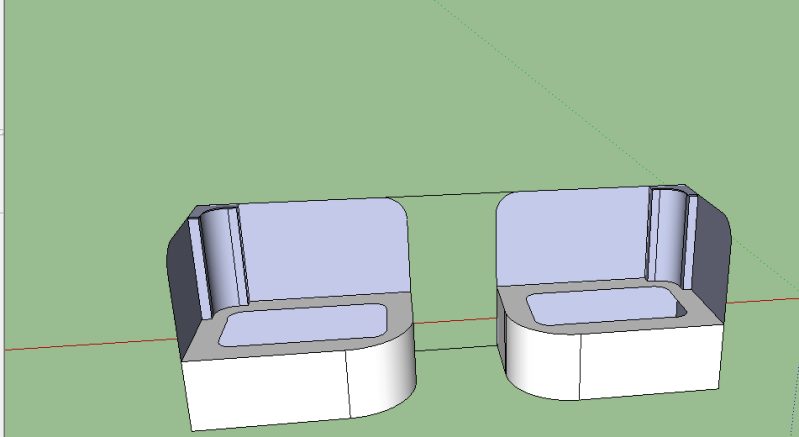
Ok so a little progress on the gauge cluster.

I didn't want to get too crazy with angling the gauges or anything so I just kept them all on the same plane as the original board.

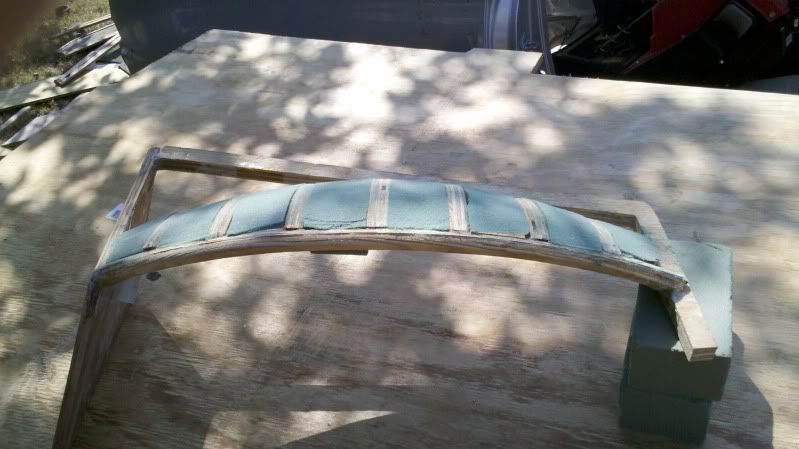
Added a single din stereo (headunit) slot and CA glued everything together. Next step is stretching my material over the whole thing and fiberglass it together.

2011-08-12_15-35-19_996.jpg

2011-08-12_15-36-21_196.jpg

2011-08-12_15-42-01_936.jpg


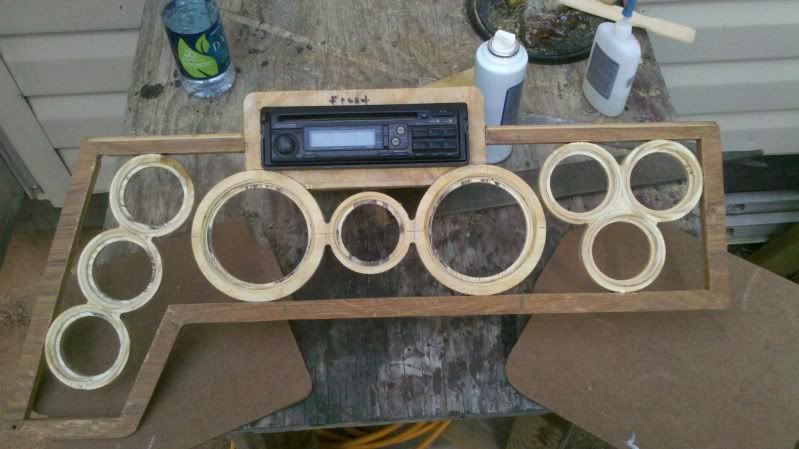
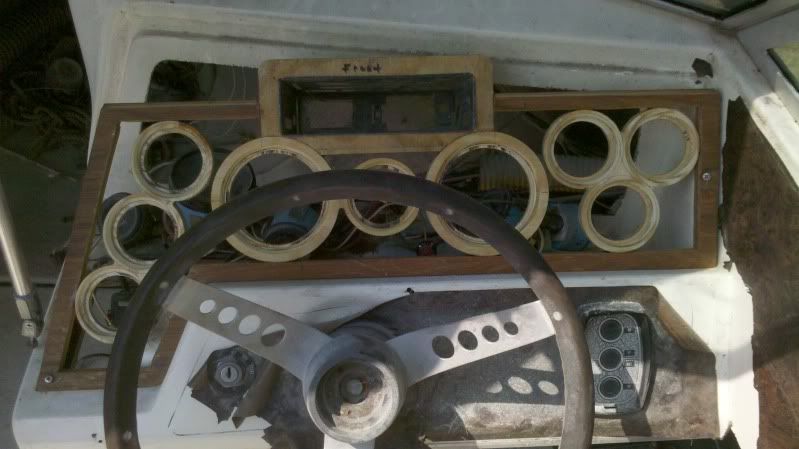
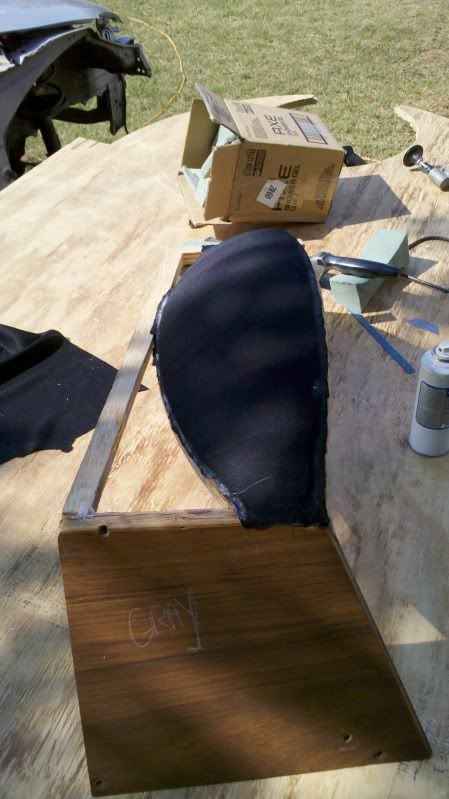
The stereo may seem a little high, but I'm going to make an arched "hood" over top of it so it clears.
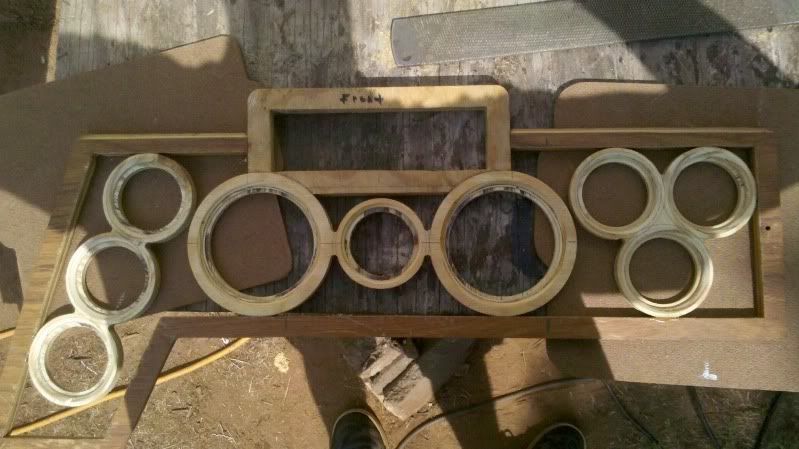
 
Just a thought about your stereo location. It looks like it will be in direct sunlight. I understand that it will be covered but there doesn't appear to be a lot of room for it to breathe.


---
- Sent from my iPhone using Tapatalk
 
This is no different than mounting it in the glovebox like most people do. With it in the center, up high, it will be the most protected from the sunlight..and the "hood" will be a more improved version of what it was, so it will help block the gauges also.
 
Updates on gauge cluster:
Before I got too far into making the cluster, I decided to start on the hood part that will cover the gauges from sunlight.

Like I did before, I cut out the original piece and just used it as a frame for my new piece. I cut out several different circles to get the correct arch I was looking for. Used CA glue to tack it all in place while it was on the boat and then move it to the workbench to fiberglass it together to make it sturdy enough to work with.
2011-08-29_22-22-31_660.jpg

2011-08-30_12-55-28_667.jpg

2011-08-30_12-55-38_211.jpg

2011-08-30_13-16-54_797.jpg


Added floral foam to try to keep it from sagging between the arches
2011-08-30_15-46-39_769.jpg

2011-08-30_15-46-46_61.jpg


stretched and glued the material on and it is ready for the fiberglass
2011-08-30_16-18-18_948.jpg


Filler panels added for the rear part
2011-08-30_21-33-22_113.jpg


So next is adding a layer or two of fiberglass on the outside, attempt to remove the wood skeleton and fiberglass the inside.
 
Not sure if any of yall are even paying attention to this? I guess I'll quit posting after this.

Need to add some filler to this and then wrap the pieces. Re-fitting the two parts:
2011-09-03_17-55-20_903.jpg

2011-09-03_17-55-37_757.jpg


I kept the panels simple this time and got rid of a bunch of stuff. The pic below, on the left, you can see a large piece of fiberglass that juts out from the side at a right angle. That supports the old panel design; I cut that off and cut the shelf below that also so that the new panel can come straight down. So now the panels are one piece instead of multiple. I didn't want cut holders everywhere and that shelf was just ugly, so it's covered up now.

The only pics I have from the previous panels:
2011-01-13_13-06-04_885.jpg


Side panels cut and fitted. I'm going to make a flush drink holder that screws to each panel for the two helm seats. Panels are now flat with the sides, so the seats can turn freely now, without hitting the panels, and it gives room to move the seats inline with the steering wheel. The panels also hang down below the shelf about 2 inches, so I'm going to run some LED strips under that.
2011-09-03_17-56-37_905.jpg

2011-09-03_17-57-00_976.jpg


Oh and these are my seats from VEADA.com
2011-09-03_17-57-13_577.jpg


So carpet will be gray, seats are white, panel will look like so:
sidepanel.png
 
That dash is going to look amazing - Really will update the interior. Please keep posting pics, I want to see what you are doing on the ol' girl. One suggestion, Not sure if it is do-able but could you round off the upper LH corner of the visor to eliminate that sharp corner? Just might flow a little nicer. Looke great either way, Nice job.:smt038

LK
 
Last edited:
Are you talking about the red circle or blue circle?
2011-08-30_13-16-54_797-1.jpg


The blue circle, You could leave the red circled area alone if it is needed for correct fit and blend into a nice radius at the blue area. Just a suggestion, Might not work.

LK
 
I did this: The arch I made comes to the corner, so it can't really be rounded from that side piece.
2011-09-03_17-55-20_903-1.jpg
 
I saw the radius piece you put in there, I was just thinking in my head that you could just grind the outside to follow that contour but not sure, I don't have it in front of me. Looks great as-is - Keep the progress pictures comming.

LK
 
I'm paying attention!!! I love to follow those restaurations!!! :smt038
 
Ok, well that's good to hear. Glad I haven't been wasting my time.

I guess next is building the rear seats and sun deck/engine cover.

Here is a little google sketchup I did of it. This is the framework only.
rearseat.png
 
Beleive me, people are looking....and drooling!

This boat is going to one of the very best srv-200's in existence.......

Do you think it will be splashed before winter? Or do you plan to work on it all winter?
 
Last edited:
I may take it out before winter, but it won't completely be done by then.

The trailer also needs some work done to it, so it may not go out this year.
 
Took some engine parts for my car to get powdercoated, and thought what the heck, I'll get the boat control lever coated too because the chrome was peeling.

Originally I got it done in black wrinkle, but they said it was made of pot metal and the finish looked awful because the metal would gas. So I got it re-done in a black hammered finish, and I think it looks decent. What's your thoughts?

2011-09-14_15-03-41_141.jpg
 
I've been on, mostly just lurking around the forum lol but this thread really caught my eye!! Time to re-work mine over the winter!
 
I've been on, mostly just lurking around the forum lol but this thread really caught my eye!! Time to re-work mine over the winter!

Since Old Skool sat all summer I shouldn't have to much to do this winter but I have a few things I want to add. We'll see how time and money allows. Keep us posted on any mods or updates you're doing.
 

Forum statistics

Threads
113,241
Messages
1,429,124
Members
61,123
Latest member
Tim Duncan
Back
Top