Works perfectly. The only interesting thing is sometimes the sink P-trap will get pulled dry after a long run but a little water down the sink and all back to normal. Maybe that happened when connected to the sump also....Wow. Just wow. Thank you so much Tom and Jeremy. I know I am a few years late to the 500/520DB Starboard Common Drain Party, but this may be the year that I finally pull the freezer and fix this Sea Ray design issue. My main concern is finding the correct parts and making the square cuts in such a confined space.
Also, how has this fix been over the past 3-4 years for you guys? Any unforeseen issues? Would you have done things differently? I'm sure plenty of us would love to know how the pioneers have fare
Navigation
Install the app
How to install the app on iOS
Follow along with the video below to see how to install our site as a web app on your home screen.

Note: This feature currently requires accessing the site using the built-in Safari browser.
More options
You are using an out of date browser. It may not display this or other websites correctly.
You should upgrade or use an alternative browser.
You should upgrade or use an alternative browser.
Sedan Bridge Common Drain Plumbing
- Thread starter ttmott
- Start date
tshannoz
Member
- Jun 6, 2021
- 152
- Boat Info
- 500 Sedan Bridge 2005
- Engines
- 2x Cummins QSM-11s
Tom et al.,
I am embarking on my galley common drain procedure and I have a few questions:
1) What is this hose that is detached behind the freezer? Is it supposed to attach to the freezer somewhere?

2) Would it be possible to tie into the common drain with a Y on the end cap? Or add a Y on one of the T’s, precluding the need to cut PVC?

Thanks!
I am embarking on my galley common drain procedure and I have a few questions:
1) What is this hose that is detached behind the freezer? Is it supposed to attach to the freezer somewhere?

2) Would it be possible to tie into the common drain with a Y on the end cap? Or add a Y on one of the T’s, precluding the need to cut PVC?

Thanks!
That little hose looks to be the condensate drain for the refrigeration units - the Sub Zero ones on my boat had drains. They tied into a single line just under that deck and routed to the galley sump at the end of the tunnel.Tom et al.,
I am embarking on my galley common drain procedure and I have a few questions:
1) What is this hose that is detached behind the freezer? Is it supposed to attach to the freezer somewhere?
View attachment 162509
2) Would it be possible to tie into the common drain with a Y on the end cap? Or add a Y in another spot, precluding the need to cut PVC?
View attachment 162510
Thanks!
I looked at tying the sink into that end cap also but didn't want to take the chance of the AC raw water discharge ( the line running into the end) backing up into the sink. Plus the sink was a 1-1/2" drain and I thought it a good idea to install a vacuum breaker - it simply got to a point that cutting in another tee was the answer.
tshannoz
Member
- Jun 6, 2021
- 152
- Boat Info
- 500 Sedan Bridge 2005
- Engines
- 2x Cummins QSM-11s
Tom, after further investigation, I found the refrigerator condensate drain AND it was not connected. I’ll be sure to do this now.

As for this second white/clear hose, does anyone know if the SubZero freezer has a condensate line as well? I cannot find any connections on the back.
Also, what is the best way to clean these condensate lines? Maybe get a long, flexible brush? Like a chimney sweep?
Ohh, one other question. Tom, why did you choose not to make a Y at this be of the existing T’s in the PVC and tie the sink into one of those? I want to understand this more. Thanks!
Tom
I guess you are talking about the 1 inch line going into the top of the last tee? Putting a Y fitting there would be too small in pipe size and also share the discharge of the hose that's already there. Secondly, a fitting atop there raises the drain connection up which isn't the direction I'd go; there's not a lot of elevation change between the common drain and sink drain. If you notice the new Tee I installed has a 1-1/2" port and it's rolled over so the sink drain enters as low as possible.Tom, after further investigation, I found the refrigerator condensate drain AND it was not connected. I’ll be sure to do this now.
View attachment 162512
As for this second white/clear hose, does anyone know if the SubZero freezer has a condensate line as well? I cannot find any connections on the back.
Also, what is the best way to clean these condensate lines? Maybe get a long brush? Like a chimney sweep?
Ohh, one other question. Tom, why did you choose not to make a Y at this be of the existing T’s in the PVC and tie the sink into one of those? I want to understand this more. Thanks!
Tom
tshannoz
Member
- Jun 6, 2021
- 152
- Boat Info
- 500 Sedan Bridge 2005
- Engines
- 2x Cummins QSM-11s
Great info. Thanks. Is there a way I could add that port after the two existing T’s. By removing the end cap and replacing it later? I am trying to figure out the easiest path forward. I really appreciate the input.I guess you are talking about the 1 inch line going into the top of the last tee? Putting a Y fitting there would be too small in pipe size and also share the discharge of the hose that's already there. Secondly, a fitting atop there raises the drain connection up which isn't the direction I'd go; there's not a lot of elevation change between the common drain and sink drain. If you notice the new Tee I installed has a 1-1/2" port and it's rolled over so the sink drain enters as low as possible.
Also, I will need to find the parts needed as well. I imagine I will need to hunt in a few different spots. Gotta love boats!
I'm sure removing those glued in bushings (end caps) will damage/destroy the Tee they are installed into.Great info. Thanks. Is there a way I could add that port after the two existing T’s. By removing the end cap and replacing it later? I am trying to figure out the easiest path forward. I really appreciate the input.
Also, I will need to find the parts needed as well. I imagine I will need to hunt in a few different spots. Gotta love boats!
tshannoz
Member
- Jun 6, 2021
- 152
- Boat Info
- 500 Sedan Bridge 2005
- Engines
- 2x Cummins QSM-11s
That makes sense. I’m amazed that you were able to get in there and cut 90 degrees. Amazing.I'm sure removing those glued in bushings (end caps) will damage/destroy the Tee they are installed into.
tshannoz
Member
- Jun 6, 2021
- 152
- Boat Info
- 500 Sedan Bridge 2005
- Engines
- 2x Cummins QSM-11s
Tom,Tom et al.,
I am embarking on my galley common drain procedure and I have a few questions:
1) What is this hose that is detached behind the freezer? Is it supposed to attach to the freezer somewhere?
View attachment 162509
2) Would it be possible to tie into the common drain with a Y on the end cap? Or add a Y on one of the T’s, precluding the need to cut PVC?
View attachment 162510
Thanks!
You were right. I removed the back panel of the freezer and I found the other end of the severed freezer condensate line. It was hidden behind the panel.
This line is much too short to ever work properly, and judging by the amount of screws and debris behind the freezer, I imagine it has never been connected.
Also, after taking the freezer out 2-3 times and accidentally causing some small marks in the floor, I highly recommend using cardboard to protect from the sharp footings. Lesson learned.
tshannoz
Member
- Jun 6, 2021
- 152
- Boat Info
- 500 Sedan Bridge 2005
- Engines
- 2x Cummins QSM-11s
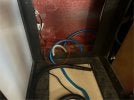
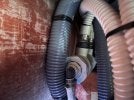
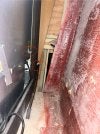
First off, thanks to ttmott and rlynch03. With your info, I was able to get my kitchen sink drain to tie directly into the starboard drain. Here are pics of my install:


A few caveats:
- I used a 2 1/2 inch pipe cutter, but needed small saw to cut about 1cm of PVC that was bonded to the fiberglass support.
- If you decide to update the tubing from the kitchen drain, please be sure to get one that is quite flexible. I went with tubing from Home Depot and it was ROUGH. Not nearly flexible enough for the S-Curve that is needed. This is why you see the flexible coupler needed at the new T.
Thanks again everyone. Great upgrade!


