
rondds
Well-Known Member
- Oct 3, 2006
- 8,859
- Boat Info
- 2001 380DA
- Engines
- Merc 8.1s (2008)...Hurth ZF 63 V-drives...WB 7.0 BCGD (2013), Garmin 8208 & 740 MFDs, GMR 24xHD dome
I figure having done this 3x on my previous boat (7.4L MIE), how hard could this be, esp on the stbd engine, which is purported to be the "easy" side. As it turns out this is a 2 (two) advil job. Took me about 3 hours and half that time was trying to figure out how to tackle it.
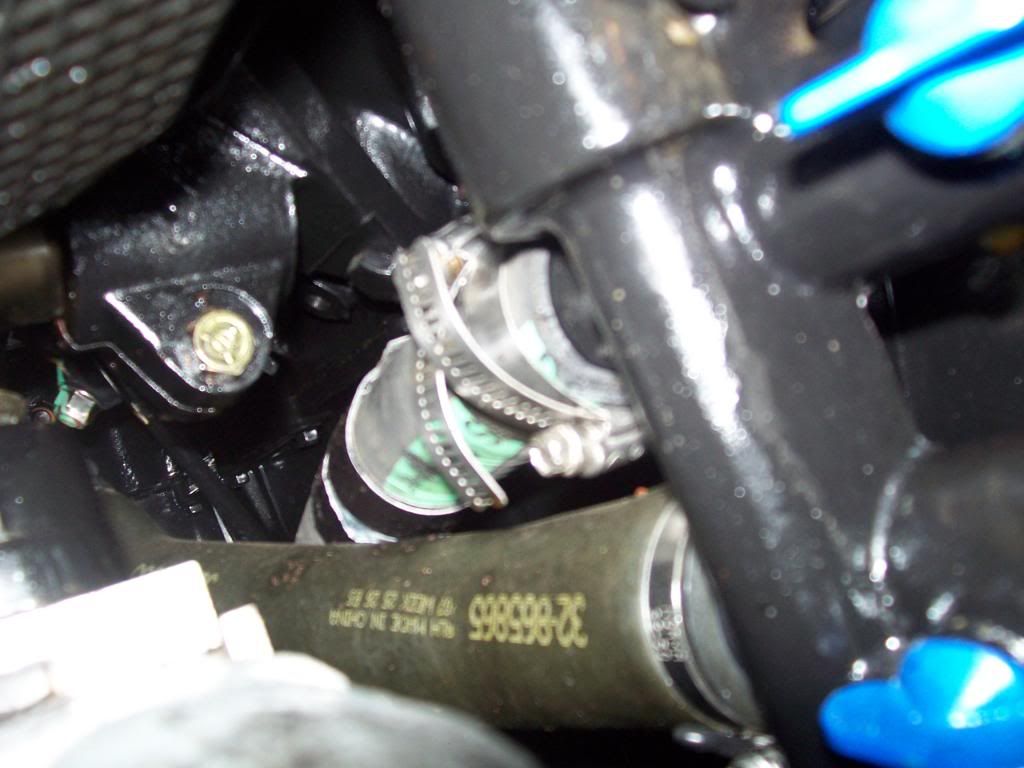
I read the manual and got the serpentine belt off no problem. This is what I'm looking at now.

Took this pic so I'd remember which hose goes where. This pump is not marked IN and OUT or LH. I also made a note that the green hose is on top.
...
Like my previous boat, the sequence of things is to get the pump to drop into the bilge, get the hoses off and pull it out of the bilge and replace the impeller on the dock. Back this bolt out of the top of the bracket, get two more off the back of the pump and it comes off the bracket.

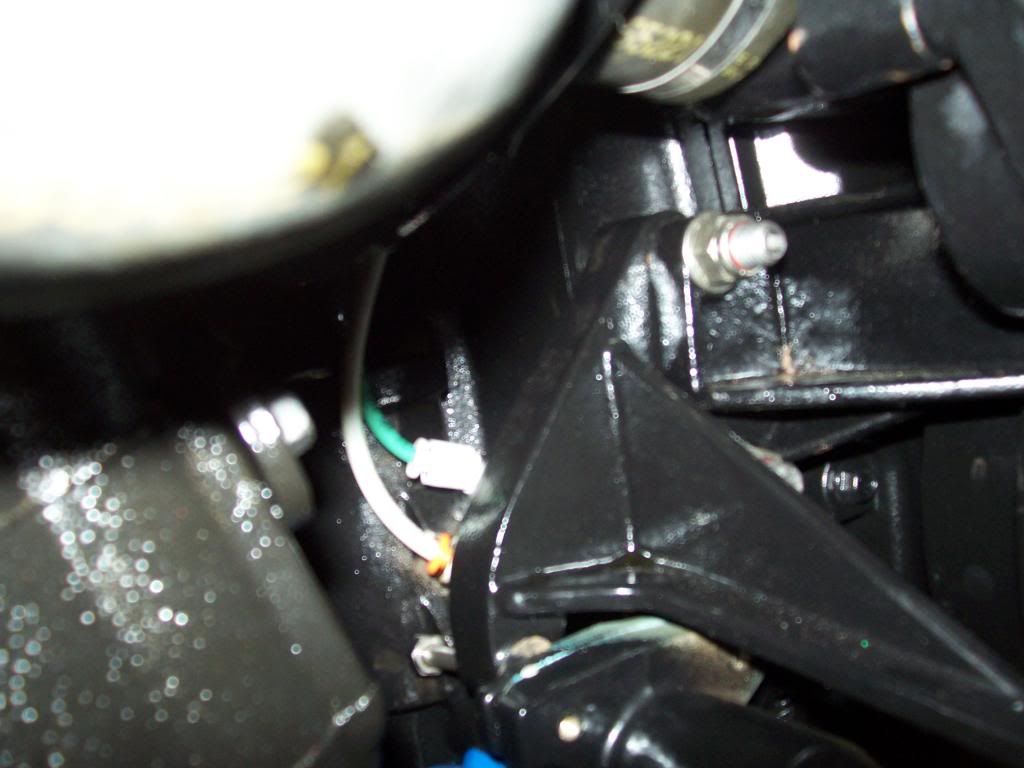
But wait, there's these two "wires." A sender? Not sure. Put the top bolt back in (not enough slack in these hoses to let it drop down), stop everything and start nosing around.
Turns out these are the air hoses that allow you to blow seawater out of the system with the little bicycle pump Merc clips to the motor. How the heck to you get themoff the pump (?) Phone call to Rick (mistercomputerman). He says you have to that little collar in and pull the hose out. Pretty simple.
Now the pump can drop to the bilge floor, after which I was able to wrestle off the hoses. I was surprised to see that this entire pump is bronze. No crappy plastic housing that I'd become accustomed to. Also found it interesting that it was sprayed while on the motor (apparently). Time for some forensic mechanics...

Could it be that this pump was never off the motor (see the untouched paint on the top bracket)? These motors went in prior to the 2008 season and have 180 hours on them. The paint flaked off as soon as I put a socket on that bolt.

4 short bolts (size 10 mm wrench) and you open up that seam to reveal the impeller. I marked the holes where the bolts came from with wite-out. Otherwise you may put a bolt in a spot that is a mounting hole, not a sealing hole. The impeller had taken a set but was otherwise perfect. No cracks starting where the vanes meet the hub either...
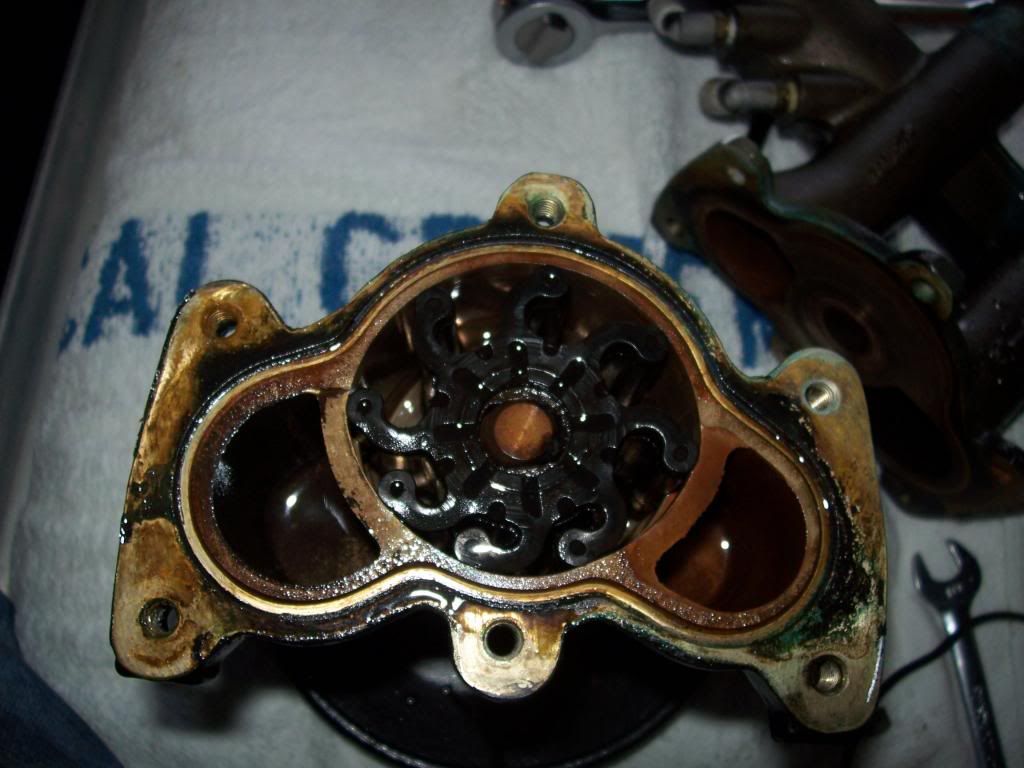
This is the other half of the pump. My buddy CJ told me he's on his 3rd or 4th pump b/c of scoring. Is this bad? I don't know? But it's going back together as-is (other than with a new impeller and new o-ring) b/c it was working fine before and the impeller was not ragged. The rubber o-ring fits in that little track around the perimeter of the water passage (see above picture).
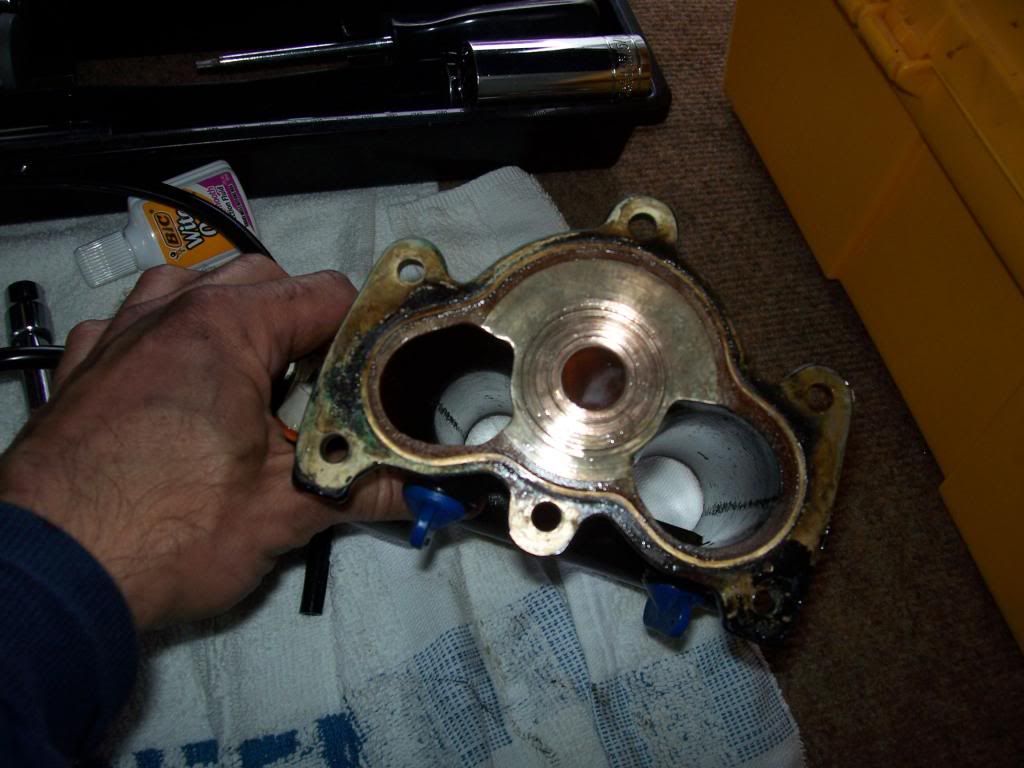
Part number I guess (?). You can see some of my wite-out on the right-most edge of the flange...
Extract the old impeller, squeeze the new one in with copious liquid soap, drop in the new o-ring and put the two halves back together. Then more fun and games as I wrestle it back into place, getting hoses on first (more liquid soap), then the mounting bolts. Last step is the little air hoses and it's time to test. Oh, remember to open the seacock back up. Sudsy water from the exhaust = success.
I think when I do the other side, I will release the output hose not from the pump nozzle but from where it connects to a T further downstream. The T sends water to the Cool Fuel unit and then onward to the oil cooler (tranny or crankcase, not sure what's the first stop).
Also invested in a set of these to get to the two 10mm bolts at the back end of the pump next time. It took probably 45min to back out and re-tighten these bolts b/c there's just no room to swing a conventional box wrench more than maybe a sixth of a turn. And you can't see the bolt head. Quite a bit of "Use the Force Luke" going on during this process. Force wasn't the only F word I was thinking of.

The red arrow is where the 10mm bolt head is located. The Yellow arrow is where the other bolt head is, but on OTHER side of the pump (the side closer to the center of the motor)

As with EVERYTHING else in a boat, the problem here is access. Not a fun job and I can see how the mechanics of the world earn their $$ on this job. Not the type of job to do when it's 87 degrees out.
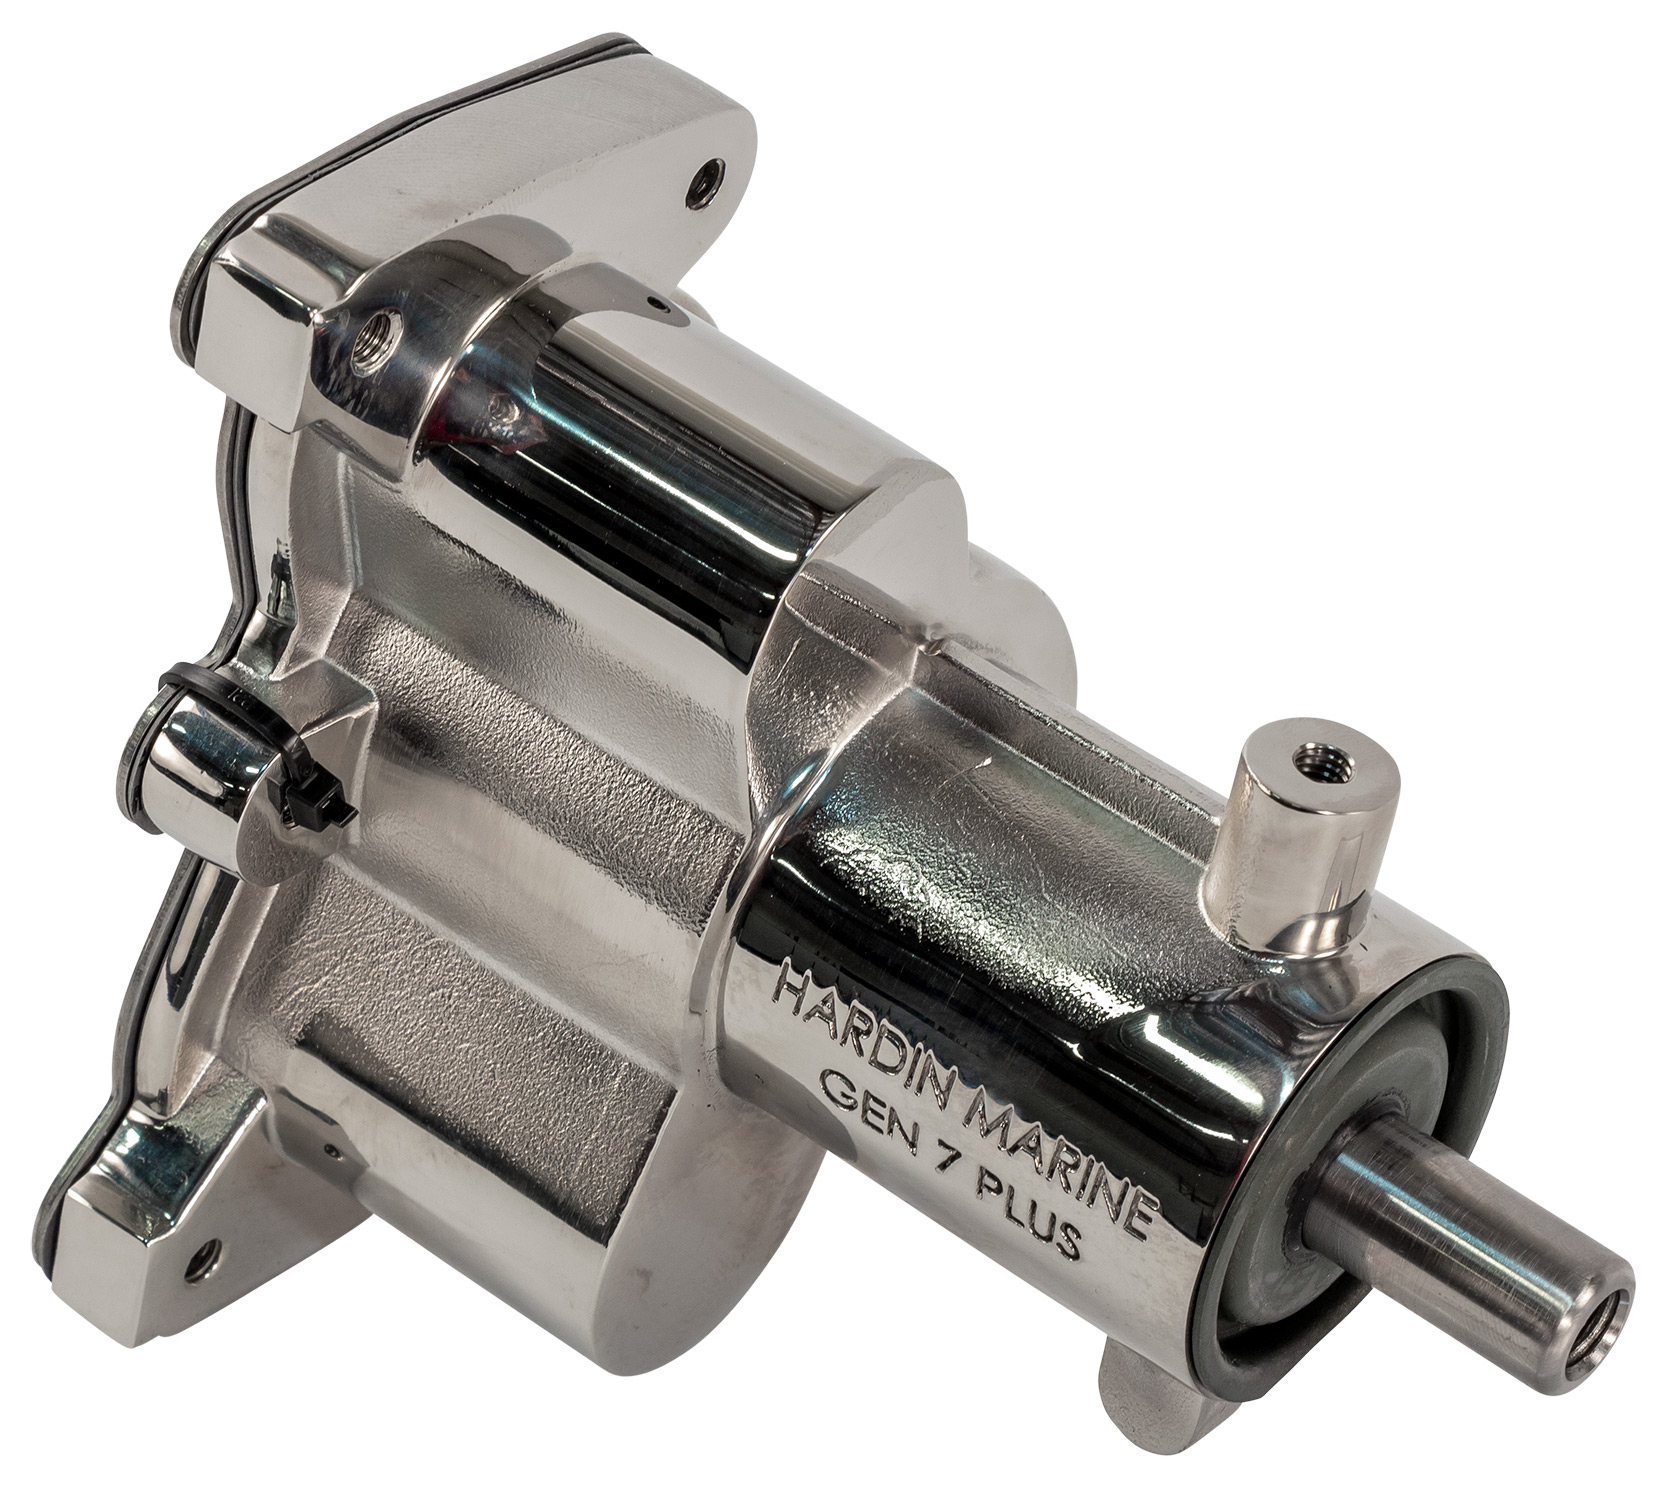
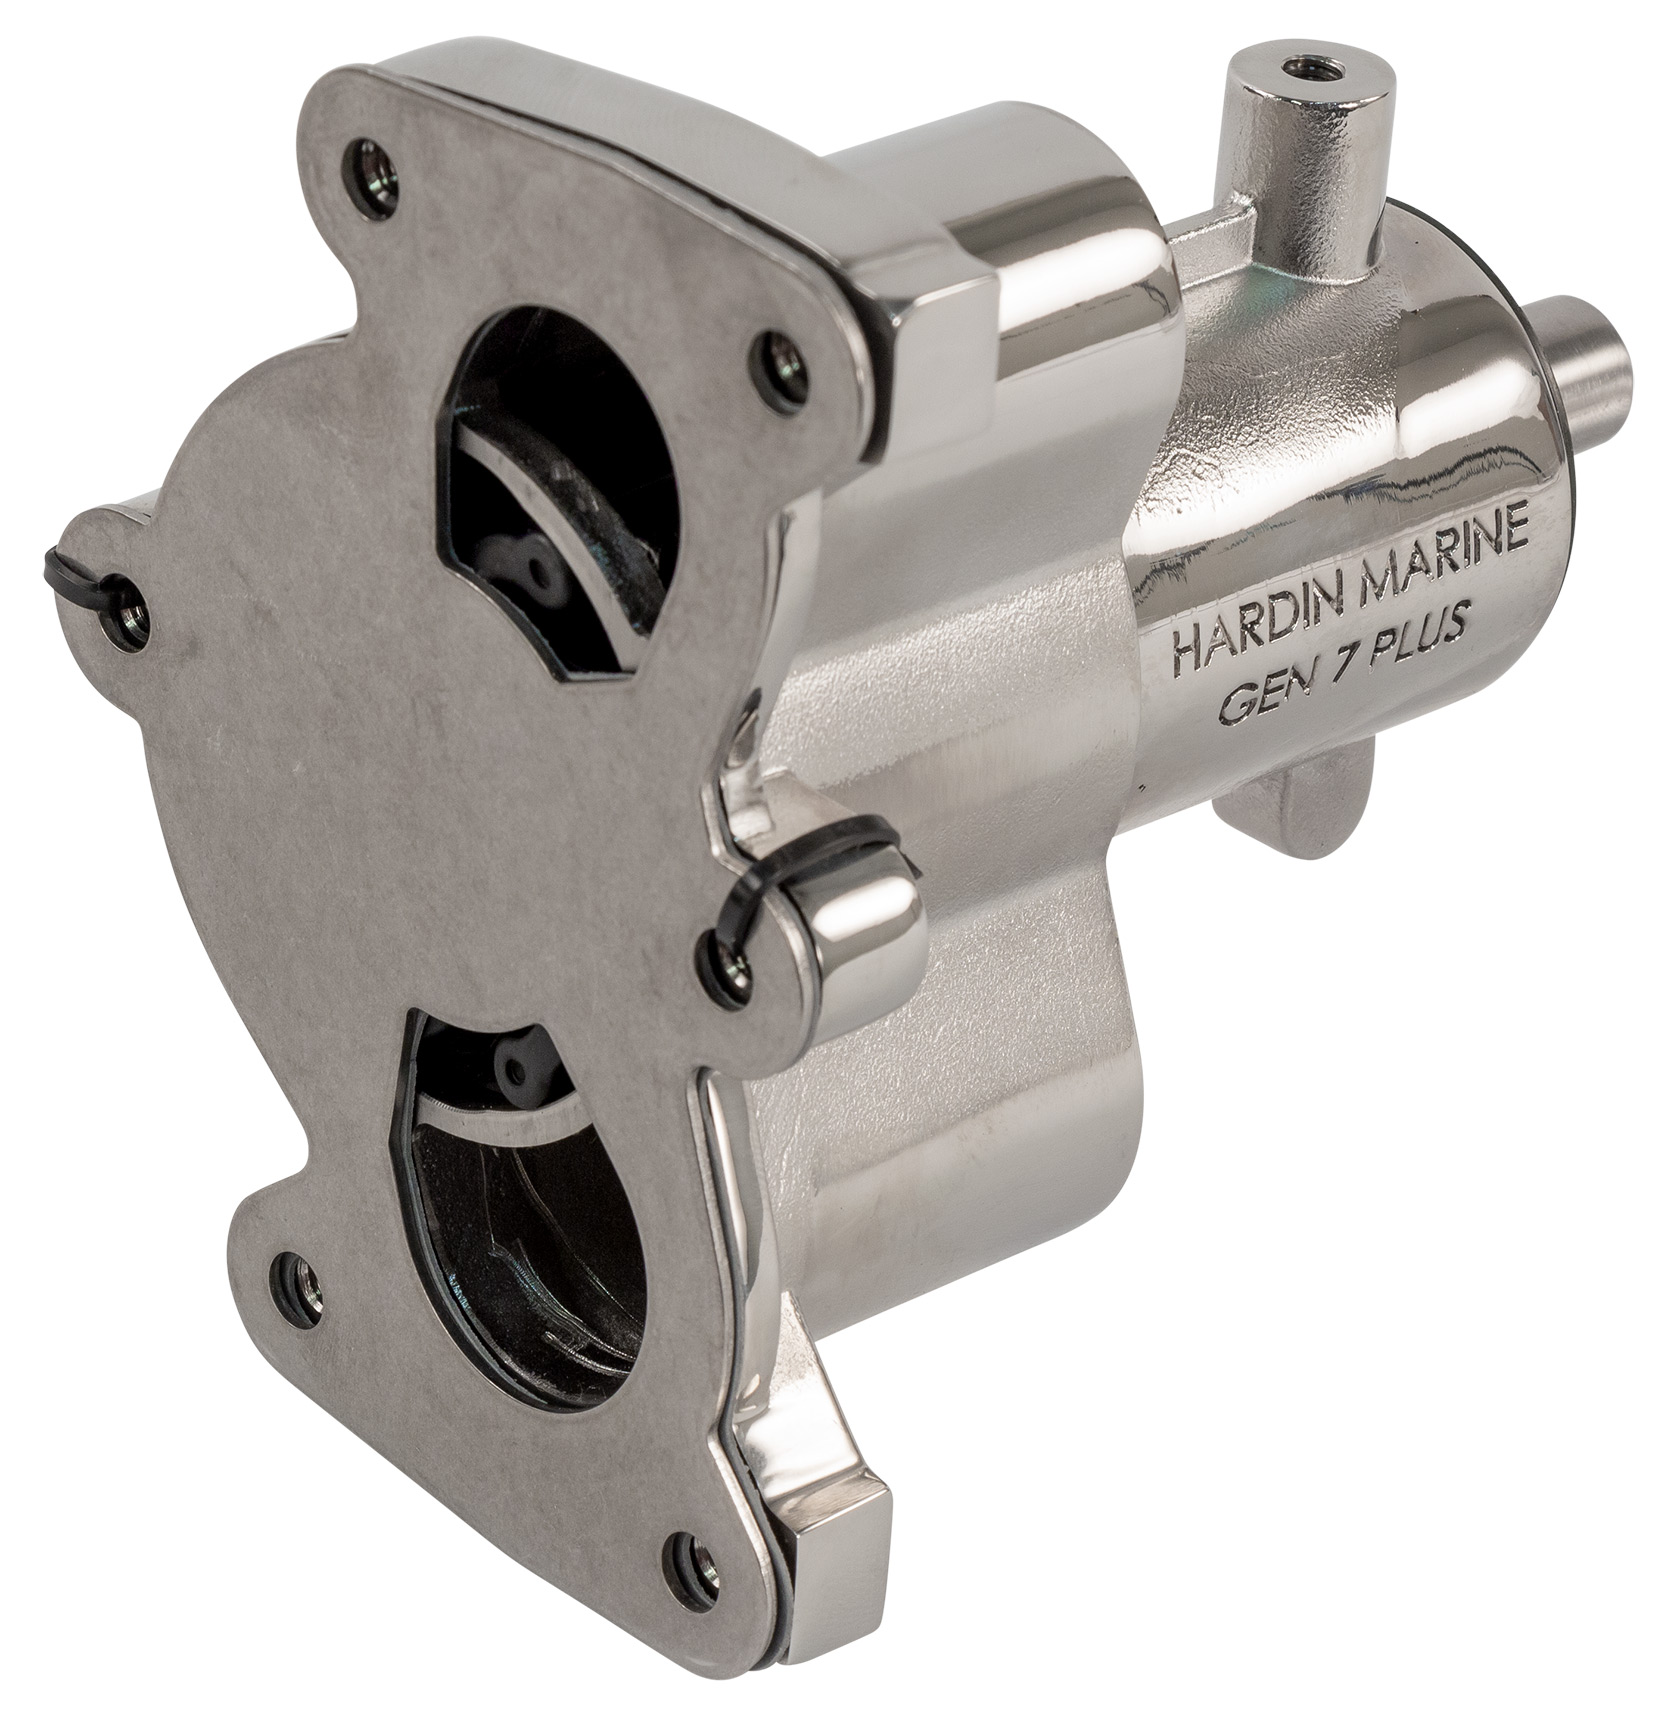
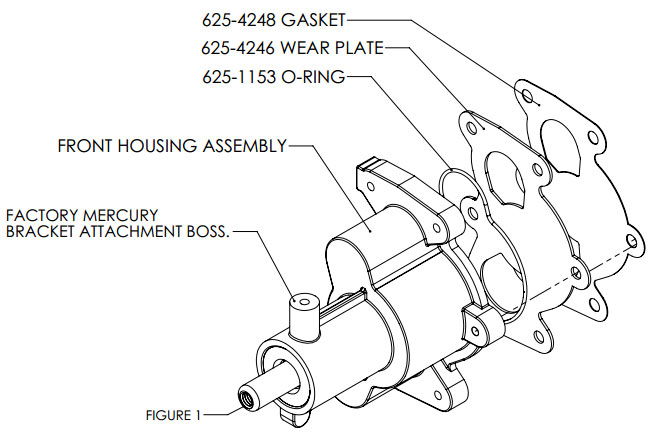
My port pump is leaking from the front lip seal/bearing. I am going to replace that pump with a stainless steel aftermarket one. It is actually just 1/2 a pump - the impeller housing half. The nozzle end with the air hose fittings stays. The improved design of the aftermarket pump includes a backing plate that protects the nozzle side from wear (see my pic above). It uses a different impeller, but it is still a standard Merc impeller (not sure of the part number). More pix to follow as that chapter unfolds - that is, IF I can get to the darn thing on the other side. Rx there is Take three advil 1 hr before job, then 2 advil six hours after initial dose.
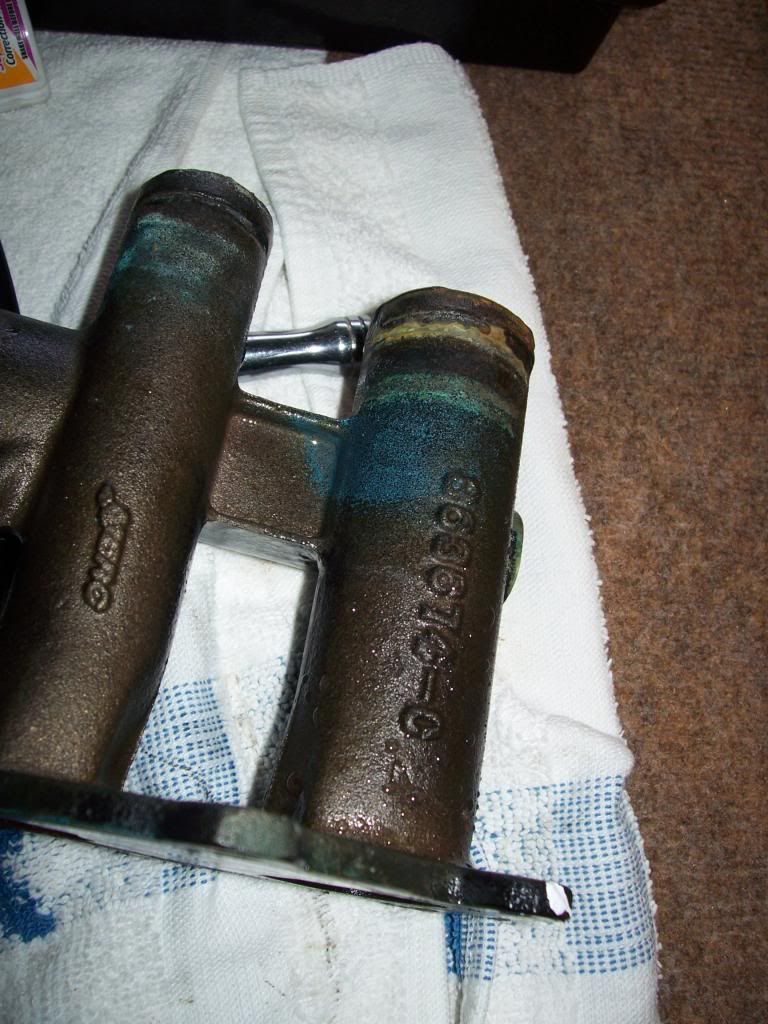
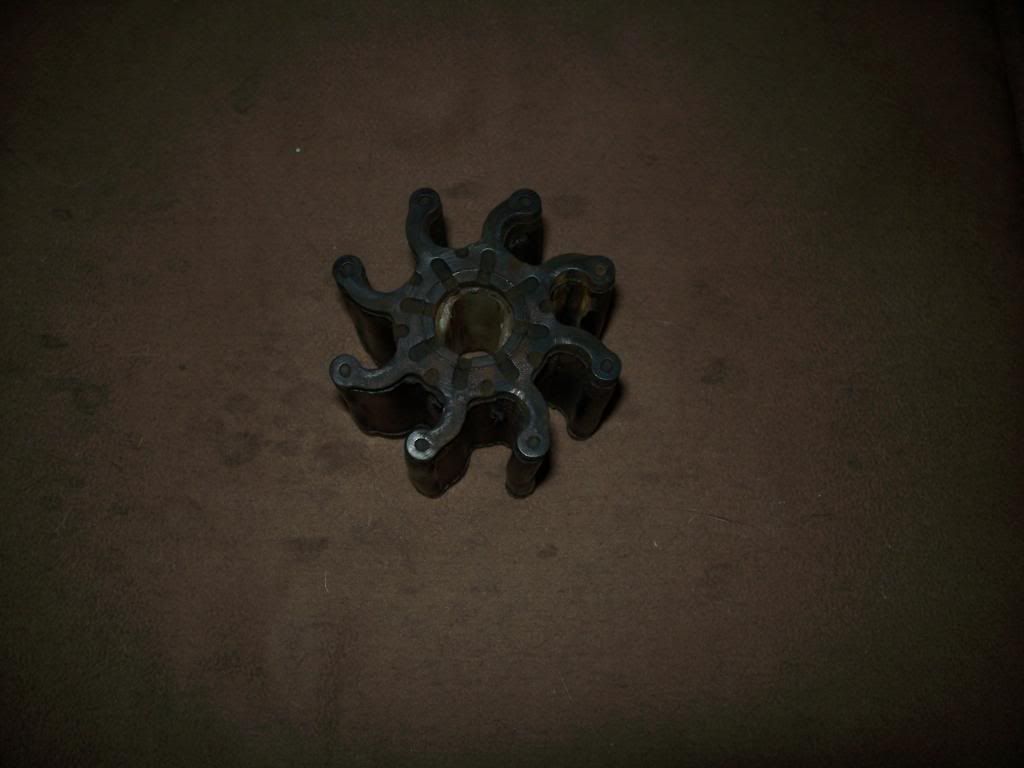
Here's the impeller I took out...
I read the manual and got the serpentine belt off no problem. This is what I'm looking at now.
Took this pic so I'd remember which hose goes where. This pump is not marked IN and OUT or LH. I also made a note that the green hose is on top.
...
Like my previous boat, the sequence of things is to get the pump to drop into the bilge, get the hoses off and pull it out of the bilge and replace the impeller on the dock. Back this bolt out of the top of the bracket, get two more off the back of the pump and it comes off the bracket.
But wait, there's these two "wires." A sender? Not sure. Put the top bolt back in (not enough slack in these hoses to let it drop down), stop everything and start nosing around.
Turns out these are the air hoses that allow you to blow seawater out of the system with the little bicycle pump Merc clips to the motor. How the heck to you get themoff the pump (?) Phone call to Rick (mistercomputerman). He says you have to that little collar in and pull the hose out. Pretty simple.
Now the pump can drop to the bilge floor, after which I was able to wrestle off the hoses. I was surprised to see that this entire pump is bronze. No crappy plastic housing that I'd become accustomed to. Also found it interesting that it was sprayed while on the motor (apparently). Time for some forensic mechanics...
Could it be that this pump was never off the motor (see the untouched paint on the top bracket)? These motors went in prior to the 2008 season and have 180 hours on them. The paint flaked off as soon as I put a socket on that bolt.
4 short bolts (size 10 mm wrench) and you open up that seam to reveal the impeller. I marked the holes where the bolts came from with wite-out. Otherwise you may put a bolt in a spot that is a mounting hole, not a sealing hole. The impeller had taken a set but was otherwise perfect. No cracks starting where the vanes meet the hub either...
This is the other half of the pump. My buddy CJ told me he's on his 3rd or 4th pump b/c of scoring. Is this bad? I don't know? But it's going back together as-is (other than with a new impeller and new o-ring) b/c it was working fine before and the impeller was not ragged. The rubber o-ring fits in that little track around the perimeter of the water passage (see above picture).
Part number I guess (?). You can see some of my wite-out on the right-most edge of the flange...
Extract the old impeller, squeeze the new one in with copious liquid soap, drop in the new o-ring and put the two halves back together. Then more fun and games as I wrestle it back into place, getting hoses on first (more liquid soap), then the mounting bolts. Last step is the little air hoses and it's time to test. Oh, remember to open the seacock back up. Sudsy water from the exhaust = success.
I think when I do the other side, I will release the output hose not from the pump nozzle but from where it connects to a T further downstream. The T sends water to the Cool Fuel unit and then onward to the oil cooler (tranny or crankcase, not sure what's the first stop).
Also invested in a set of these to get to the two 10mm bolts at the back end of the pump next time. It took probably 45min to back out and re-tighten these bolts b/c there's just no room to swing a conventional box wrench more than maybe a sixth of a turn. And you can't see the bolt head. Quite a bit of "Use the Force Luke" going on during this process. Force wasn't the only F word I was thinking of.
The red arrow is where the 10mm bolt head is located. The Yellow arrow is where the other bolt head is, but on OTHER side of the pump (the side closer to the center of the motor)
As with EVERYTHING else in a boat, the problem here is access. Not a fun job and I can see how the mechanics of the world earn their $$ on this job. Not the type of job to do when it's 87 degrees out.
My port pump is leaking from the front lip seal/bearing. I am going to replace that pump with a stainless steel aftermarket one. It is actually just 1/2 a pump - the impeller housing half. The nozzle end with the air hose fittings stays. The improved design of the aftermarket pump includes a backing plate that protects the nozzle side from wear (see my pic above). It uses a different impeller, but it is still a standard Merc impeller (not sure of the part number). More pix to follow as that chapter unfolds - that is, IF I can get to the darn thing on the other side. Rx there is Take three advil 1 hr before job, then 2 advil six hours after initial dose.
Here's the impeller I took out...
Last edited:
