- Jul 11, 2012
- 885
- Boat Info
- 2000 ~ 510 Sundancer
2024 ~ Highfield 360 Sport
Twin Axiom 12" MFD's
AIS 700
- Engines
- Twin Cat 3196's
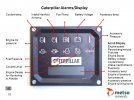
Removed the rope light under the cabinet last night and added a new outlet in the blank space of the switch plate. Always figured there should be an outlet there but didn't want to go through the process of cutting an entirely new one in. The new lighting is on order for both the galley and fwd. stateroom.
View attachment 152874
View attachment 152874
")