No stopping now

Gotta be JoKen

New Member
Apr 18, 2019
13
Boat Info
1991 310 Express
Engines
Twin 454s
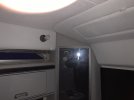
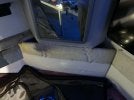
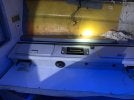
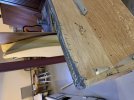
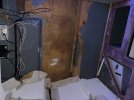
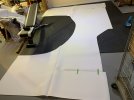
I’m just starting to remove the interior of our 91 310 express and would appreciate any help with how this jigsaw puzzle comes apart. Seems like some fabric is attached to hull directly and panels on a lot of the inside but no visible signs of where to remove. Taking closet out first but still tight even with all fasteners removed.
 

Attachments

  • IMG_1305.jpeg
    IMG_1305.jpeg
    1.5 MB · Views: 92
  • IMG_1317.jpeg
    IMG_1317.jpeg
    2.4 MB · Views: 95
Thanks for sharing, the coverings to remove are mostly painted fabric. Haven’t pulled anything off yet but seems closet is first thing to go to get the helm coverings out. Closet isn’t holding up the cabinet attached I suspect as nothing shifted removing the screws?
 
Well the closet screws were holding up the cabinets. Once the closet came out it was loose and just being supported by bottom panel screwed to hull on its bottom edge. The closet was hot melt glued to the ceiling and right side wall. Big mouse nest on top of cabinet and major water damage from rail. Glad I did this destruction now that it’s bad
IMG_1346.jpeg
 

Attachments

  • IMG_1347.jpeg
    IMG_1347.jpeg
    2.5 MB · Views: 64
  • IMG_1353.jpeg
    IMG_1353.jpeg
    2.5 MB · Views: 66
Thanks me too. I’m not sure my wife is aware of the mess I’ve started. She’s seen photos of mouse nest but didn’t realize that the cabinet was off. She knows we need to repair the damage from water but didn’t recognize the spot.
I now need to pick fabrics with her I guess which will not be fun as she’s forever changing her mind. I picked the material for the backrest and cushions without her and she likes luckily. Not happy about it though.
 
Well quality and craftsmanship wasn’t important when they built my boat obviously. Duck tape and staples holding things together. Have the wall panel and back of helm cover off now, thought it would have more access to cockpit. Still not sure how the ceiling panels are installed without ripping more of it out…
 

Attachments

  • IMG_1398.jpeg
    IMG_1398.jpeg
    2.5 MB · Views: 84
  • IMG_1399.jpeg
    IMG_1399.jpeg
    2.7 MB · Views: 80
  • IMG_1397.jpeg
    IMG_1397.jpeg
    1.9 MB · Views: 86
  • IMG_1390.jpeg
    IMG_1390.jpeg
    2.2 MB · Views: 85
Are you going to fix it properly
 
Likely will replace plywood pieces since they are easy. The light valance will probably get some solid wood glued on the damaged edge. See more once tape is removed. Don’t want to rebuild it. To do list already has grown since I started this project.
 
Well I’ve got ceiling out. Not what I was expecting but not as bad to remove as I thought. Still need to get residue off fibreglass but still too cold to spend much time on board.
 

Attachments

  • IMG_1452.jpeg
    IMG_1452.jpeg
    2.2 MB · Views: 61
  • IMG_1450.jpeg
    IMG_1450.jpeg
    2.8 MB · Views: 62
  • IMG_1441.jpeg
    IMG_1441.jpeg
    2.7 MB · Views: 80
IMG_1453.jpeg
IMG_1457.jpeg
Well some of the fabric arrived so I’m getting parts rough cut and ready to install so bring on the warmer weather. Big thanks to Amanda at Buckhorn yacht harbour upholstery for sewing the seams on the headliner.
IMG_1458.jpeg
 

Attachments

  • IMG_1458.jpeg
    IMG_1458.jpeg
    1.5 MB · Views: 18

Forum statistics

Threads
113,193
Messages
1,428,283
Members
61,104
Latest member
Three Amigos
Back
Top