osd9
New Member
White tie wraps....that's so 80's...
Follow along with the video below to see how to install our site as a web app on your home screen.

Note: This feature currently requires accessing the site using the built-in Safari browser.
Really? I didn't know that. What's the cool solution these days?White tie wraps....that's so 80's...

Yeah, but won't they break down every September? :lol::lol::lol:Orange and Blue of course!!!!

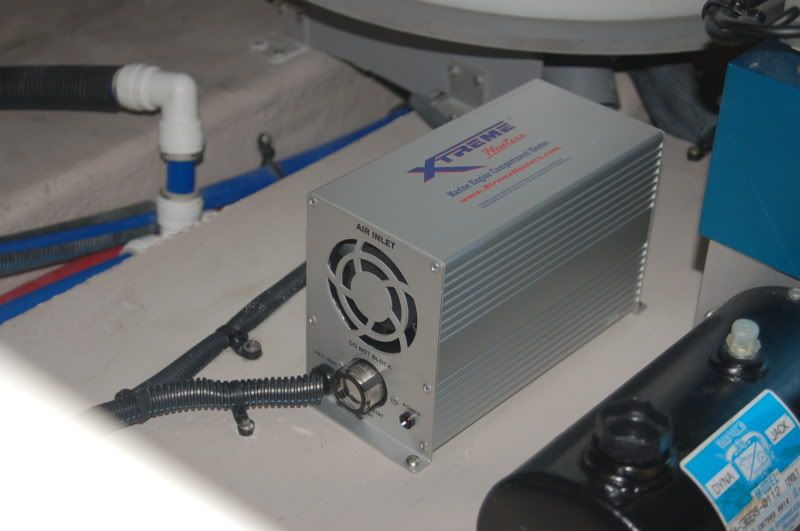
Yes, that is one of the remaining tweaks.I would get a surface mount tie wrap and screw it to the board where it enters the inverter. Keeps the wires from getting pulled accidentally as well as preventing vibration.
I was thinking that I had some red left over. I had used it to cover the DC+ wiring on a previous project. Got it somewhere on the Internet. You can get it in all sorts of colors. Are you suggesting that it should be black? I guess I answered my own question considering that the last time I used it was on DC positive wiring. :smt021. It's not a big deal to change.Where in the world did you get red wire loom. I like that! I would have used red for all the modifications so the next boat owner knows what is added and what was original. Is that what you were thinking?
Good idea. Can you post a picture of an example?My preference is to add wiring using a drip loop, so if water ends up on the jacket, it falls off instead of ending up in the connector or inside the sheathing.
For example, if water were to get onto the outside of the new green wire, then it would enter the new sheathing. But if it were routed with a downward loop, then it wouldn't.
Labeling is part of the remaining bit of work. I left the label printer at home yesterday.It appears that none of the wiring is labeled. Every wire on my boat is labeled at both ends. The factory labeled each of their wires and I labeled all of my wires. It is very handy when revisiting the work after the fact.
Good point. I will enclose the DC wiring in loom as well. As far as the ground; none of the ground wires on the boat are in loom. I will do it though. What the hell.All of the wiring I added is enclosed within split loom, just like the factory wiring. It provides additional protection from impact or abrasion. The inverter battery cables and the inverter AC ground are bare.
I have created a printed wiring diagram that I have added to the main AC diagram in the owner's binder.Another tool I use is a wiring diagram showing all my equipment and how it connects to the factory wiring.

That hurts.I guess he's trying to be the Hillary Clinton of CSR.
I guess he's trying to be the Hillary Clinton of CSR.
Wow. That really hurts.Or maybe Madeline Albright.


Damn good question. Yes, the near end just uses a longer set of #4 machine screws and nylon spacers. When I used just those two screws, the sheild was a little too flimsy. So I added another set that uses shorter screws facing up with a nut holding them in place on the top. I used a drill to make a little countersink at the bottom of the spacer so only the nylon part touches the inverter chassis. So the rear spacers are attached to the Plexiglas but just rest on the inverter. It is much more sturdy this way.Looks very nice.
A question about your 'splash shield' install. It looks like the two front spacer screws, the ones near the wire end, are attached using the pre-existing tapped chasis mounts. How did you secure the two rear spacer screws? Are there little nuts under the chasis?
