Nicholas Del Rio
Member
- Jul 9, 2022
- 37
- Boat Info
- 2003 Sea Ray 200
- Engines
- 4.2L
Hello fellow boaters!!!
You’ve all heard this story a thousand times by now - new boat owner finds issues that were overlooked or disregarded during purchase.
Bought our first boat a couple of weeks ago. Been having the time of our lives! What great family fun we’ve been missing out on!
But…I’ve started to question the “shaved” section of fiberglass right under the drain plug at the lower point in the transom. And as we use the boat more, thr paint is thinning and revealing a shoddy gel coat repair job all around that area (different colors and layers indicating prior damage and repair). My question is how thick is the fiberglass below the drain plug area? I’d like to sand and attempt to backfill the shaved area, but don’t want to punch through the hull.
Also, I’m now very reluctant to use this boat as I fear further damage! Bummer considering how much driving this thing is!
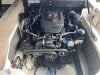
I’ve attached pics is the damaged area.
I’d appreciate any thoughts! Thanks!!!
You’ve all heard this story a thousand times by now - new boat owner finds issues that were overlooked or disregarded during purchase.
Bought our first boat a couple of weeks ago. Been having the time of our lives! What great family fun we’ve been missing out on!
But…I’ve started to question the “shaved” section of fiberglass right under the drain plug at the lower point in the transom. And as we use the boat more, thr paint is thinning and revealing a shoddy gel coat repair job all around that area (different colors and layers indicating prior damage and repair). My question is how thick is the fiberglass below the drain plug area? I’d like to sand and attempt to backfill the shaved area, but don’t want to punch through the hull.
Also, I’m now very reluctant to use this boat as I fear further damage! Bummer considering how much driving this thing is!
I’ve attached pics is the damaged area.
I’d appreciate any thoughts! Thanks!!!