How to protect new Teak Table?

Jimmy Buoy

Well-Known Member
Dec 3, 2008
2,468
Sarnia, Ontario, Canada
Boat Info
2003 Cobalt 293
Engines
Twin Volvo-Penta 5.0 270hp & DuoProps
Just bought this new teak table for the cockpit. It was the perfect size and shape, plus I wanted to have a :wow: "WOW" :wow: factor with a wood table.

It is unfinished and has black rubber separating each piece of teak.

I would like to coat the table with some epoxy or urethane that will form a very thick, hard, strong, and deep finish. My concern is the black rubber strips.:huh:

Will these strips cause any thick protective layer to crack from expansion/contraction or simply due to the fact that the rubber is less resistant to impact as the teak?:smt100

Any suggestions on the product needed for that "bar room table" durable glossy finish?? :grin:
 
Last edited:
You asked- and answered- your own question.

If you like the deep, thick gloss of a commercial bar top- use what they use- bar top epoxy.

There was a thread recently where I suggested this to someone else. I built an outdoor bar and used a UV resistant type, poured it 1/4" thick.

Easy to use, if you're interested PM me and I can give you the details and my sourcing.

PM sent.:thumbsup:
 
My personal preference is a ton of coats of high quality varnish, block sanded between coats, and I'll admit to limited knowledge of table top epoxy as an exterior finish. I do have some experience finishing teak with regular epoxy as a sealing coat, and will offer some cautions for epoxy and teak.

Teak is a porous wood. Epoxy kicks with an exothermic reaction, i.e. the catalytic action of the resin and hardner mix generates heat. When epoxy is applied to teak, the heat causes the teak to "gas out" air trapped in the wood pores. That can cause bubbles in the finish that must be handled as they occur. Leaving them alone can ruin an otherwise beautiful finish if the air does not completely escape before the epoxy cures. There is no fix either, except to sand off everything and start over.
 
Frank,

I share your concerns, however after reading more on woodworking sites it has been suggested that the wood top be sealed (with varethane?) before applying epoxy to minimize formation of bubbles.:huh:

As far as fixing by sanding off the epoxy - I wouldn't even try with the thickness of epoxy, it would be toast.:smt089

Your comments are appreciated.:thumbsup:
 
Start with a mahogany/teak filler. This will fill in the grains so your coating will be like glass. Otherwise you WILL see dips and grain lines in your finish. Then go with a quality sealer. You can get them in the varnish aisle in your marine store. 2 coats of sealer. This will keep the oils from the teak from making the varnish flake off later. From there, put your varnish on.

I recommend (and use) the Z Spar Flagship 2015. Apply about one coat per day. Thin the first coat with 50% thinner. The second coat is thinned with 25% thinner, the third with 10% thinner. In between each coat, sand with 220-grit sand paper. If it appears that you have almost taken off the last coat you put on, then you are doing it right. Your not really taking it all the way off, it just looks that way.

After sanding in between coats, wipe down with thinner or acetone. Then apply another coat. 7-8 coats would be perfect.

If you want show-quality shine, wet sand the final coat with 1000+ grit sandpaper, then buff it out.

As for brushes, I do the first 4-5 coats with the standard foam brush. The final coats I use a badger hair brush.

I learned all this the hard way when restoring a 1963 Chris Craft Roamer. Except the hull (steel), the entire boat was mahogany and teak. It was the shiniest boat around, and at the show when I got done.

There is NO sustitute for hard work when varnishing. You can buy the "quick building" and "non-sand between coats" varnishes, but it will not turn out like you want.

Or you could go with the bar top epoxy method. I like that look, but for my bar. The varnish is the way to go (in my opinion) for the rich deep nautical look that will make people say "WOW"!!!
 
Here is another finishing approach. I've always been concerned about using fillers on teak that stays exposed. I'm accused of being old fashioned, behind the times and polite folks call me old-school, but I seal exterior teak with West Systems Clear slow epoxy. I first heat the teak surface.....out in the sun, with a heat gun, a propane heater until the entire table is warm to the touch, l then mix the epoxy and apply it with a fine bristle throw-a-way brush after turning the heat off so the table begins to cool. That prevents the teak from gassing out and helps draw the epoxy into the pores.

Next I sand with 220 paper and start spraying finish. I am refinishing my cockpit table now and am using Epifanes Gloss Wood Finish this time. With this product you can over coat without sanding but I never go more than 2 coats before block sanding. After 6 coats, and 3 block sandings all the grain and imperfections are filled with finish. I'm on the 12th coat and up to 400 grit paper now and will probably block sand with 1200 grit and begin to buff with compound this weekend.

To call this type of finish "labor intensive" is a gross understatement.........it will work you to death, but the results are worth it. I have significantly more time in the finish than I do in the wood work.

Whatever method you choose, pay attention to the chemistry. If mineral spirits is the solvent for your finish of choice, then don't use anything else to degrease or wipe down the surface between coats. Lacquer thinner, acetone, alcohol, etc. may soften previous coats and there may be enough incompatablity to cause fisheyes in subsequent coats.

As I wrote this, I wonder why you could not use the heating process to deal with gassing out on a table top epoxy finish? Until the epoxy kicks, I'd stay close by with a propane torch or heat gun to burst any bubbles you get.
 
Last edited:
I have heard good things about the Epithanes Gloss, but never had good results with it. I use the 2015 for exterior surfaces as it has the most UV protection of any varnish. For inside, I would like to try the Epithanes Hand Rubbed Satin to see what it looks like.
 
The Epifanes is kinda quirky. I get the best results spraying it and using their hot thinnner (I forget the number. It is very subject to chemistry issues with residue left in the spray gun or on a wiping cloth. They admit to limited UV protection and suggest final coats be a good varnish with UV inhibitors. I use so many coats of finish with this process, I don't have much of an issue with the sun......I built the table 10 years ago and it was getting tired looking from just regular use.
 
Last edited:
Jim- I'm going to reply here instead of the PM, good discussion here and others might find the info useful.

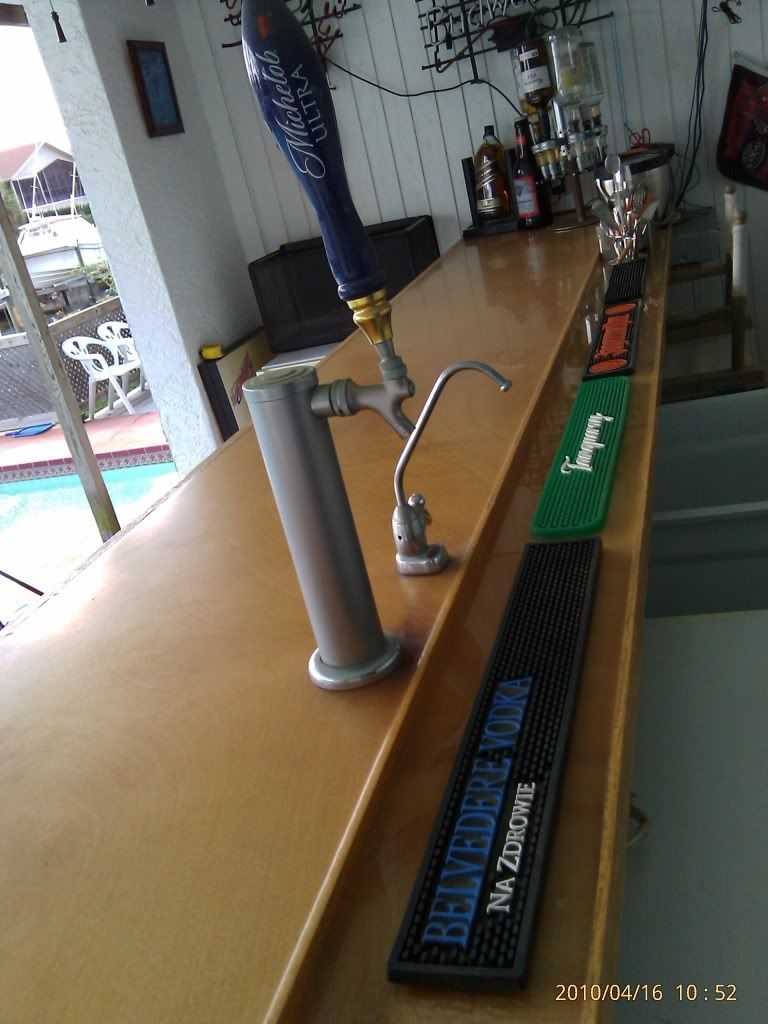
This is a picture of my outdoor pool bar where I used bar-top epoxy:

bartop.jpg


Note that the edges of the bar top are oak trim- and the top edges are elevated above the bar top by 1/4" to form a "dam" for the epoxy. Leveling the surface is critical, as the epoxy flows out and is completely self-leveling. Without a "dam", it's impossible to use this method.

Not to say it can't be done- you could form a "dam" around the perimeter with some sort of plastic material that will release from the epoxy, then after the main pour cures you come back and brush the vertical edges. Or, you could place the table top on a suitable surface that will release, and leave a 1/4" or so reveal (space) between the tbale edge and the "dam" that will fill flush to the bottom of the table when you pour.

Frank's method- which is the exact same one I use for the teak on my boat- is also a good one. Using West System with the Special Clear Hardener (I used 4 coats) and followed by Epifanes Woodgloss (as many coats as you can stand) works very well. The epoxy provides very fast "build" (thickness) which is what gives that deep, mirror gloss.

There is no question that the bar-top epoxy (UV resistant type) will provide a more durable finish. If the table is going to see a lot of use, I would lean that way. Varnish is not particularly tough and scratches easily.

You might consider getting hold of a piece of teak and doing a sample of each method to see which you prefer.

As far as the "bubble" issue, I didn't find it to be much of a problem. You mix the epoxy (just like you would varnish) by stirring carefully so as not to introduce a lot of bubbles.
I did mine as temperatures were falling (if the wood gets warmer, the air within will expand and gas-off more) but yours is small enough to do indoors in a controlled temperature environment. I used denatured alcohol in a small spray bottle to pop the bubbles as they appeared, but a propane torch will also work; toothpick for the stubborn ones. You need to stick around until it's cured as the bubbles will keep appearing until then.

Beautiful table- good luck!
 
Remember that all catalyzed finishes like epoxy are exothermic....i.e. they give off heat when they cure. Teak is especially porus so while Mike didn't have bubble problems with his bar top, even indoors in a controlled environment, teak may and probably will gas off some. The key to reducing bubbles is to have the teak cooling as the epoxy cures. On small surface like your table, the bubbles will probably be manageable by any of the methods Mike mentioned. The key is to stay with the table and not leave the curing epoxy alone until you are sure there are no more bubbles forming.
 
.........Whatever method you choose, pay attention to the chemistry. If mineral spirits is the solvent for your finish of choice, then don't use anything else to degrease or wipe down the surface between coats. Lacquer thinner, acetone, alcohol, etc. may soften previous coats and there may be enough incompatablity to cause fisheyes in subsequent coats.

As I wrote this, I wonder why you could not use the heating process to deal with gassing out on a table top epoxy finish? Until the epoxy kicks, I'd stay close by with a propane torch or heat gun to burst any bubbles you get.

When my friend (a professional painter/wood finisher)did the catalyzed pour on the cockpit table I made he used a Bernzomatic torch to allow the bubbles out between coats. Since my boat's name is lasered into the top, the one thing he said we would do different is pour, then flame relieve the laser sections only first. There are a couple spots where the lasered areas have very small bubbles. Not bad but if you look close you can see them. Otherwise it looks great.

Nehalenniacockpittable-1.jpg
 
Lot's of great suggestions - thanks guys!:smt038

Since a durable finish is one of my top priorities, I tend to lean towards the two part bar table product. I've got some teak to experiment with before going for the real thing.

Heating up the wood is a great tip that makes sense!:thumbsup:

If I have trouble experimenting I'll be considering the other methods. One thing for sure, I will post the results once completed.

Thanks again for the assistance - CSR Rocks!!:grin:

(always open for more suggestions...)
 
Frank -

I know there are several posts on CSR about teak table finishes. Can you direct me or suggest how to seal a teak cockpit table. I am looking for a durable, expo type finish but not sure what the correct process should be.
thanks.
 
When my friend (a professional painter/wood finisher)did the catalyzed pour on the cockpit table I made he used a Bernzomatic torch to allow the bubbles out between coats. Since my boat's name is lasered into the top, the one thing he said we would do different is pour, then flame relieve the laser sections only first. There are a couple spots where the lasered areas have very small bubbles. Not bad but if you look close you can see them. Otherwise it looks great.

Nehalenniacockpittable-1.jpg

That table looks amazing.
 
Todd- how were the edges treated? One edge looks like it's a raised edge/piece of trim, but it might just be a light reflection.
The edges were treated the same. The bar pour runs over the edge and then when dry and the bottom was done, the edges were sanded and touched up. This has been an extremely durable way for the top and I'm very happy. I was pretty anal about it when it was first done, but it's been bumped and had things accidentally slid and dropped on it and it's no worse for the wear.

That table looks amazing.
Thank you.
 

Forum statistics

Threads
113,229
Messages
1,428,965
Members
61,120
Latest member
jingenio
Back
Top