Cockpit re-upholstery project

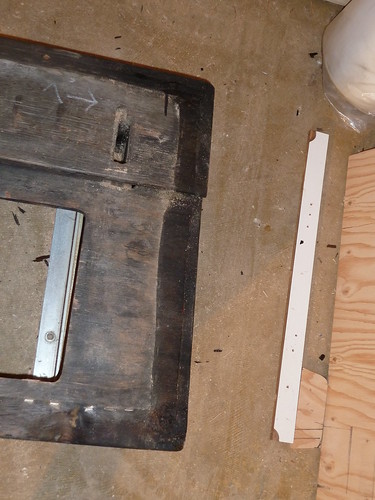
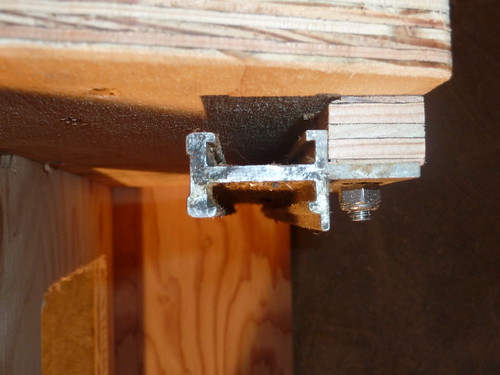
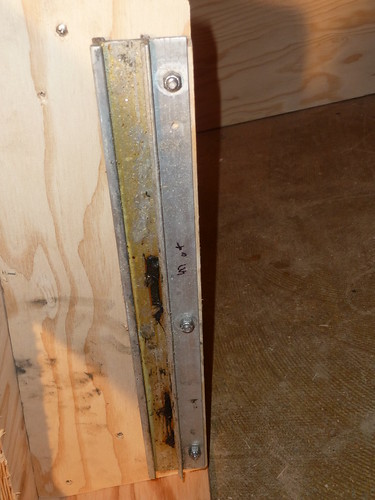
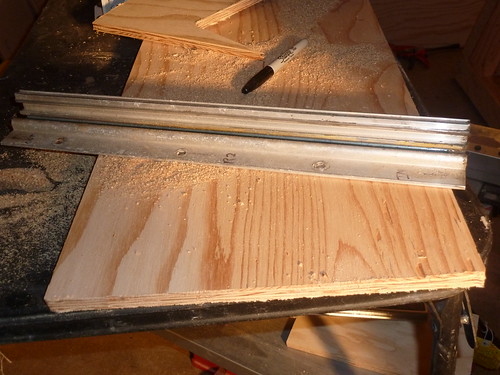
Here are a couple more pics of one of the complex panels - aluminum angle brackets and they're being filleted with a mix of epoxy and sawdust as filler. Once this sets, I'll sand it all down smooth and then coat the entire assembly with epoxy without filler

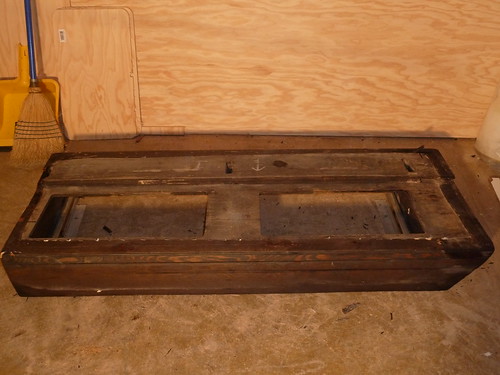
Both panels - frontside


P1010114 by Boykster, on Flickr

One panel - rear -


P1010113 by Boykster, on Flickr

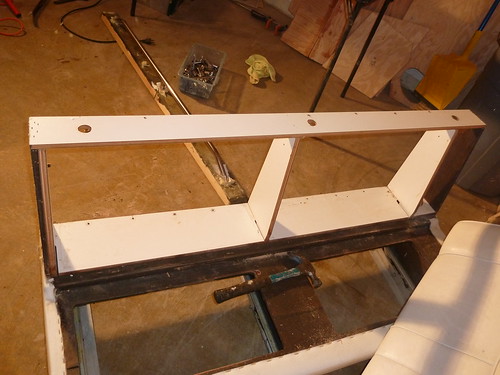
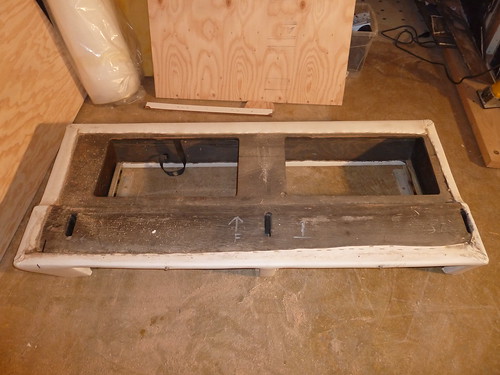
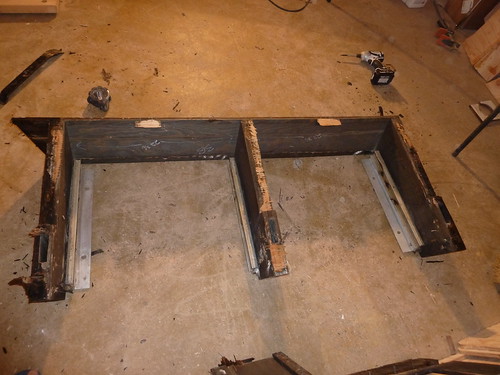
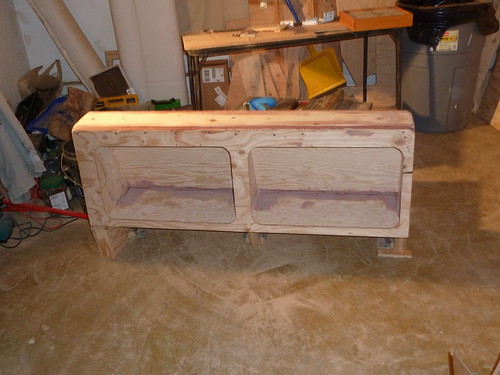
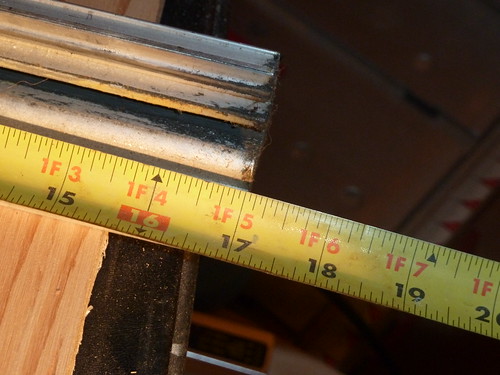
I also started planning the jumpseat modifications....first thing was to get a basic reference for what can retract - the only thing I can't change is the location of the far left and far right slide mounts because they are integral to how the main seat attaches to the decking.


P1010109 by Boykster, on Flickr

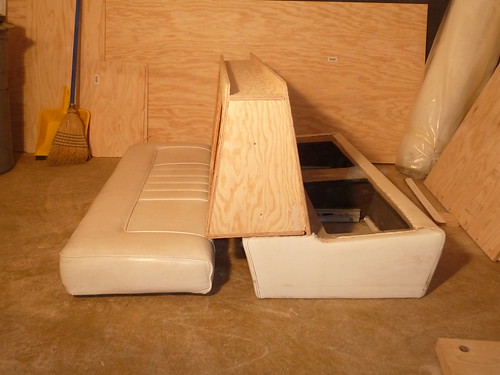
I've considered removing the middle divider, but I'm concerned it will make the helm side less solid....We'll see...
 
Starting disassembling the upper portion of the helm seat - planning on shortening it up by a few inches on the left side and making the rear angle more comfortable for the rear seating. Going to assemble the new upper portion before I disassemble the lower portion to make sure everything fits. Then I'll rebuild the lower making sure it fits the upper....

Pics are all after stripping the vinyl and foam.

Rear

P1010115 by Boykster, on Flickr

Front

P1010116 by Boykster, on Flickr

Front, back, and toprail off

P1010118 by Boykster, on Flickr

I already templated out a new side panel, but haven't cut any panels yet. Probably the last work I'll get done until I get back from vacation...
 
Looks good... I'm really interested in the helm seat refit... if you can template 2 of everything you do I'll buy the second set from you!.. my biggest complaint to our helm seat is the seating angle for the rear facing seats... from what I can see if you change the verticle supports inside the cubby you can achieve the new seating angle and end up with more space inside the seat. Is that what you are planning?
 
Thats pretty much it - since I'm adding the seat extension on the pull-out jump seats, I'm going to 'extend' the rear facing part of the helm seat by a few inches to allow for the rear seats to have an angle similar to the front facing helm seat. If I was sticking with the original profile on the jump seats I could probably narrow the top portion of the helm seat and make a better angle for the rear seats.

With the approach I'm using, the storage cubbies will be a bit bigger than they are now...deeper for sure at the bottom.

I'd be happy to trace paper templates for you to use
 
Here's a rough sketch of what I'm talking about -

The top set shows Old (current) and New (what I'm envisioning) from a top-down view of the rear jump seats. Currently, when they're closed they are flush with the base of the helm seat and don't stick out, and when they're open they extend individually by with a seating surface of ~10". What I'm planning on doing is extending the seating surface and connecting them together. When closed, the new cushion extension will stick out ~4-6" from the back of the base of the helm seat, and when extended it will be ~14-16" of seating. The U-space in the middle is actually smaller then I drew it - its really about ~2-3". This will allow for a deeper seating surface with more support

The bottom 2 doodles show the proposed change to the seatback - the front side (helm side) won't change, but I'm changing the angle of the rear seatback by widening the base and making the overall shape more like / \ rather than / | . The new wider seatback will overhang the existing helm seat base abit, but with the deeper seating surface it shouldn't look strange. I also plan on keeping the cubbies as shown with the opening door with curved arrow. I'm going to keep the exact dimensions so I can re-use the metal trim, but will upholster the outside differently so its more comfortable.

sketch_helm.jpg
 
Ah - finally back from vacation and some business travel. No new pics yet - I left my camera in my briefcase at work, but I'll take some pics later this week. Today I spent the afternoon watching football (Seahawks - meh) and building the helm seat back with the new dimensions. Everything is looking good so far. Next weekend I'm taking a bunch of the new panels for test-fitting on the boat to make sure its all good before I start foaming and vinyling them up.

I'll get the camera back and take some pics of that process too....
 
Interesting project! Thanks for sharing with all the detailed narrative and photos.
 
Last edited:
More progress tonite - first off, the new seat back framing

Front

P1010047 by Boykster, on Flickr

Left Side - notice that the new seatback is shorter than the old base and the rear overhang is about 4". The new 'pull-out' seats will stick out at least this much so it won't look odd once its all put together

P1010046 by Boykster, on Flickr

Right side -

P1010048 by Boykster, on Flickr

Back

P1010045 by Boykster, on Flickr

Side again with a cushion for reference - decent seat back angle now!

P1010049 by Boykster, on Flickr

The tab/slots that connect the seatback to the base

P1010050 by Boykster, on Flickr

I need to decide how I'm going to 'finish' the inside of the cubbies - probably fill any holes/seams, epoxy it all, and then paint it with a white enamel.

Next up, seat base disassembly. I was still amazed how wet/rotten much of the base was. It's been in my heated dry basement for WEEKS, but a lot of it is still soaked.

Starting point

P1010051 by Boykster, on Flickr

Removing vinyl from port side of seat - wet and mildewy...the wood was 'slimy' even...yuck

P1010052 by Boykster, on Flickr

Vinyl stripped

P1010053 by Boykster, on Flickr

dark wood - WET

P1010054 by Boykster, on Flickr

Taking apart the top

P1010067 by Boykster, on Flickr

The most important stuff - the supports

P1010069 by Boykster, on Flickr

Need to build 3 of these

P1010071 by Boykster, on Flickr

Tomorrow - take apart one of the supports and template out a new one. Looks like they are all exactly the same, so I should be able to template 1 and then router 2 more once I'm happy it's a good match.
 
Looking great - On a side note - Does anyone know where to get that aluminum piece for the slide and what does the other half look like? My boat was missing the slide out seat and I would like to re-do it this winter?

LK
 
More progress this weekend - finished the base of the main cockpit seat and did some epoxy/fill work on the upper. I'm going to epoxy the inside of the storage cubbies, and the paint with a white enamel paint, so I wanted to fill any defects. I also wanted to make sure there weren't any voids on the top of the seat structure to capture water, so I filled them all....


P1010347 by Boykster, on Flickr


P1010343 by Boykster, on Flickr

And for alwhite00 - here's a shot of the metal bracket that attaches to the pullout seats - there are 4 of these and they're all the same


P1010345 by Boykster, on Flickr
 
More progress this weekend - finished the base of the main cockpit seat and did some epoxy/fill work on the upper. I'm going to epoxy the inside of the storage cubbies, and the paint with a white enamel paint, so I wanted to fill any defects. I also wanted to make sure there weren't any voids on the top of the seat structure to capture water, so I filled them all....

http://www.flickr.com/photos/68011704@N03/6321448776/
P1010347 by Boykster, on Flickr

http://www.flickr.com/photos/68011704@N03/6320924803/
P1010343 by Boykster, on Flickr

And for alwhite00 - here's a shot of the metal bracket that attaches to the pullout seats - there are 4 of these and they're all the same


P1010345 by Boykster, on Flickr

What does the mating part look like?

LK
 
Boykster, Your progress is awesome... Keep up the great work.....:thumbsup:


Ps: What is the red wood filler looking stuff???
 
Al - I thought I posted the other part already, but I thought wrong. I'll snap a pic and also measure the length of the pieces tomorrow evening.

Pyrojodge - thanks, I sit in meetings or in front of a computer all day, so it's so rewarding to come home in the evenings and weekends and spend a few hours doing some basic woodwoorking. The red filler stuff is west system epoxy thickened up with West 407 low density filler. You mix up your epoxy and then stir in the filler until it has the consistency you want - since i was filling some larger gaps, I made it peanut butter thick. It sands/forms nicely.
 
Oh, and no pics yet, but I spent some time yesterday / last night planning out how the bolster hinge is going to work. It looks like I'll need to split the helm bench seating surface into 3 pieces. The fixed section on the left, and then 2 pieces for the captain's section. I thought I could make a bit L with just one separate bolster area, but there's nowhere to mount one of the hinges if I go that way. I'll need to re-tool how the cushions latch onto the base since I'll need the smaller pieces to be pretty secure otherwise moving the bolster will just flip the while seat up, not just the bolster.

I'm going to mock things up later this week and I'll post some pics then.....
 
Al - Here's a shot of the end of the piece that is attached to the seat base

P1010348 by Boykster, on Flickr

and a side shot

P1010349 by Boykster, on Flickr

and a side shot of the bracket that attaches to the pullout seat

P1010350 by Boykster, on Flickr

both brackets are 17" long

P1010351 by Boykster, on Flickr

the piece that mounts to the pullout seat is 2" wide

P1010352 by Boykster, on Flickr

and just over 1.25" tall

P1010353 by Boykster, on Flickr

The bracket that mounts to the seat base is just over 2" tall

P1010354 by Boykster, on Flickr

Here's a shot of how the two brackets mate together - extended

P1010356 by Boykster, on Flickr

and pushed all the way in

P1010357 by Boykster, on Flickr

Didn't get a chance to work on the seat bolster this evening. I started epoxying the seat base and seat back. I got most of the base coated with it's first coat, and much of the seat back. More epoxying tomorrow
 
Thank you VERY much for the pictures, That explains it very well. Keep up the good work, Looks great.

LK
 
Obviously I need to pull all the brackets off and degrease/clean them before final re-assembly. Been meaning to do it, but was too busy getting the base built. The helm seat is the single bulkiest piece, so the sooner I can get it built and epoxied up, I can move it out of the room I'm using as a shop and will have more space!
 

Forum statistics

Threads
113,212
Messages
1,428,676
Members
61,110
Latest member
rvlewis
Back
Top