Best way to find water leaks?

Dave S

Well-Known Member
TECHNICAL Contributor
Oct 3, 2006
6,014
Upstate South Carolina
Boat Info
Boatless
Engines
Boatless
Here is the situation. My boat is about 1.5 months out of it's one year warranty. It has always been moored under a covered dock and not subjected to rainstorms. We pulled the boat out of the water a few weeks ago because of the low water levels in our lake and it is sitting on a trailer out in the open. The Camper canvas is on the boat, The boat is at a bit of an angle on the trailer.

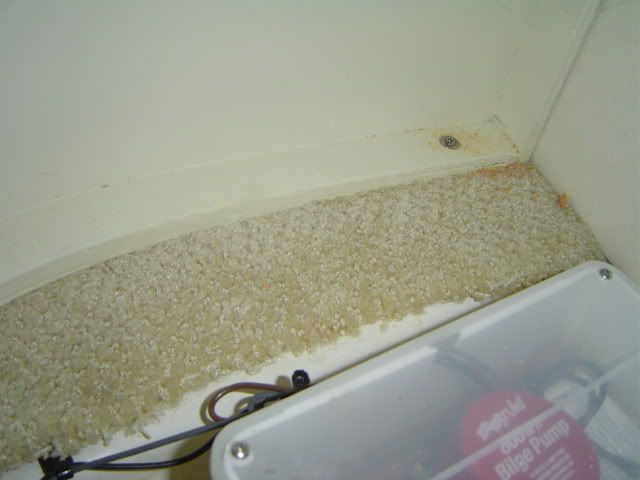
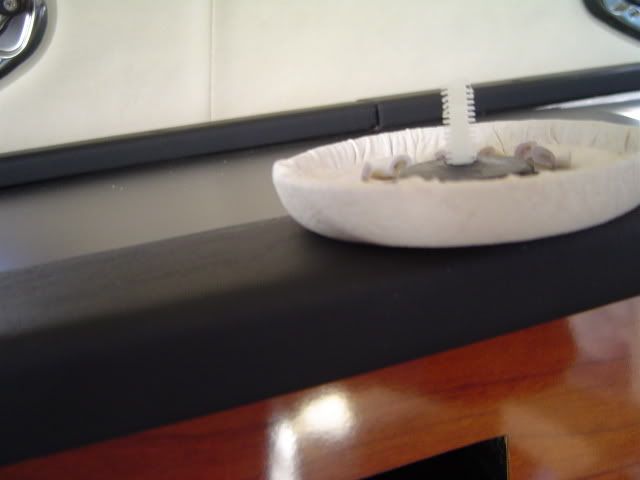
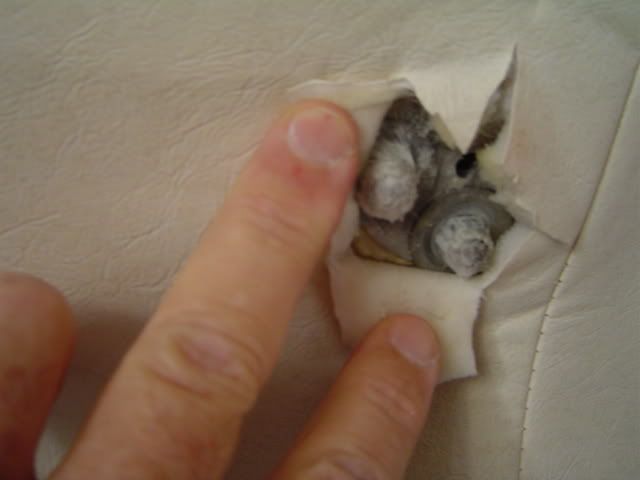
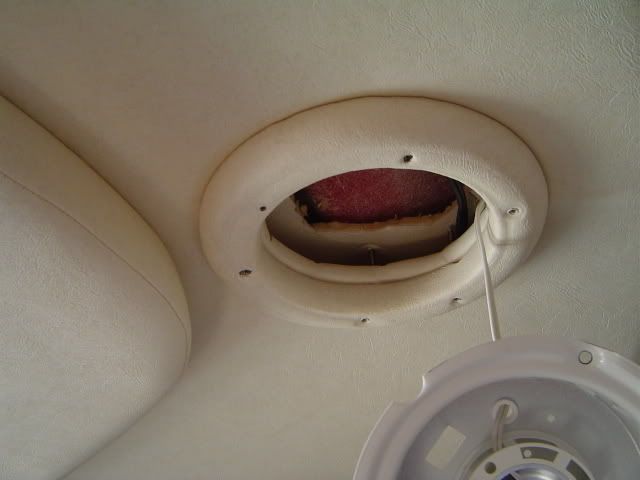
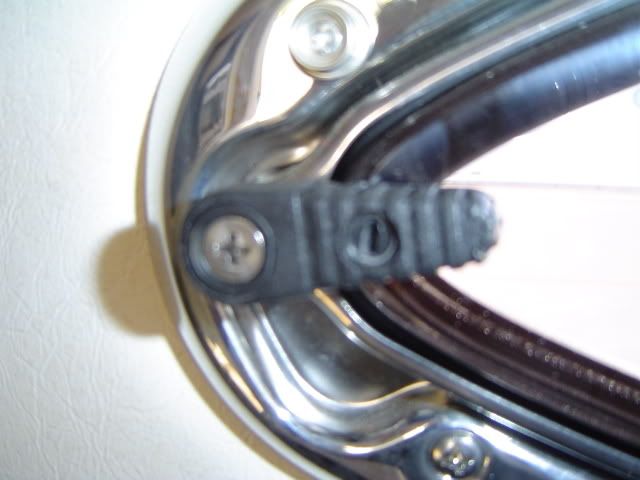
Over the last few days we have had some much needed rain so today I went to check on the boat. What I found was the cabin floor carpet was wet right below the steps. It is dry in the area under the step where the backup sump and the shower sump is located. I also noticed a bit of water on top of one of the cabinets right below one of the big "buttons" in the ceiling. Here is a picture of that layout.

2007260DA.jpg


Those buttons probably allow access to the fittings for the bow rail so I guess that is a likely place to look first. But I also realize water could be leaking in from somewhere else too so I would like to hear from any of you folks who have had to trace water leaks what the best way is to go about doing it. I don't think much of the interior can really be removed to look for water leaks. And I don't know whether the dealer can get authorization from Sea Ray to fix this under warranty but if not I am, on my own.

Dave
 
I'm not sure what is behind those buttons but if you feel dampness around them, then you need to pull them off like you said.

I also noticed you have those porthole windows there. Those things need to be adjusted from time to time or they will leak also. I had about 6 inches of water in a hold under the bed in my port stateroom and traced it to one of the porthole windows leaking and wicking down the inside of the hull and accumulating in a hold.

Those little black plastic things that you rotate to open the window or lock it down (there are 3 of them per window) have a little black adjustment screw in them over the glass that increases or decreases their push on the glass to form a seal. Best thing to do is have someone take a hose on the outside and spray the windows and see if they leak and adjust the screws accordingly.

Good luck
 
Finding leaks can be a painstaking effort, but ya goota do it.

I use the method Gary suggests, but I'll give you a little more to work with.

Start with the lowest suspect possible leak. Begin with a water hose with a weak flow and begin wetting the possible spot from a top down water flow if you suspect rain fall. From the bottom up if you suspect flooding. While the hose runs remain inside and was look for the leak ... strip back anything you can from the interior to see the bolts, etc. For portholes, run water from the top down and watch for leaks.

Work from the lowest spot on that has a suspect to the highest on the boat. Don't be impatient. It can take several minutes for water to work through small leaks to make its self known.

When you find the leak, don't stop. Check all other suspected sports to eliminate the prospect of multiple leaks.

The make repairs and adjustments as required.

If the leak is the port light, tighten as suggested, but first check the seals. Sometimes they become crusted with salt, pollution debris etc. and this debris causes leaks. Clean the seal with a dish soap solution and a soft tooth brush, wipe clean and apply a very thin protective lubricant like Super Lube.

You should clean the port lights annually in the north and semi annually in year round boating conditions like Florida.
 
I suppose it could be leaking at the base of the windsheild as well since it crosses over in that general area too. How does one go about checking for leaks there? It doesn't seem like there is any way to drop a ceiling panel in that part of the cabin because the ceiling panel covering is just glued in as far as I can tell. So tracing leaks with everything constructed like that is not going to be easy.
 
Last edited:
Being only 1.5 months out of your warranty, have you asked the dealer to see if they would help you out. Explain to them how you've had it covered and now that you don't it's got some leaks. They might help ya out.
 
Those round buttons are the thru fittings for the bow railing. I pulled all mine last spring cause they were leaking.

I would also check with the dealer, or better yet, Sea Ray directly and explain...
 
Finding leaks can be a painstaking effort, but ya goota do it.

I use the method Gary suggests, but I'll give you a little more to work with.

Start with the lowest suspect possible leak. Begin with a water hose with a weak flow and begin wetting the possible spot from a top down water flow if you suspect rain fall. From the bottom up if you suspect flooding. While the hose runs remain inside and was look for the leak ... strip back anything you can from the interior to see the bolts, etc. For portholes, run water from the top down and watch for leaks.

Work from the lowest spot on that has a suspect to the highest on the boat. Don't be impatient. It can take several minutes for water to work through small leaks to make its self known.

When you find the leak, don't stop. Check all other suspected sports to eliminate the prospect of multiple leaks.

As anticipated Dave you are getting good advice and the comment from Asureyez is right on the money. I learned a trick long ago from an expert boat worker - tape small pieces of paper towel along the exposed ridges of the interior where you expect water to flow into the boat from a hatch or a deck fitting, etc. You can do the same thing to any exposed nuts or fittings under the headliner. After you have gently soaked the exterior areas that are suspect - check each piece of paper towel for water saturation. By checking to each piece of towel you will learn the direction that water is flowing into the boat and hopefully the source as well.

Of course, a new fully waranteed boat should not leak and the dealer should respond to your problem immediately.

Good luck and please do post the outcome..
Warren
 
Talcum powder works too. DO NOT use flour as it's a food product and will eventually attract vermin or cause mold. Puff a bit of it along areas leading towards the places that got wet (assuming the path is now dry) and repeat the gentle application of water with a hose on the outside.
 
Thanks for all the suggestions everyone. That's what I was looking for.

I'll get together with my dealer on Monday to see if Sea Ray will cover this under warranty but regardless I will probably try to find the leak(s) on my own first.

Dave
 
Just got back from the FLBS and a broker told me his number one best question to ask a seller or owner is where does the boat leak?

The answer to that question has always spoke volumes about the type of owner/SELLER he was working with.
 
Just got back from the FLBS and a broker told me his number one best question to ask a seller or owner is where does the boat leak?

The answer to that question has always spoke volumes about the type of owner/SELLER he was working with.

:smt017:smt017:smt017

Not quite sure what this has to do with my question.
 
I assume he was just commenting that it's common to get leaks like this. If you ask someone where their boat leaks and they say "It's never leaked"... they are lying.

I'm interested to see what the Sea Ray dealer says. On my warranty, it really calls out leaks in all caps and basically says "not our problem". However, when I had a large front window leaking in the salon a few years ago, I called Sea Ray customer service in Florida and, although they didn't offer to fix it, they were able to tell me how to fix it as they had seen this problem on other 480's. You may want to try that route if they tell you to pound sand.

If it makes you feel any better, I'm pretty disappointed is some of the caulk work that was done on my 480 DB and I just fixed a leak a few weeks ago where the caulking that existed in a joint on the bridge was dried out and just fell apart. The leak made it all the way down into the salon. I went to the boat yesterday and the salon was dry after 6 inches of rain so I think I got it... Leak detection and fixing is a constant battle though.
 
Last edited:
Dave,

I have the same problem - water in the hull area under the shower sump box.

It first happened to us last spring after the shrinkwrap came off while it was still sitting in the yard on stands. I went though a campaign of caulking the windshield and cleaning porthole gaskets etc etc.. Boat went in the water and was outside (unlike Dave S) and despite thunderstorms, stayed dry all summer.

Boat came out of the water earlier in the month and on stands for winter storage. In the period between being hauled and shrinkwrapped it rained, and quess what came back.

I happened to be at the yard the other day to pick up the last of the canvas and I happened to mention it to the guy who runs the yard. His thought was that because the boat was on stands it might be becuase the flexes in such a way as to allow the rub rail, or bow rail connections to open enough to allow water in. As the boat is wrapped I have no way to test the theory. But it does kind of make sense.

Henry
 
Create a vacuum in the boat interior, cover the boat with baby shampoo and then look for the bubbles to form wherever the leak is.

Well, that's the way I test scuba masks for leaks. Same problem, smaller scale.

Dennis
 
Here is what I found concerning my water leak. (I have also posted this same reply on another posting just in case people are ever doing searches specific to 260 Sundancers water leaks.)

First off, the problem I had was wet carpeting at the foot of the cabin stairs. Only the flat portion that you stand on was wet. The sides were dry. Normally, wet carpeting here often signifies a leaky shower sump. Why is that so? This picture taken of the sump area should explain it. The carpeting in the cabin is glued down before the stairs are put in place and the carpeting extends into the sump area.
DSC03454.jpg


Any water that overflows from the sump will get wicked up by the carpet protruding into the sump area. That was not my problem but I am posting this picture so everyone knows what to look for first if the cabin carpet is wet.

Next, I took the advice of several CSR members on the best way to look for water leaks. (Remember, I also had a tell tale puddle of water on top of my galley cabinet right below one of the buttons in the ceiling.) Those buttons cover the bolts that hold the deck rail down. The buttons just pull off. Here is a picture of the button when it is removed.

DSC03446.jpg


Next I had to slice back the opening in the vinyl a bit so I could see the bolts.

DSC03445.jpg


At this point I started a hose running on deck so this whole area was being flooded with water but I saw no signs of a leak thru that fitting. :smt017 But I am sure water leaked from that point somehow during the last rain because the foam backing on the vinyl was still wet. Up on the deck The other likely things that could leak and maybe find there way down to this opening were the windsheild screws, the mooring cover snaps, the Sirius Antenna, and the snap for the vinyl strap that is used to secure the windsheild when it is open. So I dropped the overhead light fixture in the cabin since it is the only thing that is easily removable to allow some access to this area.

DSC03442.jpg


Then I proceeded to flood all those area on deck with the hose. Naturally I couldn't see or feel any water leaking.:smt119 Rather than do nothing at this point, I decided to tighten a few things and reseal other areas. I snugged the mounting bolts for the hand rail and applied additional silicone under the slight gap at the bottom of the rail where it meets the decking. Next, I removed all the screws holding the mooring cover snaps in place that are mounted at the base of the windsheild and put marine grade silicone on them and put them back in place. (I did the same thing with the nylon strap for the windsheild). It is possible that one or more of these screws leaked but so slowly it was difficult for me to duplicate the leak unless I let the water run for a long time.

Next, I decided to check out my oval cabin windows to see if they leak. JACKPOT!!!!!!!!!!!!! :smt038 Three of them leaked like there was no tomorrow. Moreover, the way the windows are designed even a light rain directs water flowing off your upper deck right over the window and gasket area. So it was extremely obvoius this was a major source of water intrusion in any kind of rain be it light or heavy. Gary (Four Sons) had mentioned these things leak a lot and had pointed out there is way to snug them up. It is not obvious at first how to do this so I took this picture (it's blurry but it shows where the adjustment is made).

DSC03450.jpg


That little black nylon set screw you see will apply more pressure to the window so it seals better against the gasket. Just tighten those screws down a bit. I recommend making the adjustment with the window open so you don't apply undue pressure on these screws or the glass. Then just be sure you can close the window and turn the closers to hold the window closed. Then retest for leaks. I was able to stop the leaks at all the windows just by making this adjustment.

For now I hope this takes care of things. I will wait for the next rain and check things out a bit. If it still leaks, then I will pursue getting Sea Ray to cover this under warranty.


Dave
 
Dave S, thanks for the info on your leak. My 06 260 has the exact same problem w/ water on the carpet and shower sump bilge area. When the water was coming in at the windows, did it run down the interior or between the liner and the fiberglass? It has been pretty annoying for me. Thanks again SB
 
Dave S, thanks for the info on your leak. My 06 260 has the exact same problem w/ water on the carpet and shower sump bilge area. When the water was coming in at the windows, did it run down the interior or between the liner and the fiberglass? It has been pretty annoying for me. Thanks again SB

It runs on the outside of the vinyl liner but will eventually work it's way down to the floor behind the galley cabinets.
 
It runs on the outside of the vinyl liner but will eventually work it's way down to the floor behind the galley cabinets.

Dave,
I'm glad you found the source of the problem. Only one question, wasn't the a trace of dripping water when a leak took place before you started your analyses. When I had similar issue I could clearly see few drops and whent over all the windows to make sure all is good.

Alex.
 
Nice write up and glad you found it. Everyone with these port holes that have never adjusted them should read your story. A small screwdriver and 5 minutes can save thousands of dollars in repairs and frustration over the years.
 
Last edited:

Forum statistics

Threads
113,315
Messages
1,430,457
Members
61,174
Latest member
Bigram512
Back
Top