420/44 DB Owners Club

Thanks for posting the results. I looked at the prop info the PO passed along to me and the cupping is listed as " 6 -.089 " . So I am trying to figure out how to translate that into medium vs light cupping. My fuel burn is 15 to 20 percent higher than yours. We are pretty loaded up for cruising up into Canada and the dingy and Presto lift on the back...but I do not know if the weight makes any difference.

If you know how to convert my numbers into light vs medium, I would appreciate some clarity!
IMG_0876.jpeg


I see here the numbers for cupping below the light / medium / heavy but don’t know much more than that. Maybe give DeepBlueYachtSupply.com a call and see what they have to say
 
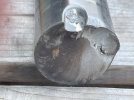
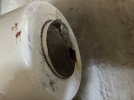
I thought I would share and close the loop on my broken starboard shaft. I took the shaft to a metallurgist for an inspection to help determine the cause of the breakage. The metallurgist discovered a stress crack at the beginning of the shaft taper at transmission coupling keyway due to fatigue and was confident it was caused by engine misalignment. The crack propagated three-fourths around the shaft over time before it gave way and broke. The crack was hidden inside the coupling. The starboard engine was misaligned at .012 when mated with the newly manufactured A22 shaft. The metallurgist saw no issues with the quality of the shafts. My port shaft was misaligned at .010". All motor mounts/isolators were in great shape, and did not appear to be compressed, so maybe it doesn't take much compression or this misalignment was from the factory, IDK. In any case it took 17 years and 900 hours to break. The scary part is that the stress crack was hidden inside the transmission coupling and I never experienced any vibration. I replaced both shafts, dripless couplings, cutlass bearings and realigned the shafts. Good to go now, except I am poor. Thanks to all who commented.
 

Attachments

  • Short Shaft 3.jpg
    Short Shaft 3.jpg
    97.2 KB · Views: 48
  • Long Shaft 2.jpg
    Long Shaft 2.jpg
    117 KB · Views: 45
  • Short shaft 1.jpg
    Short shaft 1.jpg
    1.8 MB · Views: 45
I thought I would share and close the loop on my broken starboard shaft. I took the shaft to a metallurgist for an inspection to help determine the cause of the breakage. The metallurgist discovered a stress crack at the beginning of the shaft taper at transmission coupling keyway due to fatigue and was confident it was caused by engine misalignment. The crack propagated three-fourths around the shaft over time before it gave way and broke. The crack was hidden inside the coupling. The starboard engine was misaligned at .012 when mated with the newly manufactured A22 shaft. The metallurgist saw no issues with the quality of the shafts. My port shaft was misaligned at .010". All motor mounts/isolators were in great shape, and did not appear to be compressed, so maybe it doesn't take much compression or this misalignment was from the factory, IDK. In any case it took 17 years and 900 hours to break. The scary part is that the stress crack was hidden inside the transmission coupling and I never experienced any vibration. I replaced both shafts, dripless couplings, cutlass bearings and realigned the shafts. Good to go now, except I am poor. Thanks to all who commented.
A key in the keyway that has moved up when installing into the coupling will also cause an interference and prevent the shaft taper from properly seating in the coupling. In fact the defect is strangely right at the keyway.
One important thing is to make sure the shaft is centered in the log and the strut isn't bent as a part of the alignment process.
This is why the shaft should be installed lapped and an index line drawn without a key installed to ensure the assembly returns to the index line when the key is installed. From the school of hard knocks.
 
Water tank access. I think I have a leak at the fill neck or vent on the water tank. If I fill until I see water come from the vent, I get a little fresh water in the bilge area under the steps. Gonna take a guess and say the fill and vent are on the front of the tank. Has anyone dealt with something like this? Can you remove panels in the guest cabin to gain access?

Also have a fuel leak at either the fill neck or vent on top of the port side tank. If I top off and go I burn the fuel down below the neck before it had a chance to create a noticeable leak. If I top off and tie up, I get diesel in the bilge. Access looks tight. Has anyone had to deal with this? Looks like an access panel under the couch might be the best way.
Either access under couch or remove part of exhaust to climb closer but still tough
 
Water tank access. I think I have a leak at the fill neck or vent on the water tank. If I fill until I see water come from the vent, I get a little fresh water in the bilge area under the steps. Gonna take a guess and say the fill and vent are on the front of the tank. Has anyone dealt with something like this? Can you remove panels in the guest cabin to gain access?

Also have a fuel leak at either the fill neck or vent on top of the port side tank. If I top off and go I burn the fuel down below the neck before it had a chance to create a noticeable leak. If I top off and tie up, I get diesel in the bilge. Access looks tight. Has anyone had to deal with this? Looks like an access panel under the couch might be the best way.
The water fill can be accessed behind the port sofa.

STBD fuel fill can be accessed via STBD stern quarter locker. For the PORT I think you'll need to take out the stern shower.
 
The water fill can be accessed behind the port sofa.

STBD fuel fill can be accessed via STBD stern quarter locker. For the PORT I think you'll need to take out the stern shower.
Thanks, but I need to access both at the tank. The deck fill end looks fairly accessible. The tank end, not so much.
 
Has anyone ever removed their bridge windshield? The gray paint/coating is peeling and flaking due to corrosion from the aluminum frame underneath. Seems to be getting worse every year. I have the crazy idea of removing and having it powder coated. Seems like I could take this apart in sections however wondering if its too involved of a task. Anyone else experience this flaking and remedy one way or the other?
 
Thanks, but I need to access both at the tank. The deck fill end looks fairly accessible. The tank end, not so much.
There are access panels under each sofa, which get you to the top of each tank.
 
There are access panels under each sofa, which get you to the top of each tank.
Cool. Thanks for the reply. Might not be as big a deal as I thought.
 
Not the water tank, though.
More concerned with the fuel tank. Access to the water tank fill neck has to be right behind the ER forward bulkhead.
 
More concerned with the fuel tank. Access to the water tank fill neck has to be right behind the ER forward bulkhead.
You can reach the deck fitting by removing the port sofa back as described by others. If you remove the sofa bed you can see down to the general area of the water tank, but I don't recall that you can reach it (or see where the fill pipe connects).

I had a cracked fitting on the outlet of the water tank. It can be somewhat reached under the stairs but you have to remove the washer/dryer.
 
.

I had a cracked fitting on the outlet of the water tank. It can be somewhat reached under the stairs but you have to remove the washer/dryer.

Thanks. Water tank is going to be a winter project. Seems like headboard interior panels should be removable to access things like this. I tugged on them but it’s not clear on how they are attached or if they are made to be removable. I’d love to do a walk thru on one of these boats with the interior gutted out.
 
Thanks. Water tank is going to be a winter project. Seems like headboard interior panels should be removable to access things like this. I tugged on them but it’s not clear on how they are attached or if they are made to be removable. I’d love to do a walk thru on one of these boats with the interior gutted out.
Check the post below. Some build photos that may help your research.

http://www.clubsearay.com/index.php?threads/420-44-db-owners-club.39333/post-1155137
 
We r thinking sell the 44 DB and get a cruisers yacht 52 Express. At almost 67 and 68 yrs old not having the bridge steps would be nice. In fact I already fell down them.
 
We r thinking sell the 44 DB and get a cruisers yacht 52 Express. At almost 67 and 68 yrs old not having the bridge steps would be nice. In fact I already fell down them.
Considering the same but looking at a 2010-2015 SeaRay 510 Sundancer with V drives
 
  • Like
Reactions: RBB
Made some headway on the AC relay box and amplifier mysteries. I found the AC relay behind the couch, took the cover off and it looks factory under the cover. I checked incoming voltage and there is none.

What I found was that the cable from the panel to the relay box had been cut behind the panel and a new cable was run straight from the panel breaker to the pump. The cable going from the box to the pump was cut near the pump. I ohmed out both cables and they appear to be fine. Even it they are not, pulling new ones isn’t a big deal.

I can’t seem to find a reason for bypassing the relay box. I have good trigger voltage from both AC’s and I hear the relays click when the AC compressor comes on. I’m thinking I’ll just reconnect everything as it should be and see what happens.

Issue 2, amplifiers. I found the amps behind the couch. There is no power going to either of them. I’m guessing that these amps were to supply the interior speakers? The boat has a JL Audio head unit under the TV connected to the cockpit speakers. The subwoofer doesn’t work because I’m pretty sure the 2 speakers are connected directly to the head unit with no amp.

I was thinking of adding an amp to the JL head unit to get the subs working. That would go in the space under the TV. Since the 2 amps behind the couch don’t work, I’m thinking get rid of them and maybe install a 2000W inverter back there tied to the outlets. Maybe 2 1000w inverters, one for port outlets and one for stbd.

With the amps gone, I could add another head unit dedicated to the interior speakers. There is a small amp beside the AC relay also. Can anyone confirm that these amps are tied to the interior speakers? Pics below. Thanks.

IMG_2138.jpeg
IMG_2139.jpeg
 

Forum statistics

Threads
113,186
Messages
1,428,171
Members
61,097
Latest member
Mdeluca407
Back
Top