Navigation
Install the app
How to install the app on iOS
Follow along with the video below to see how to install our site as a web app on your home screen.

Note: This feature currently requires accessing the site using the built-in Safari browser.
More options
You are using an out of date browser. It may not display this or other websites correctly.
You should upgrade or use an alternative browser.
You should upgrade or use an alternative browser.
300 Sundancer questions.
- Thread starter Bridog
- Start date
JimFromMD
Well-Known Member
- Aug 9, 2010
- 1,777
- Boat Info
- 2005 300DA, Garmin 740s w/Vision Charts and GMR18HD RADAR
- Engines
- 5.0MPI w/BIIs, Kohler 5E Generator.
Has anybody installed hardwood flooring on their boat. We want to do just in front of the fridge and table.
Beverly,
Havent seen any posts about hardwood / laminate in the 300DA specifically, but there are several threads here that document hardwood installations on other models in general that may be of assistance. Would love to see how it turns out if you decide to take on the challenge.
ZZ13
Well-Known Member
I finally figured out the overhead light fixture in the head. The fixture has three "slots" on the edges and the cover has three "nubs" that line up with the slots. Just pull down as you turn (you can turn in any direction) and eventually you will get the nubs to the slots and it will come off. The same bulb I put in the cabin ceiling works here, which is linked to in post #1099 in this thread.More on LED bulbs: After trying several BA15D LED bulbs in my 3 floor cockpit fixtures, I ended up with part number 74545 from ledlight.com. These only come in white and warm white (I bought warm white) so if you are a colors person, these aren't for you. For the two cabin overhead G4 lights (the ones in the same fixture as the AC bulb, I went with the G4 15 bulb tower from LEDwholesalers.com. They are a little shorter than the 18 LED tower from superbrightleds.com so they fit just fine sticking straight down. They seem to be a tad less bright than the stock 10w halogen but they light up just fine. They are about half the price of the 18 LED tower from superbrightleds, so I put them in my 6 swivel fixtures as well. I installed in the swivels by popping off the clear plastic "lens" and then snapping it back in. On one of my swivels the clear plastic wouldn't stay back in on one edge so I had to put a tiny tab of crazy glue on the peak of one of the curves. Its a small enough dab that I will be able to pull that lens back off if I need to. Only one I have left to do is the overhead bulb in the head and I haven't figure out how to get at that bulb yet. Anyone know how to remove that fixture (just pull straight down?)? I also put LEDs in the two nav lights in the Perko nav/anchor fixture on the arch, got them from marinebeam.com.
So now, if I am not running the genny I have low power LEDs in every bulb I would want to keep on for a while: cockpit floor lights, arch lights, cabin reading/swivel lights, cabin overhead lights, anchor lights. I don't plan to do the two cabin floor lights (I seem to never use those) or the two cabin AC bulbs or the bow and stern nav lights (I actually bought a stern LED light once but dropped it in the river while installing, duh) since I only have then on when the engine is running.
ZZ13
Well-Known Member
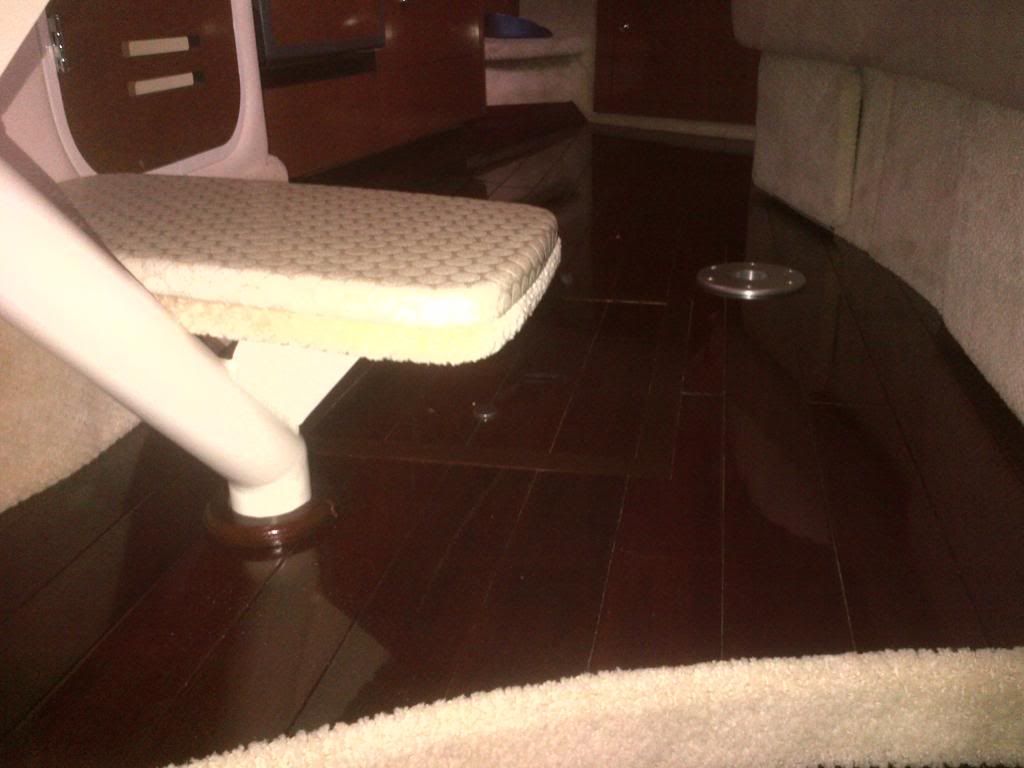
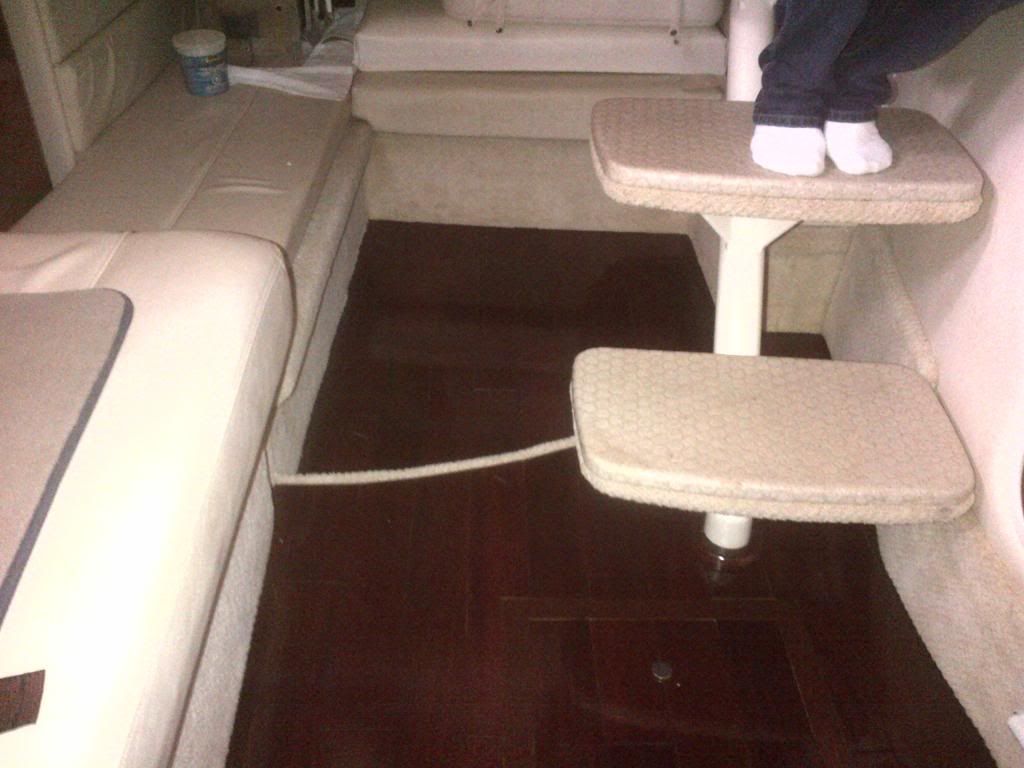
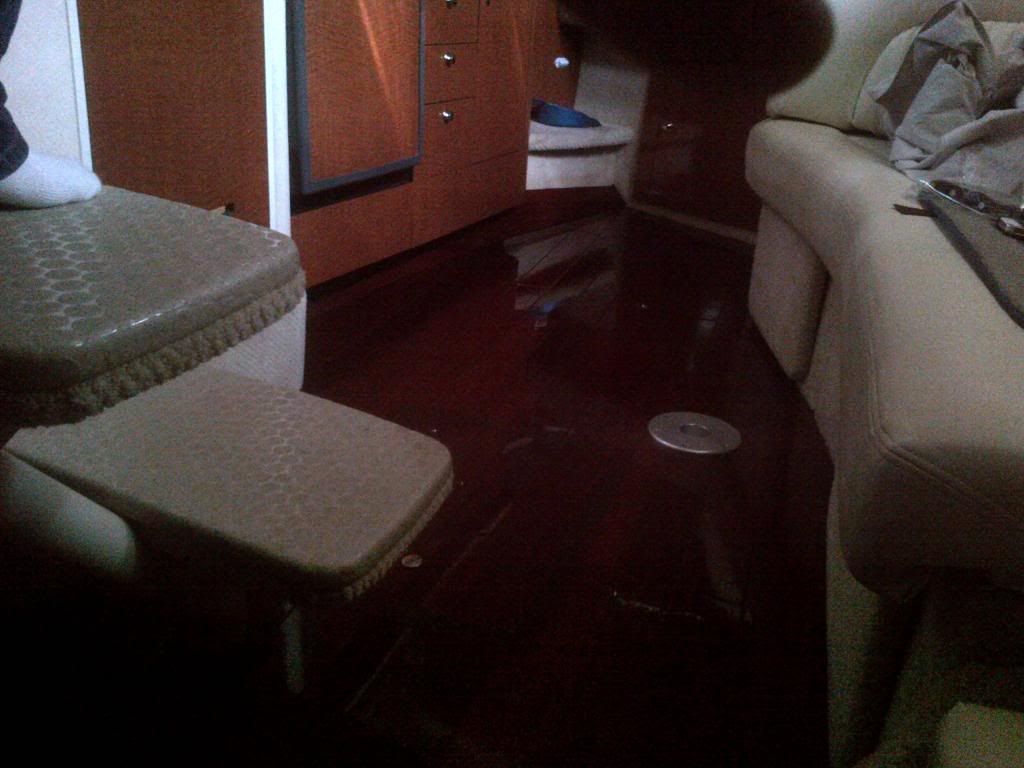
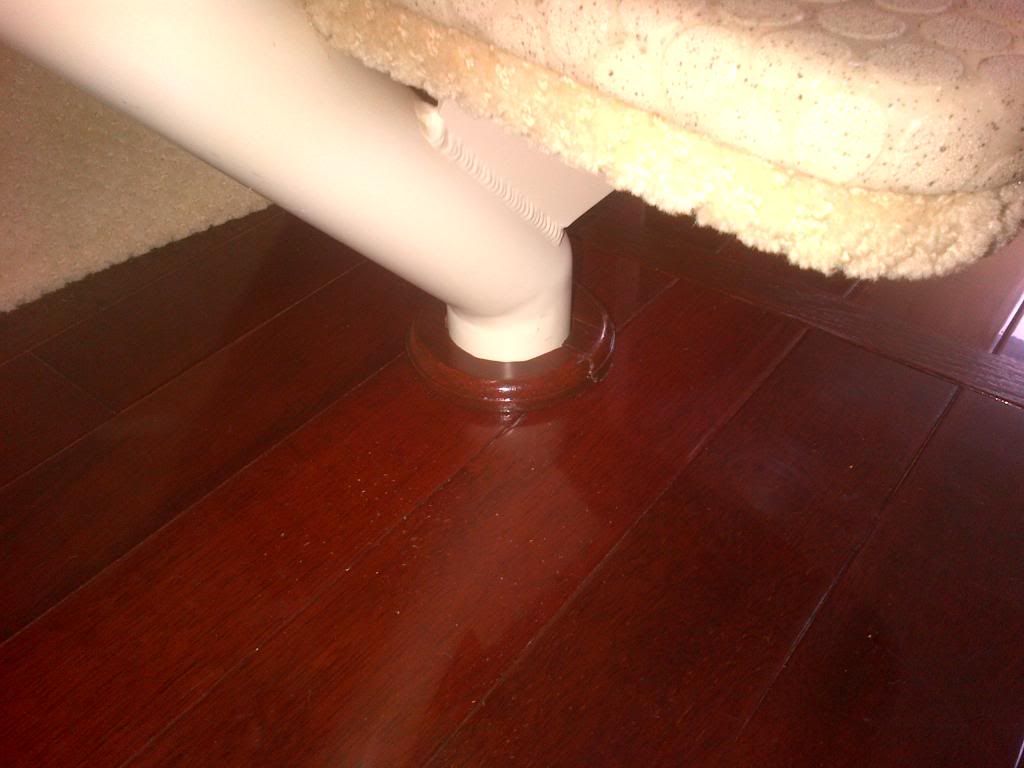
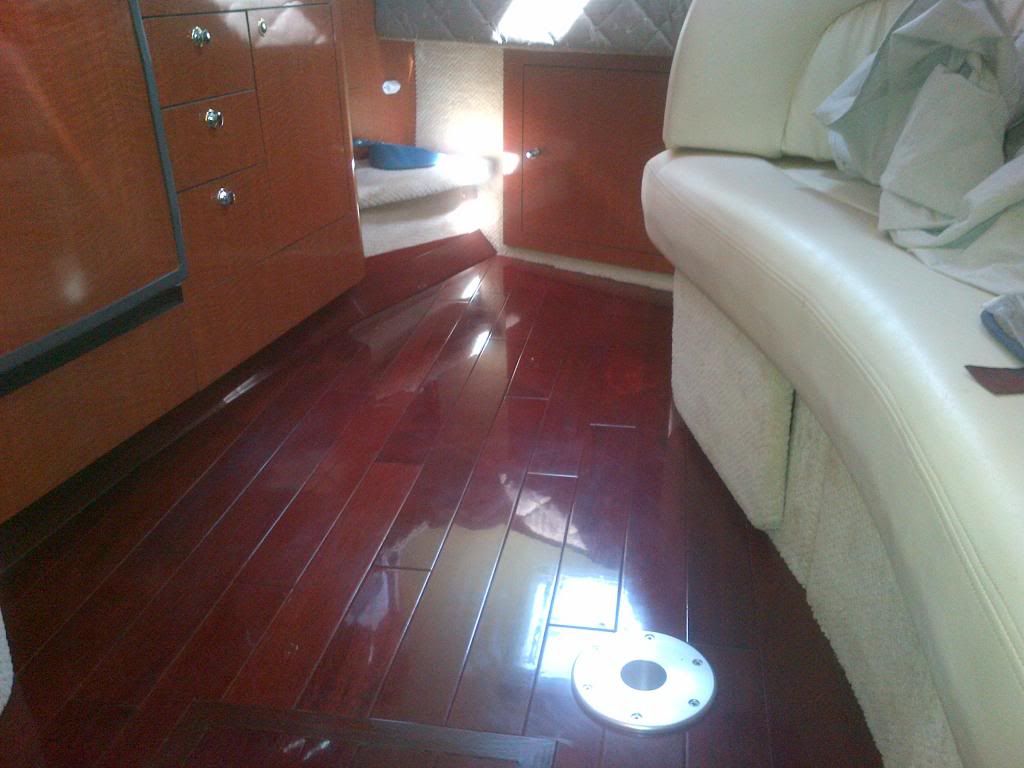
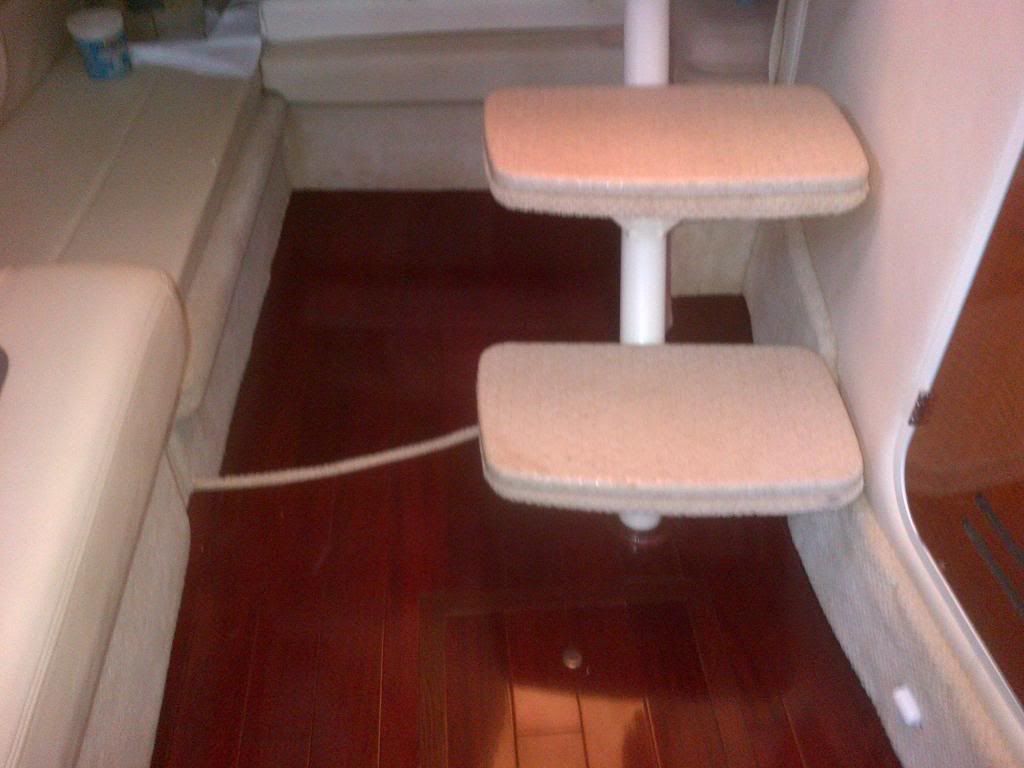
We'll need step by step instructions as well as the pictures. :grin:We installed the hardwood in our boat. When I figure out how to post pictures I will. It is a very big job. Took a few weekends but well worth it. It looks great.
I put all my pictures on Photobucket and then copy the links to the pictures into the post. Many people here use that approach and it works well.
JimFromMD
Well-Known Member
- Aug 9, 2010
- 1,777
- Boat Info
- 2005 300DA, Garmin 740s w/Vision Charts and GMR18HD RADAR
- Engines
- 5.0MPI w/BIIs, Kohler 5E Generator.
I put all my pictures on Photobucket and then copy the links to the pictures into the post. Many people here use that approach and it works well.
I sent Bev a PM with my email volunteering to host her photos in my Photobucket and post them up. Anxious to see myself!
")
- Oct 4, 2006
- 2,344
- Boat Info
- 2006 300DA Sundancer
- Engines
- 350 Mags / Bravo III
subscribing...again
JimFromMD
Well-Known Member
- Aug 9, 2010
- 1,777
- Boat Info
- 2005 300DA, Garmin 740s w/Vision Charts and GMR18HD RADAR
- Engines
- 5.0MPI w/BIIs, Kohler 5E Generator.
Beverly's Hardwood Install Photos.... Thanks for sharing Beverly, and great job!
James

James
Last edited:
Beverley
New Member
It was a lot of work but so worth it. We started out with removing the carpet, then added a wood floor, the hardest part is getting the hardwood to match with the way the floor goes so my husband had to do a lot of grinding on the back of the wood, he made the hatchway first then did the rest. He dry fitted so much of it at a time,then he pin nailed and glued it all down. He used liquid nail on the back of the boards, for the pieces that had to go up the sides a little he used liquid glue and 5 minute epoxy. Good luck to those of you that do this.
drjjames
New Member
Im having an issue with one of the batteries. Im getting a loud constant alarm from the Smartcraft on my 2005 300. It comes from the starboard engine and says "BATTERY." I've noticed that the voltage while running is about 14V on the port side but about 11-12V on the starboard. As I cruise throughout the day, the voltage on the starboard battery gets lower and once it reaches about 10.7V the alarm starts up. I've remedied it temporarily by running the generator which apparently charges the battery as we are running. The batteries were all replaced when I bought the boat a year and a half ago. So either the problem is with the battery, or with the alternator. How do I figure this out? The boats stays plugged in to shore power when docked so the battery charger can run. It still seems that that particular battery is undercharged though. Thanks in advance!
kaz911
Active Member
It has something to do with your Alternator on your engine. It might be broken - or cable has come loose. The alternator charges your batteries on the way from the engine. Usual placements - facing the belt - upper left hand thing where the belt goes around.
where the belt goes around.vrcrdavi
Member
- Nov 17, 2012
- 49
- Boat Info
- 2004 300 DA Raymarine C70
- Engines
- 5.0Ls w/Bravo III Drives
I had this same problem and ended up replacing the alternator. Have not had any problems since then.
adishman
New Member
Hello All,
First time on here and I have read through all the post trying to find a solution to my recent problem. We purchased our dream boat, 2006 300 Sundancer last month and have enjoyed every moment with her so far! This past weekend however, with heavy rain all day Sunday, I noticed a leak in the forward berth port side. The leak was dripping down onto the head rest of the bed. I was able to pull down some of the ceiling cover to expose the area below the port signal light. The light appears to be the problem due to the stain on the foam backing of the ceiling. Has anyone experienced this problem? I inspected the light and found no signs of damage or cracks. I removed the lens cover to expose the bulb and mount. The is a rubber seal between the fiberglass and the plastic housing. There are three holes for anchor screws but only two present. The third hole was never drilled so the hosing does not set firmly down on the seal. I really feel like this is the problem but wanted others opinion before I drill another hole.
First time on here and I have read through all the post trying to find a solution to my recent problem. We purchased our dream boat, 2006 300 Sundancer last month and have enjoyed every moment with her so far! This past weekend however, with heavy rain all day Sunday, I noticed a leak in the forward berth port side. The leak was dripping down onto the head rest of the bed. I was able to pull down some of the ceiling cover to expose the area below the port signal light. The light appears to be the problem due to the stain on the foam backing of the ceiling. Has anyone experienced this problem? I inspected the light and found no signs of damage or cracks. I removed the lens cover to expose the bulb and mount. The is a rubber seal between the fiberglass and the plastic housing. There are three holes for anchor screws but only two present. The third hole was never drilled so the hosing does not set firmly down on the seal. I really feel like this is the problem but wanted others opinion before I drill another hole.
ZZ13
Well-Known Member
I had my light apart recently and I am pretty sure I only had two mounting screws as well. Now that the ceiling is down, run water from a hose on the light and see if it seeps in. If not, then move up to the center hatch and run a hose on it. Then on to the fixed circular ceiling "window" on the port side and run the hose on it. Even try the bottom of the windshield on the port side. The key is to work your way from the bottom up. Any of them could be the source of the leak as gravity will probably take the water to that spot you are noticing. I guess even the bow rail supports near the light could be the source as well. So try water on them also.Hello All,
First time on here and I have read through all the post trying to find a solution to my recent problem. We purchased our dream boat, 2006 300 Sundancer last month and have enjoyed every moment with her so far! This past weekend however, with heavy rain all day Sunday, I noticed a leak in the forward berth port side. The leak was dripping down onto the head rest of the bed. I was able to pull down some of the ceiling cover to expose the area below the port signal light. The light appears to be the problem due to the stain on the foam backing of the ceiling. Has anyone experienced this problem? I inspected the light and found no signs of damage or cracks. I removed the lens cover to expose the bulb and mount. The is a rubber seal between the fiberglass and the plastic housing. There are three holes for anchor screws but only two present. The third hole was never drilled so the hosing does not set firmly down on the seal. I really feel like this is the problem but wanted others opinion before I drill another hole.
Can you post a picture of what you pulled down in the cabin and the stains.
Last edited:
adishman
New Member
Bill, thanks for the suggestions. I will try them out this weekend when we get back to the boat. The pictures will be up Monday. Thanks
adishman
New Member


adishman
New Member
Here are the pics from the leak. Going to investigate more tomorrow. Appears to still be coming from the port marker light.
Sundance280
New Member
Hello Everyone - My brother-in-law has a 2002 300 Sundancer with twin 6.2L; he needs help locating the fuel pump fuses.....they're listed in the wiring diagram, not clear of the location. Has anyone had to replace these? Thanks -
kaz911
Active Member
Hello Everyone - My brother-in-law has a 2002 300 Sundancer with twin 6.2L; he needs help locating the fuel pump fuses.....they're listed in the wiring diagram, not clear of the location. Has anyone had to replace these? Thanks -
On my 2008 - all the relays are just below the "shield plate" mounted on the top of the engine - on the flame arrestor. Facing the belts they are just in the upper left corner of the shield plate.
