Club Sea Ray banner

Rudder position indicator

9.1K views 59 replies 12 participants last post by  Arminius  
#1 · (Edited)
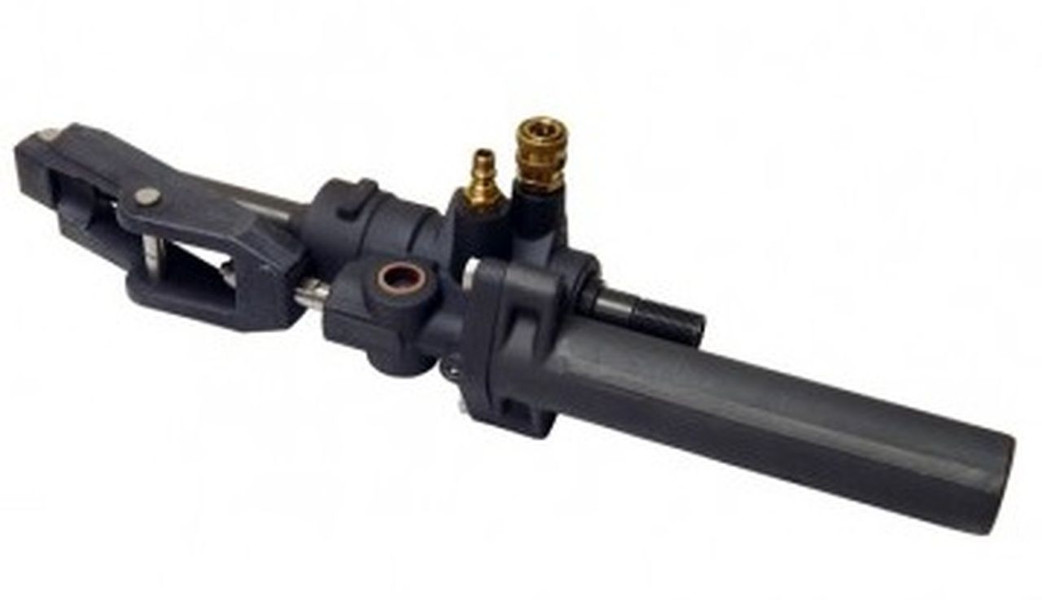
Has anyone put a dash rudder position indicator on a Mercruiser Alpha One, Gen 2 outdrive? This Davis doohickey on my helm is not reliable. The provocatively named Bang-good company sold me one for $40. Swede and a Boat uses a vertical sheet metal arm under a bolt dropped into a clevis pin hole but I have my doubts as to its hardening and precision. Someone must have solved this mechanical problem other than Mercruiser with their newer offerings. I'm thinking a horizontal mounting of the pot on a a thick sheet metal plate between the clevis pins with the actuator rod engaged by a fitting on the transom mounting bolts. A sliding fitting on the pot's shaft is already provided.
Image
 
#2 ·
Image

The pins have about .050" vertical play under finger pressure but my proposed plate would need to be thick enough to thread and would need a dogleg bend by the right pin as there is a step. Longer pins should be available. Think I will layout the forging and start on drilling and tapping. Back to the plate idea if the material is too hard and/or I break a tap. Could be worse. The blind work on the pins is not appealing.
 
#3 ·
Rudder position indicators are used with boats that have, well... rudders! :)

Mercruiser doesn't use them with stern drives. Just like in a car, it's so easy tell where center is that it's a "problem" that doesn't actually exist. In other words, there is no problem. Just turn hard over one direction, then back about a 1-1/2 turns and you're centered. Besides, with the way that small boats, especially, get moved around from wind and current, you can't rely on having the stern drive "centered" to keep the boat going straight. In practical use, a rudder indicator on a stern drive is of no help. A trim gauge isn't far behind......
 
#5 ·
I find my rudder position sensor invaluable. When maneuvering in and around a tight marina, it's probably not the best time to determine your rudder position by brail. That said, mine is not an outboard or outdrive so its impossible to visually determine which way I'm about to point.
 
#4 ·
I'm an outboard guy. When I get close to the dock I turn around and look which way the engine is pointing and pause while calculating whether it should be forward or reverse and which way the prop should face. With an I/O, I trust my intuition which is wrong more often than random probability would predict.
Then there is skiing where I yell "straighten out the boat" before "hit it." I'm in the water getting cold and Susan's quick temper is coming on-line. I eventually recall that the next step is to yell, "Look at the ****engine" But now there is no engine to look at!

Maybe I'll go with 1/32nd" sheet steel plate material and solder nuts on top.
 
#7 ·
Frankly I never felt like I needed a rudder indicator on my single B3 drive. It had a very tight lock-to-lock turn, so I didn't feel lost with it. Basically center the wheel and you're good, with center being easy to find. With the thrust being essentially vectored by the drive, any forward thrust will tell you immediately if you're straight or not.

Now with my current boat I have an inboard and a smallish rudder. It has a like a 20" or 22" wheel that runs 6 full turns lock to lock. The rudder position indicator is extremely helpful when backing and making tight turns in the mooring field. My practice is to pull down the fairway, swing right to line up the the slip, center the rudder, and back in. I'll use throttle blips to control speed, and side to side position is controlled with the bow and stern thrusters. My last boat had the same type of setup with no rudder indicator making backing into the slip more difficult.
 
#9 ·
Davis Instruments RPI. I put one on 30 years ago and wouldn't live without one if I still had a pesky I/O. It mounts on the steering wheel center cap with stickum tape and is a gravity-type system with no mechanical or electrical connection to the outdrive. It gives an instant visual to which way the OD is pointing.

90% of the time its not needed, but after maneuvering at an anchorage or dock when the OD is at a huge angle, it surely comes in handy when you're ready to leave.
 
#11 ·
Your ideas help. Lazy Daze mentioned location on dash of read-out. I think an auto style external instrument mount up by compass might be good in heat of docking. Putting the potentiometer on the moving cylinder rod requires reversal of coordination-which was possible after some experimenting. Biggest obstacle was removing the heavy engine cover and I better cover the transom lube procedures while I have it open. Wonder if there is still a zerk on steering cable as that is a high maintenance item on O/Bs at least.
 
#12 ·
There's a chance the instrument will interfere with the compass. Put all associated pieces of the instrument temporarily in place to check. With a piece of equipment that has a moving component, try to simulate that, as well.
 
#15 ·
Maybe I'm just toying with the chattering class. Generally inept, they hypothesize the most grotesque excuses to perpetuate their lazy defense of the status quo they purchased into. Nah, that couldn't be it. My tap drill worked and bright aluminum cuttings emerged. Securing the pot will be easy. Trying to figure out an easy post to place between the bolt stumps coming out of the transom.
 
#18 ·
Progress report: Scroll below the image. Your thoughts are invited. Gave up drinking 30 years ago but a shot of whiskey remains a treasured thought.
Image

Hard starboard and the end of pot arm will be so located, swinging to left as boat is steered to port. Radius will diminish and arm must slide. The Swede's double roller setup at the end of the arm would produce less read-out lurch than my intended rig with an additional tapped spacer under the epoxy at the axis. I'm on top of the head of the clevis pin so I ground away 1/2 of Ace Hardware mock-up but I should find clearance even if I have to redrill. Bloody pulling out blind cotter pin. That is soft aluminum the pot is on top of so take your time with the tap, backing off repeatedly to break the cutting peel, and you will be OK. 6-32 was used but 8-32 would be better. Tape on top of Allen head screws temporarily held the Allen wrench. String is to retrieve pot from bilge. Maybe I will replace a boat instrument on panel with this mechanical read-out, moving the little used instrument down on the dash. LD is right that an electromagnetic field is a bad companion for compass. Gadget instructions say I can reprogram actual travel of arm. Might take a break on this project. Yea, I cut one of the tabs off pot but it is tight in there!
 
#19 ·
Your work looks good - creative resolution to what some find a need for.

Still mystified by "Maybe I'm just toying with the chattering class. Generally inept, they hypothesize the most grotesque excuses to perpetuate their lazy defense of the status quo they purchased into." from a sober man, though. Regardless of your dismissive assessment, I still have no need of an indicator for my sterndrive position - just another solution looking for a problem.
 
#26 · (Edited)
I tried the Davis helm-hub mount and it was not reliable. Added Velcro, but never looked to it when needed as I couldn't remember when last checked/reset. I didn't fuss with it as there was some inherent defect. Maybe my tilt wheel was at an angle. Still thinking about the Banggood unit. I don't think the Swede's double roller is going to avoid arm flexing at lock and a post may be better than his roller gate. I've run enough gates and done more sliding than carving. Back to my post idea I think. Here's a pompous accent saying Jim's hub indicator is a piece of crap:
Simplest post will be 1/4" rod bent into a figure "8" with a torch, placed over protruding transom bolts and terminating in a vertical stub: the post. It's going to look Mickey Mouse. Maybe angle iron. Simple is good though.
 
#28 · (Edited)
Image
Image
On my installation, the factory loop will go around a 1/4" post between the bolt ends coming out of the transom. The issue is allowing for the changing radius as the
potentiometer shaft is rotated. I've got a good sliding connection without angular play by inserting a .125" aluminum spacer. Getting a precise fitting without modifying the stock was pleasing. Had to trim the width with a hack saw and drill a 3/8 or so clearance hole for the nub at the base of the setscrew (no longer used.)

Image
 
#29 ·
Not going well and I will give up if I don't think of a new approach. Got the figure 8 rod bent and mounted but the back of the SS strap caught a cooler hose clamp. It is too complicated and the space is too tight for the high reliability I need in this relatively inaccessible area. Will check where my disused Davis indicator was made. The Swede had more room in his dual 4.3 rig but I really doubt his sheet metal disaster is still working.
 
#31 ·
Image
Juliery:
Thank you very much for your kind words. This is exactly how I felt after coming back from the helm and seeing the image above. But, perfection is the enemy of practicality, why don't I flip the strap back around, secure it with the set screw, drill the strap and use a spring? The percentage of expansion can be adjusted as recommended for a SS spring and it could last a long time.
There is no marking obvious on my Davis hub unit as to origin. It is not a piece of crap. It works reliably when vertical but much less so when tilted, as for my Sig 200 tilt wheel.
I'll try a spring provided the pot still works. Thank you again Juliery.
 
#32 ·
View attachment 113125 Juliery:
Thank you very much for your kind words. This is exactly how I felt after coming back from the helm and seeing the image above. But, perfection is the enemy of practicality, why don't I flip the strap back around, secure it with the set screw, drill the strap and use a spring? The percentage of expansion can be adjusted as recommended for a SS spring and it could last a long time.
There is no marking obvious on my Davis hub unit as to origin. It is not a piece of crap. It works reliably when vertical but much less so when tilted, as for my Sig 200 tilt wheel.
I'll try a spring provided the pot still works. Thank you again Juliery.
You are welcome and you get full marks for innovation ... and persistence!
 
#33 · (Edited)
Image
Image
Spring works. I'll order a stainless version. Lots of zip-ties before I put the lid on this. Used lock-tite on set screw. Image ****842 is with rudder and wheel amidships. Next image in a week or so will be of dash with installed indicator. Thank you, the old wheels turn slowly.
Image
Starboard is full over on the gauge. S/Arminius aka "the Plywood Guy"
 

Attachments

#34 ·
Autopilot! Talked with an old friend who fishes about this project. He was very familiar with the issues as they arise in installing autopilot. While he installed the expensive full suite, his buddy improvised as I have done. Not all the play was removed as the buddy's boat "hunts" as they both head out to fishing grounds. The Swede's double roller concept seemed very sophisticated for an improvisation. With the lid off the engine, my checklist remains fairly long.
 
#35 ·
Stainless spring is MSC catalog # 04076071 3/8X.035x1&1/2. Extension spring; catalog shows strength. My radius is 4" to 4.250 so I did not need to put much tension on it. Experimenters should note that strength:wire thickness is not arithmetic and could be exponential. Springs cost $30 cause you have to buy 10. I could have tried .030 but am happy.