Club Sea Ray banner

a/c strainer flush cap

12K views 24 replies 14 participants last post by  J Levine  
#1 ·
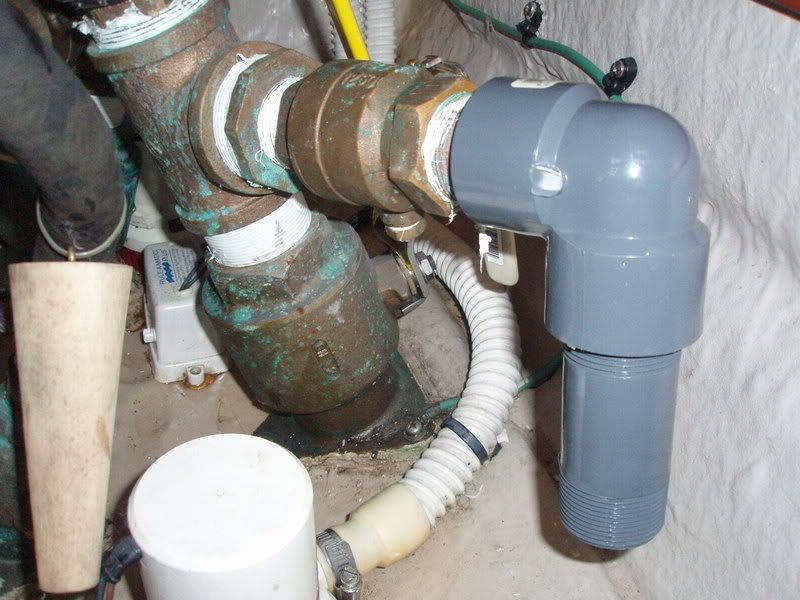
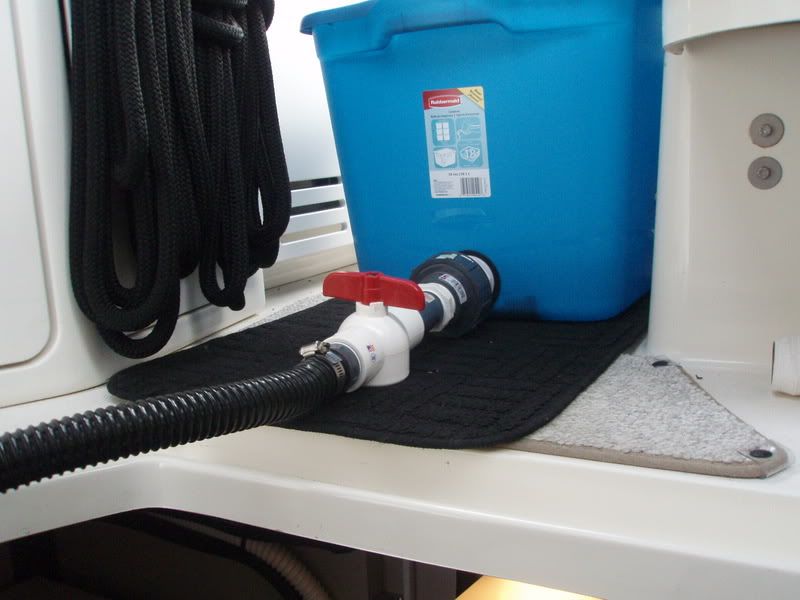
Here is a pic of the a/c strainer cap I just got back from the machine shop. I just plan to use this for winterizing and flushing. The cap was drilled and threaded so the hose fitting can be removed.
 

Attachments

#4 ·
cap

The Perko strainer cap is about $25 and the fitting is only a few dollars. A friend of a friend drilled it for me so I'm not sure what it would actually cost, but it can't be much. It is only a hole, drilled and threaded, through the center of the cap. You could also attach a ball valve to the cap if you wanted to allow for a shut-off.
 
#8 ·
Jackson - thanks for sharing....my Groco cap is made out of nylon or polycarbonate material, but I should be able to drill and tap a pipe thread into one for winterizing purposes.
This really looks like a time and skinned knuckle saver!
Buy some Groco bronze caps.
(I got mine from West, expensive, but you only do it once. [I want to say maybe $25 each, but I forget]).
Put the bronze on the strainers for full time use. They're much more rugged than the plastic.
Then drill and tap the plastic ones, for flushing only.
1/2 thread, with a 1/2 nipple, ball valve, and hose adapter works out nicely.
For added strength, I epoxied the nipple in place, as the tapped portion of the cap is very thin.
 
#7 ·
Please do not drill and tap a poylcarbonite cap and then try to use it for more than temporary flushing or winterizing. Pipe threads are tapered and get tighter as the fitting is inserted in the threads. Cracks too small to see can and probably will occur during assembly.

While you are at it, just go ahead and replace the plastic strainer caps with bronze ones........plastic if just wrong for this application even it it does save $100/ boat.
 
#11 ·
Frank - Good point about pipe threads...
Steve - Do you use an anti-seize paste with the bronze caps?
Jeff,
A little O-ring lube on the O-ring, and wiped into the outside threads of the cap. I have a Groco wrench.

As far as the thinness of the tapped portion of the cap is concerned,
once the nipple is threaded into the newly cut threads, (only about 1-1/2 to 2 threads), have the nipple flush with the bottom of the cap.
Pour epoxy into the dished portion of the cap, around the nipple.
This will strengthen and seal it.

The following is the best way to use a tap:
The drilled hole must be precisely the right size for any given tap.
This will be indicated on a tap chart, or sometimes on the tap itself.
Once drilled, when tapping, go clockwise 1/2 turn, and then counterclockwise 1/4 to 1/3 turn, to clear the cutting flutes of chips.
Continue this way for the entire depth of the tap.
You'd be surprised as to how many people tap by keeping turning clockwise, without clearing the flutes,
and wonder why their threads are all torn and ragged.
 
#10 ·
There isn't enough meat in the bronze caps to hold a full 1/2" NPT thread. ANy bump or pressure could cause the threads to break off since there are about half enough to get full physical properites of a threaded connection. I think this is the reason Thoroughflush went out of business.

If I were doing this, I'd use a metallic epoxy like J&B weld for a thread sealer.
 
#19 ·
Gary - I didn't want to have to buy a pump to push the AF through the AC an Gen. Gravity has worked in the past, the temporary cap fitted with a 3/4 id hose will be better than what I have done in previous years...If I had to flush engines and other systems as much as you guys have to, damn right I'd have these to! ; )
 
#22 ·
From experiences with my boat, when you loose the water (prime) between the seacock and the inlet of the strainer, it is a bitch to reprime the the AC water pump, even if the strainer bowl is full. I presume water is lost in the inlet line when the plug is removed for the garden hose connection.

In past years, I disconnected the hose at the seacock (lost the water to the inlet), placed a funnel in the hose and poured AF in. Even then it wouldn't reprime. When I drain and refill my bowl after service to the strainer, it primes every time......my logic was to close the seacock, service the strainer, refill the bowl with AF, place the cap with the hose barb and a short length of hose on the strainer, and pour in the AF. When finsihed replace the modified cap with the permanent one. After the boat is hauled for the season, I make certain the seacocks are opened to drain the water in the inlet hoses.

I like your method, Groco shows them being used with a pump to push the AF through the system. I have considered buying a pump, but I chose to give this a shot first.
 
#23 ·
I havent had a problem with the pump priming. I remove the seacock inlet hose and clamp on the hose of a 5 gal fill jug, turn on the a/c and the gravity and pump do the rest. Dominics system is even better, I think his hold at least 20 Gls.
 
#25 ·
Dom,

Great minds think alike. I made up the a very similar set up for my boat a few years ago. I put Bronze "T"s on the inlet side of all of my sea strainers. I just keep a pipe plug in the "T"s during the season. To winterize I close the sea cock, remove the pipe plug and thread in a hose adapter. I then took a large clear plastic storage container, drilled a hole in the side at the bottom and installed a gate valve set up connected to section of 6' clear plastic tubing. With the clear container and clear tubing I can actually watch the AF flowing. I also put a hose inlet with a gate valve on the bottom of the container so I can connect a garden hose and either run AF or water through the system depending on what I want to do. I actually use the set up also in the spring to run the engines while still on the hard.