To ease the Cabin Fever.

BlewByYou88

Member
Jul 24, 2010
963
Arizona
Boat Info
268 Sea Ray Sundancer 1988
Engines
2X 4.3L 4bbl Mercs w/ Alphas
I know its not that cold in AZ right now, but the ol' girl is still laid up for the winter. I've decided to just make one thread for my little proiects and would like some feeback as I am going along to see how everyone likes, or dislikes what I am doing. I hope this will help ale some of you that are going stir-crazy in the snow.

There isn't much wrong with the boat, but I want to change, upgrade, and fix things Sea Ray messed up.

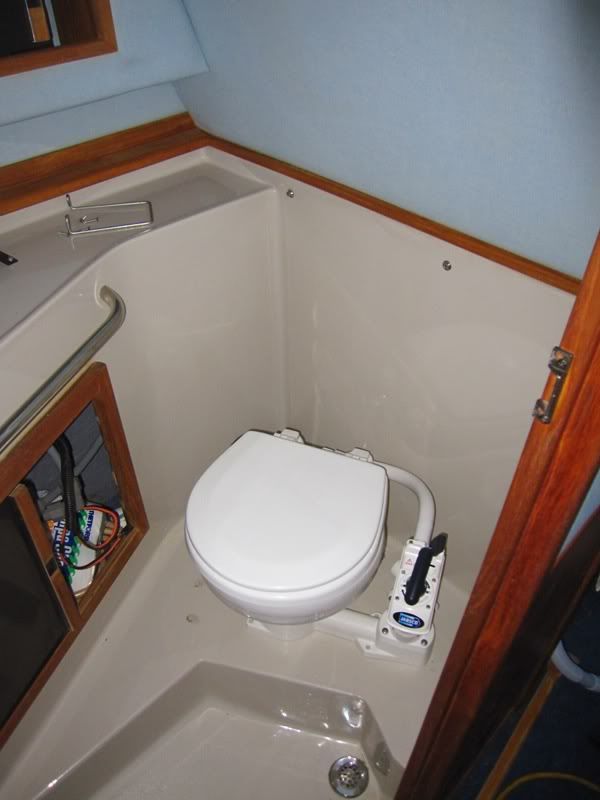
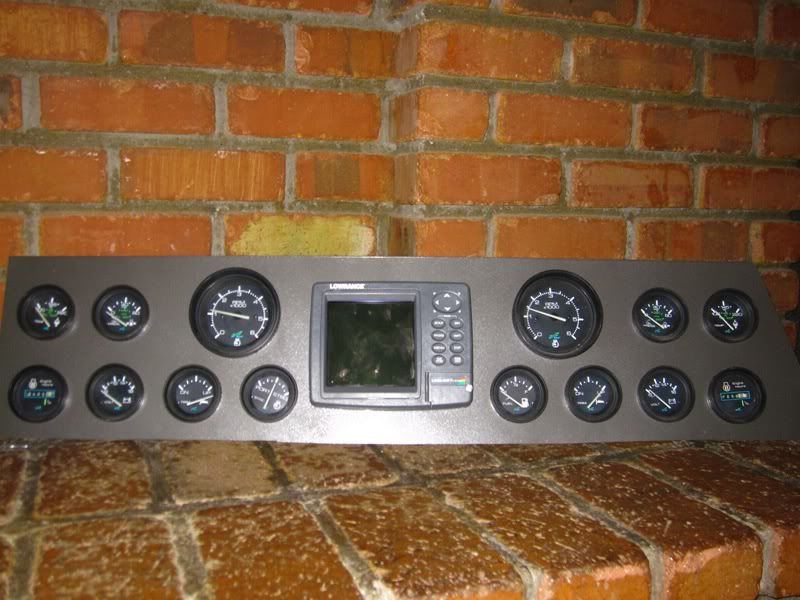
On my last outting, my oil pressures seemed quite low, so I'm going to be installing new oil pumps, install manual flush head system, Rewire the battery switching, and do some dash work. Feel free to chime in with any feedback.

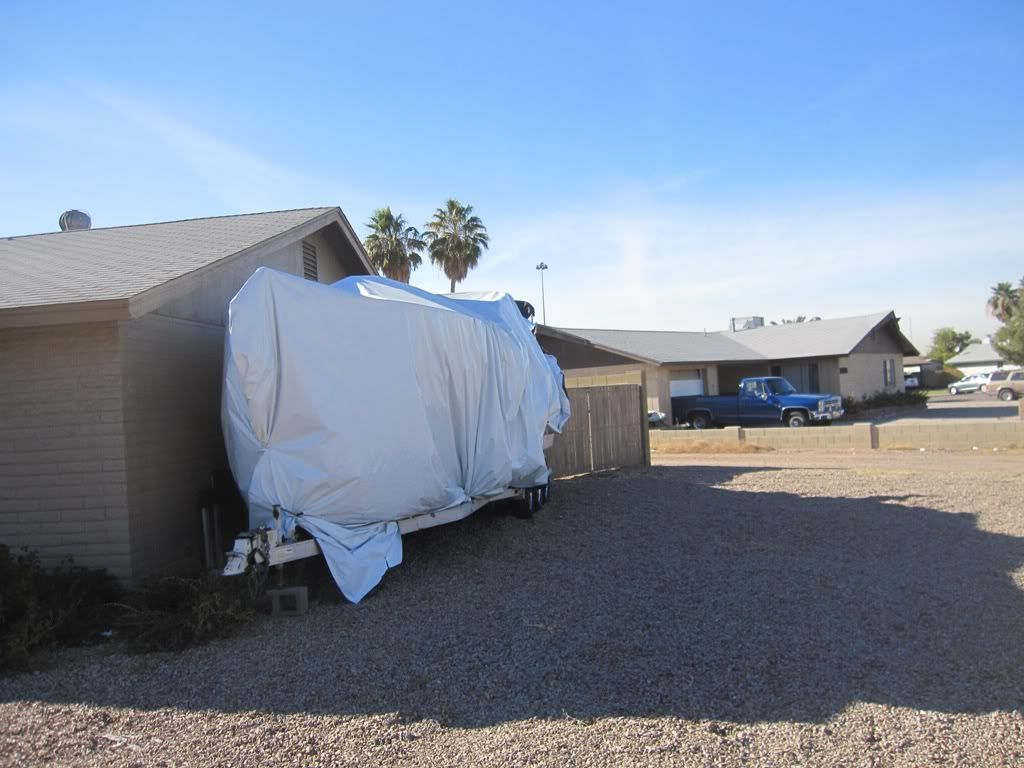
Preparing for work. My neighbors call her the great white whale.

IMG_1638.jpg


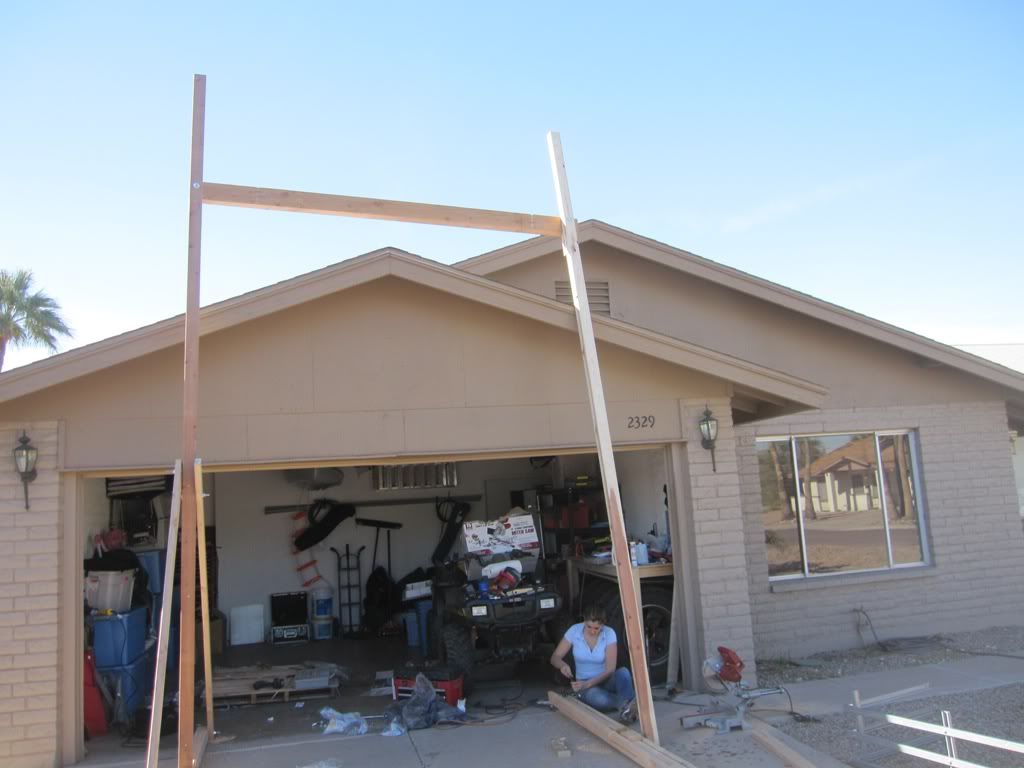
Started bulding the gantry to hoist the engines out. Even the g/f came to help.

IMG_1637.jpg


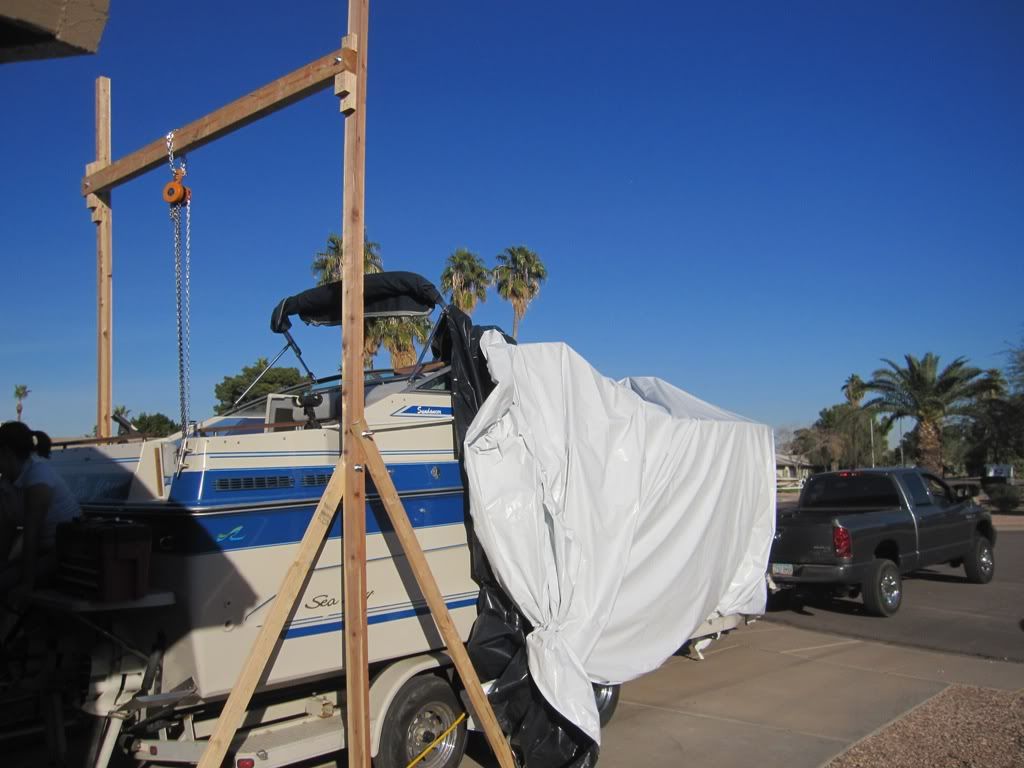
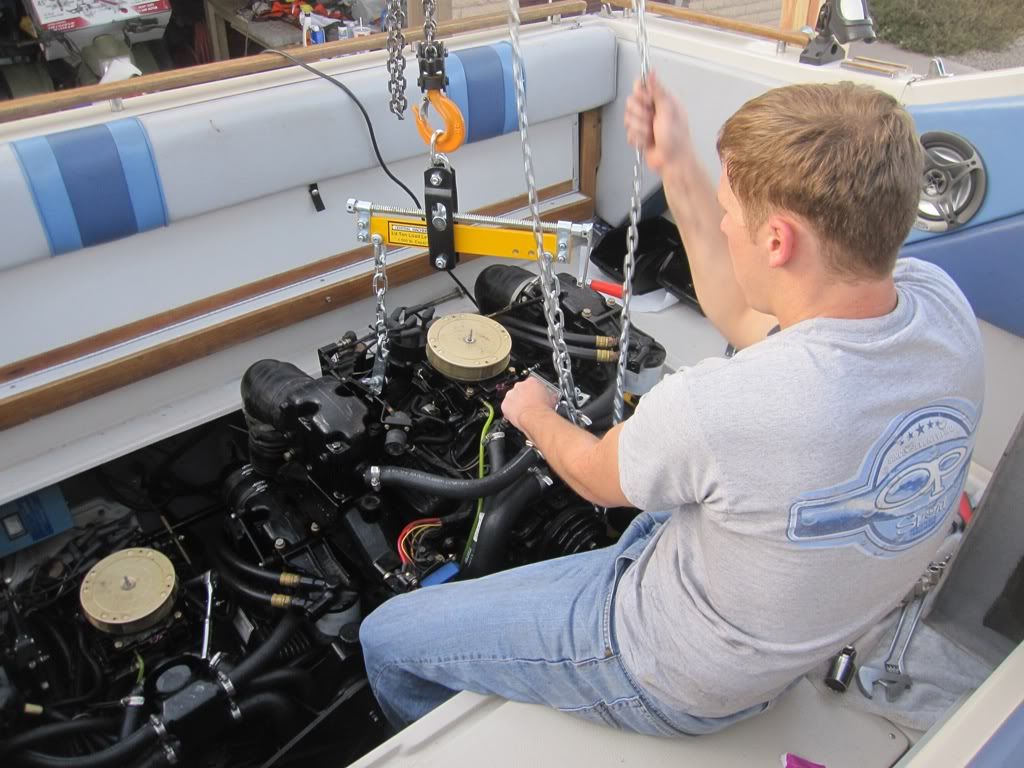
Gantry assembled and ready to start removing the engines.

IMG_1639.jpg


This is a dang, tight squeez. I can't imagine what brainiac thought it would be a good idea to make this set up. The engine mounts are impossible to get to, I had to use some creative socketing to get to them and loosen them. I'm not excited to put them back in,

IMG_1648.jpg


The money shot, I figured I would go along with my fellow boaters who have pulled their engines themselves and do the pose with one of the twins by the boat.

IMG_1653.jpg


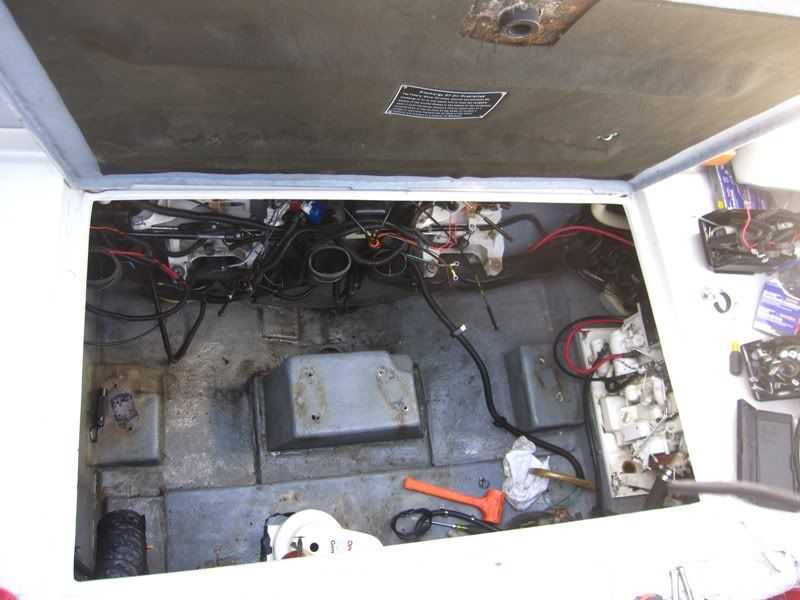
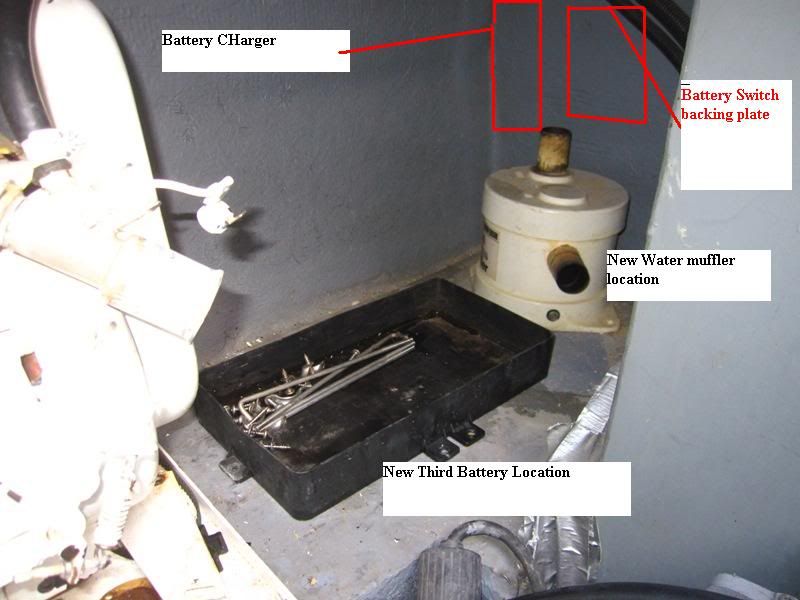
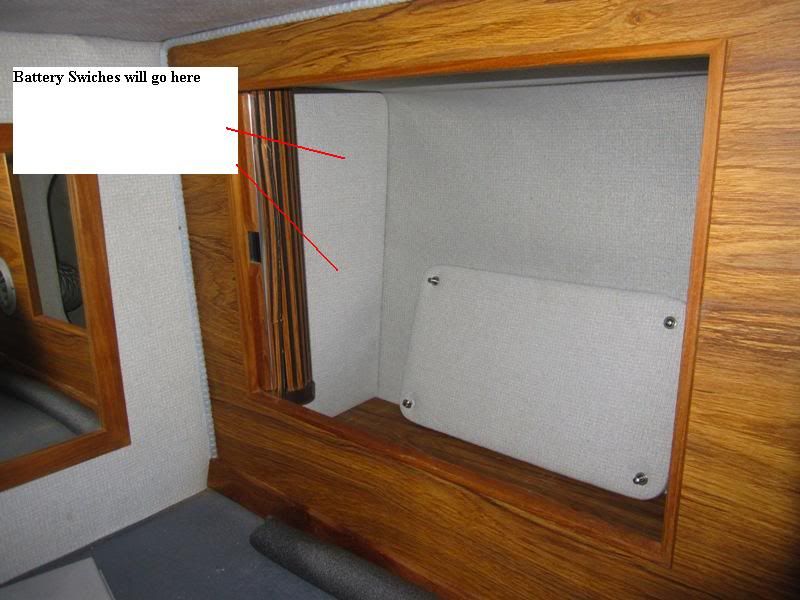
With the engines out, I'm going to start rewiring the power ditribution wires and add some batt switches. I found out that the port engine and generator never disconnected. I only have one batt switch and it was controling the house, and STBD main engine. This isn't right, and I'm going to move the switches to a more desireable location so I don't have to open the engine hatch to just flip switches.

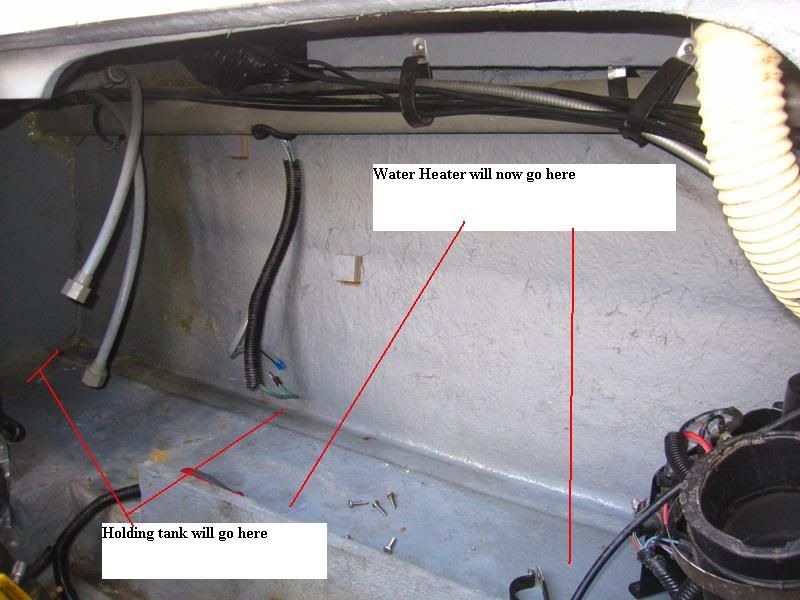
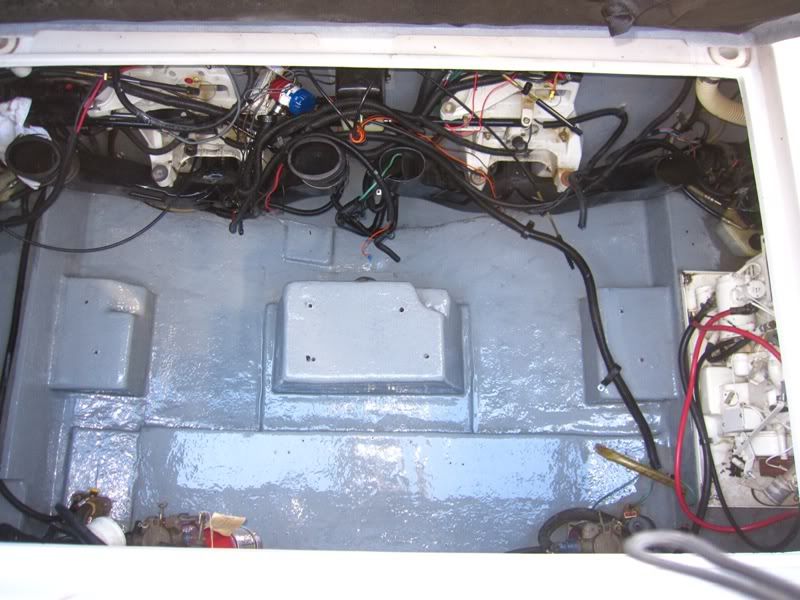
The engines we going to have to come out anyway fr the holding tank when I get it, so, I'm going to take this time to clean things up.

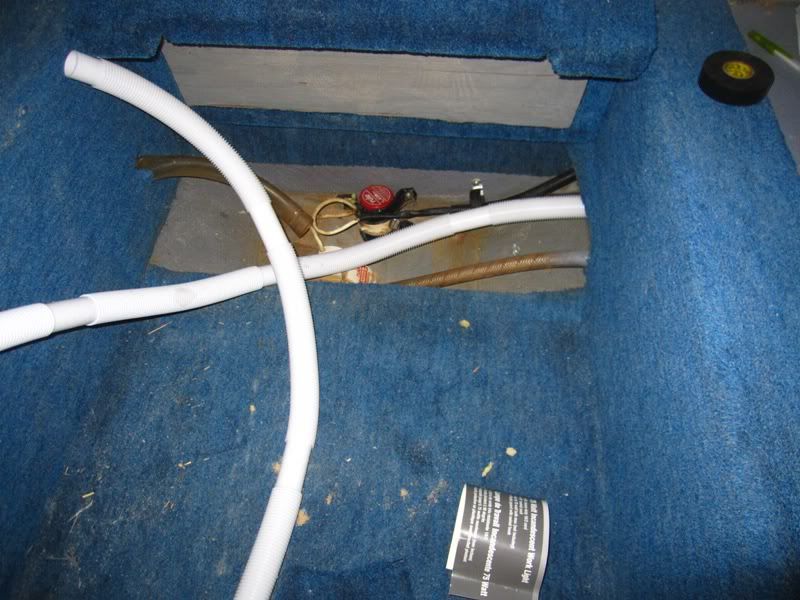
While I have them out, I want to do some routine maintanence like changing plug wires, New Trim Senders and Limits, Bellows, Exhaust flaps, fresh water tube that goes through the gimble housing, bigger bilge pump, plus I have to get the new holding tank down in there when it arrives. So, staty tuned, this will be a long drawn out project since I travel a lot for work and only have limited time to work on the boat, but I will post what I can when I can! Enjoy!
 
Doing good so far!!!! Are you going to paint the bilge?

Mike
 
Welll...I'm afraid I'm definitely one who has contracted "the fever".

"I hope this will help ale some of you that are going stir-crazy in the snow."

Ummmm..perhaps just the opposite....seeing you out there in nothing but a t-shirt just makes it worse. :grin:

Just kidding. Good luck with your projects.

However...I do have a question...not directly related to what you're doing though.

After reading all 82 pages in the forum over the past few days...one pretty popular subject is that darn rear seating in these 268's...as well as others. Pretty poor design overall it seems by SeaRay designers.

Anyway....on yours Blew.....where are the support legs for your seat bottom? I note they're not visible when it's stowed in the upright position. I wish I could see one in person to see what SR did. I have to design something for my boat...the seat is gone...and I need the additional seating. But I don't want to carry deck chairs around.

My transom has a full padded/upholstered panel on it from top to the floor...with a cut out in it for access to a bit of a storage compartment. Storage space is good....but no where to park your keester. I have to do something about that....in the spring...when I can get out there in nothing but a t-shirt. :grin:
 
thanks for the pics-good luck with what you plan on doing-should be a great weekend in your neck of the woods!
 
After reading all 82 pages in the forum over the past few days...one pretty popular subject is that darn rear seating in these 268's...as well as others. Pretty poor design overall it seems by SeaRay designers.

Anyway....on yours Blew.....where are the support legs for your seat bottom? I note they're not visible when it's stowed in the upright position. I wish I could see one in person to see what SR did. I have to design something for my boat...the seat is gone...and I need the additional seating. But I don't want to carry deck chairs around.


I had posted pics before of the rear seat, but I guess they were deleted in the post because my upload file got to big, so I went back to using photo bucket. I will fix the thread and post the link for ya. That seat is pretty worthless, and I have plans to fi change it, but right now I got bigger concerns that need to be dealt with below the engine hatch. All in good time!

86 268DA - Rear Seating Area (New Project)
http://clubsearay.com/forum/showthread.php?t=19701&highlight=268+rear+seat

Heck...This was your thread!:lol:
 
Doing good so far!!!! Are you going to paint the bilge?

Mike


Imay throw a coat of bilge-Kote down there, I haven't decided yet. Probably woudn't be a bad ide since I'm going to have a lot of the wiring out of there. My bilge isn't bad, she stays pretty dry. Some ugly stains though from when I changed the fuel pumps. I really wish I had waited to do the fuel pumps for when I pulled the engines, but I was impatient, and the hard starting was pissing me off.
 
A very impressive pull. Keep us up to date.
 
BBY Progress Report:


DUUUUUUUDE!!!! SO! I found out both the Port engine and Genset were tied to the same battery, the same battery that had no switch. The same battery that wasn't tied into the charger, but wait it gets better! This battery also tied to the things that stayed on even if the switch was supposed to be off...ie the bilge pump, so once connected, it could die if the engine or genset never started for an extended period.

So you are probably wondering, where did the third battery charger wire go? they put it on the wrong side of the battery parallel solenoid for jumping all three batteries together. So they were sending excess charge for the third bank back to one and two which were already tied to the charger! GAH!:smt009

Sea Ray Fuged this one a little. The diagram for the 89 with twins showed 2 battery switches. I wish I could go back in time and make someone buy me another battery switch.

I can't believe how crappy the wiring was done. I'm going to feel so much better after I have this all fixed up! and Cleaned up!

When we started to pull the STBD engine out, went to take the hoses loose from the engine to the water heater, they were so rotted they just broke apart when trying to get them off the water circ. pump on the engine.

I had replaced all the engine hoses in september, but now I'm thinking I want to do do the enitire water, and fuel system hoses, as well as the exhaust hose on the Genset.

I also saw the hourmeter on the genset today. Pretty sad that the Genset has 285 Hours on it and the engines are at 325. ( All the rotting is a result of lack of use an no replacment in 22 years.)

The low hours on the engines just go to show how little my dad really liked usuing the boat. She is a trailer queen. :smt009

Well, back to work!
 
If it can leakk, replace it now, you won't be sorry later. Its SOOO much easier when all the stuff is out of the way, especially fuel fill hoses. Good catch on the charger wiring, could have saved you a "sinking" experience. Have fun.
 
Looks good. Get that thing ready for heading up here for Desolation. Should be great.
 
It may be worth you time to plasti-gage your main and rod bearings when you drop the pans to change the oil pumps. I went through a similar stiuation years ago (changed an oil pump to try to gain oil pressure) and it made no difference. My engine was getting a little loose. Nice boat!
 
It may be worth you time to plasti-gage your main and rod bearings when you drop the pans to change the oil pumps. I went through a similar stiuation years ago (changed an oil pump to try to gain oil pressure) and it made no difference. My engine was getting a little loose. Nice boat!

+1 :thumbsup:
 
It may be worth you time to plasti-gage your main and rod bearings when you drop the pans to change the oil pumps. I went through a similar stiuation years ago (changed an oil pump to try to gain oil pressure) and it made no difference. My engine was getting a little loose. Nice boat!


Thanks for the compliments and the advice:smt038
It actually probably would be a good idea. Man, I haven't done a plastic gauge measurment in like 4 years.

Idk how necessary it really is with such low hours.
 
So, now that the other engine is out, I got the water heater out as well. There isn't anything wrong with the genny, so we'll just leaver her in place. I have never seen so many hose clamps/holders in my life. I bet I will be able to support/route everything better usuing half of what Sea Ray used!

Gonna put new hoses, impellar, and t-stat on the genny.
Gonna go ahead and do all new fuel lines. (Everything is cracking)

I'm going to re paint the bilge the best I can. I don't want to remove anything else at this point, so I will paint around some stuff if I have to.

IMG_1661.jpg


The hot water tank will turn 180 from it original location. The trim pump had to be moved aft about 4 inches to give me the necessary cleances for the new holding tank and water heater, this inludes necessary space for the fittings on both water heater, and holding tank. I guess its time to get that holding tank on order. Going to go with the Sealand 20 gal. 20hts-hrz tank.

IMG_1662.jpg


On the port side. I'm going to move the third battery over there to help offset the weight of the new holding tank. As well as slide the other two engine batteries over a little as well. This will help any listing issues when the holding tank fills.

IMG_1665.jpg

I will have to move the water muffler back a little. Then back in the same corner I will mount the battery charger and battery switches.

IMG_1666.jpg


I'm going to make it so the switches will be accessible from the mid - cabin storage locker. Any one see any probs so far???


IMG_1667.jpg


One other quick question....Is it normal for the windlass to be tied into the buss for items that are always on??? Like the mercathode, bilge, and step down circuits???? Idk why the windlass would need to be operational when the main switch is off. The wiring on this thing is giving me a headache!
 
Last edited:
This will be my last update for a few days, got called out on a job.

Degreased, sanded and washed the engine compartment. Sealed all the unnecessary holes with epoxy prior to coating with Intuluxe bilge-Kote. I'm going to go back later and do some touch up's after it dries.

IMG_1676.jpg


The New potty arrived! :smt038 So I have been test fitting the exact location to install it in the head. I'm going to seal and getlcoat the holes from the old potta-potti when we have some warmer weather, that way I can fix all the wholes an knicks with one shot when I get the gelcoat color matched properly. The holding tank is about 3 weeks out, so I will have to bide my time with other projects until it arrives.

IMG_1678.jpg


Started running a 1 1/8" bilge hose from the step down pump. I'm going to go ahead and add the showe sump box and I will probably have the step down fill right in to the sump box, that way I won't have to tee the 2 pumps together. I'm also going to take out the 3/4" through hull and install a 1 inch for the new hose. Hopefully I can install the sump box next time I'm home.

IMG_1679.jpg
 
Looking Great! Man that bilge looks awesome! Was the pic taken while it was wet or is is a permanent gloss? If it is permanent that will make it easy to keep clean. :smt038
 
Looking Great! Man that bilge looks awesome! Was the pic taken while it was wet or is is a permanent gloss? If it is permanent that will make it easy to keep clean. :smt038

That was about 2 hours after the application. Idk if it will stay like that or not, but it would be nice!
 
My ADD got the best of me today, and between dealing with the water in the engine mount issues, and preparing the water tank for install, I decided to tear into the dash.


I wanted to mount my GPS/Fishfinder into the dash so it wasn't sitting in my line of site, I also wanted to rewire the rats nest under the dash. SO here is a preliminary Design for the new dash usuing some 1/4" thick Lexan from home depot, and some rustolem paint. I think this will look pretty nice. ANy opinions?

IMG_1688.jpg


ALso, dropped the pans on the engines. Everything looks ok. Just waiting for the pumps.


I also took the starters apart for some inspection and cleaning, Brushes are about half worn, can't seem to find any places locally or on the internet that will just sell the brushes:huh:
 

Forum statistics

Threads
113,118
Messages
1,426,514
Members
61,035
Latest member
Lukerney
Back
Top