Nater Potater's Build Thread

Nate, I got some food grade white 55gallon drums from a brewery. They hold malted barley. Anyway, they are perfect for a pump out tank. I dump in a clean out along the side of the house.

If you would rather one of these, let me know. I'm sure I can get you one or two around the valley.
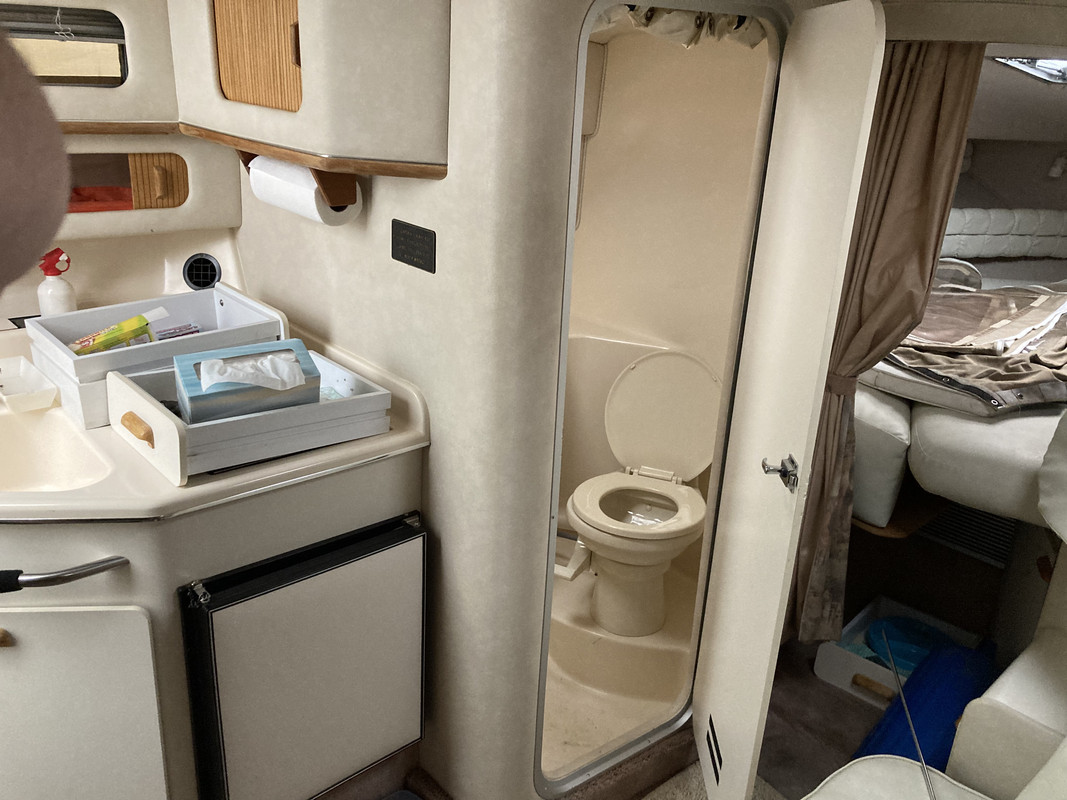
Thanks for the offer, but so far, carting it in five gallon buckets and dumping down the toilet in the garage bathroom is fitting the bill. My hope is that we'll soon be near a marina with a pump-out station. Non-issue at that point.
 
The pump-out just didn't seem to do what I thought it should. We snaked a 1/2 tube into the tank and siphoned out the remaining gunk so the pump could be removed. Here's what we found:

Good outlet valve
IMG-2746.jpg


Bad inlet valve
IMG-2745.jpg


The check valve was installed correctly, but had become completely inverted, thus rendering it non-functional. My only explanation would be if the pump had been left running with the waste port capped off. Either way, that's why we weren't getting any appreciable flow from the pump. I'm looking into a rebuild kit now.
 
Looking forward to following your progress. Any inside pics?
Just for you, I snapped a few this afternoon. Not pretty to look at, but you get the idea of the layout.

Hatch from the swim platform is behind the up-ended engine room lid. The cushion behind the lid will pull out into another bench seat, so lots of seating in the aft section
IMG-2742.jpg


Turning around from that same vantage point reveals the walkway down into the galley
IMG-2735.jpg


Once below and looking back, you see the aft berth
IMG-2737.jpg


Along the port side is the galley
IMG-2741.jpg


A bit more forward is the head
IMG-2739.jpg


Forward berth (full canvas, thankfully)
IMG-2740.jpg


Finally, another 90 degrees to the right would have been the dining area if the admiral hadn't decided to see how it gets converted into a bed, then got disgusted with the mold she found behind the cushions. Yes, the rub rail will be coming off "sometime"
IMG-2738.jpg


There you have it. The interior really isn't too bad, as I don't think it was ever a live-aboard. My only major issue (and it's more of an annoyance) is that the headliner is starting to sag. That's for another day.
 
I have the exact layout. Just not torn up and a different color. I just dont have the gennie and AC.

I dont have the black water discharge pump but a macerator. I've yet to clean out the black water tank and see if I can get it to work. I need to get it all cleaned up now and see if I can get it to work properly. The PO said it worked when they would cruise to the San Juan's from Oregon.
 
Looks good Nate! Nice to see it is now in the hands of someone with the motivation and skill set to bring it back to the vessel it is. Looking forward to following your thread.
 
I dont have the black water discharge pump but a macerator. I've yet to clean out the black water tank and see if I can get it to work. I need to get it all cleaned up now and see if I can get it to work properly. The PO said it worked when they would cruise to the San Juan's from Oregon.
Get some digestor down the toilet if you haven't already and give it a few days to do its work. It ain't pretty, but, once you get on top of it, it'll be so much easier to maintain. That's what I tell myself...
 
07/16/22 -
Diaphragm pump (not a macerator!)
IMG-2733.jpg
That is in fact your macerator discharge pump; an older TW Vacuflush. The interesting thing is it's connected to the bottom of the holding tank - how the heck would one service it if there was anything in the tank at all? Because, no doubt, service is required when the tank is full; ttmott's law of compounding faults. I'd cap off that bottom port and mount that pump atop / above the tank and drop a siphon tube into the tank for the pump to draw. Marinesan has all of the parts to do that. There are four duckbill check valves in that assembly. There should be a relay that operates that pump of which the ground for the relay coil is switched at the discharge valve so when the valve is closed the pump cannot operate. Also now is the time to replace the vacuum relief valve on the top of the tank to prevent tank collapse and failure.
 
Because, no doubt, service is required when the tank is full; ttmott's law of compounding faults. I'd cap off that bottom port and mount that pump atop / above the tank and drop a siphon tube into the tank for the pump to draw.

You might be able to move the pump over a little bit and install a ball valve shut-off.
Both very good ideas; thanks for the suggestions. Unfortunately, space is at a premium, as seen by the attached image of the top of the tank where the vent line exits
IMG-2743.jpg

I may be able to find the room for a ball valve, but it's questionable. The siphon tube sounds like the way to go. As for the controls: no switch, no interlock, no nuthin'. The boat is a '92, whereas the pump is a '94, so appears to be added-on at a later date. I would have guessed that the pump would have been powered by the key switch in the head, but no. 'Probably was at some point. At the very least, I'll install a key switch in place of the toggle to avoid inadvertent actuation.
The siphon tube goes through a rubber grommet so it can slide in at an angle; it'd be tough to do for sure plus drilling the hole not easy. I would pull the tank out far enough to make the cut and get the tube in. Typically the siphon tube goes towards the boat's aft as that is where the slope goes to. Plus you need to correct that kinked vent hose it will probably break the fitting off. Looks like someone glued the level sensor cap in so that is useless to clean the sensors. So, while drilling the siphon tube hole drill another for a Maretron TLM100 level sensor and abandon that float type. Yur in this deep, why not get it right....
 
While we're waiting for the blackwater duckbills, I thought it'd be good to get some more time on the outdrive corrosion. By another member's suggestion (I'm sorry; I can't remember who you are!), JB Weld Marine Epoxy was squeegeed into the heavier pits and especially along the trailing edge at the prop. After a day's rest (of the epoxy), it'll be wash, rinse, repeat, but on the other side.
IMG-2763.jpg


A little painter's tape to act as support while the epoxy hardens.
IMG-2764.jpg

The trick is to squeegee it thick enough to fill the pits, but thin enough so as to keep the sanding to a minimum. Once that's done, a bit of aluminum-filled body putty follows, then paint. I can hardly wait for the facelift!

That's good stuff, I have used it for the very same purpose on my Honda 225.
 
Nater,

What did you use to remove the black Merc paint and primer? A wire wheel brush or something else? It looks good! I don't think I have any pits, but I'll have to take another look. Mine could probably use some paint and new decals. Might be a winter project!
 
Nater,
What did you use to remove the black Merc paint and primer?
I use a non-woven strip disc from HD: https://www.homedepot.com/p/Avanti-...ck-Strip-Disc-PNW040100D01G/202830913#overlay They're pretty aggressive so expect to follow-up with something a bit finer (180 grit?) before painting.

If you didn't know there's more you can do with a pool noodle other than noodling a pool, check this out! A bit of sticky-backed sandpaper, and you're ready to tackle the awkward inside curves of the outdrive
IMG-2766.jpg


IMG-2767.jpg
 
Nater,

What did you use to remove the black Merc paint and primer? A wire wheel brush or something else? It looks good! I don't think I have any pits, but I'll have to take another look. Mine could probably use some paint and new decals. Might be a winter project!
I have some really nice stuff to paint outdrives Jim. I don't remember the name of it, but it's for airplanes. It's a three step process.
It's packed deeply away in my stock trailer right now though. You can have it when I get that thing unloaded.
 
Nate,
Have you tried filling or skimming the pits, then using a lightly dampened cloth to level the epoxy filler?

I always used mechanical grade, 95% isopropyl alcohol and old t shirts. I would put two layers of cloth over a dish sponge backed by a .25" thick piece of wood to keep it flat and stiff. Wet out the "stack" and lightly "buff" the thickened or gelled epoxy filler. Leaving it a little high to sand smooth.

This is what I did to fill holes in fiberglass tubes and the spiral on cardboard tubes for high power rockets. I also did the same on metal furniture when I was a repair technician.

Just a thought.
 
I like the noodle idea as a sandpaper backer. Who says you can't teach old dogs new tricks.

My wife has gotten on a kick that we need to surround our home with large plants in HUGE vases. Rather than fill the whole vase with dirt I came up with the idea of using pool noodles, cut into about 10" pieces to take up space in the vase. Uses a lot less planting soil and they weigh a lot less.


Hmmm, now what can I find that needs sanding? o_O
 
I have some really nice stuff to paint outdrives Jim. I don't remember the name of it, but it's for airplanes. It's a three step process.
It's packed deeply away in my stock trailer right now though. You can have it when I get that thing unloaded.
Hey! This is my thread! What about me getting first crack at the paint???
Just joking. I already have a line on the paint. :D
 
(I'm sorry; I can't remember who you are!)
That would be me of course. Nice job on the outdrives. I know, its a arduous tasking. its worth in the End! Been gone for a while and just reading some threads catching back up. Nice to see Nater, your carrying us along the journey.
 

Forum statistics

Threads
113,154
Messages
1,427,386
Members
61,060
Latest member
Danileo
Back
Top