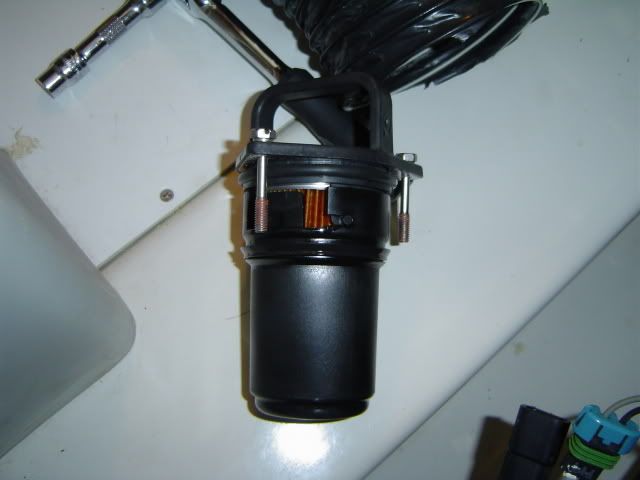
The Gen 3 Cool Fuel unit combines the fuel pumps, an internal filter, and the heat exchanger into a single unit. Not all Mercury engines use this unit, Some still use the separate spin on canister. The Gen 3 Cool Fuel unit itself looks like this:
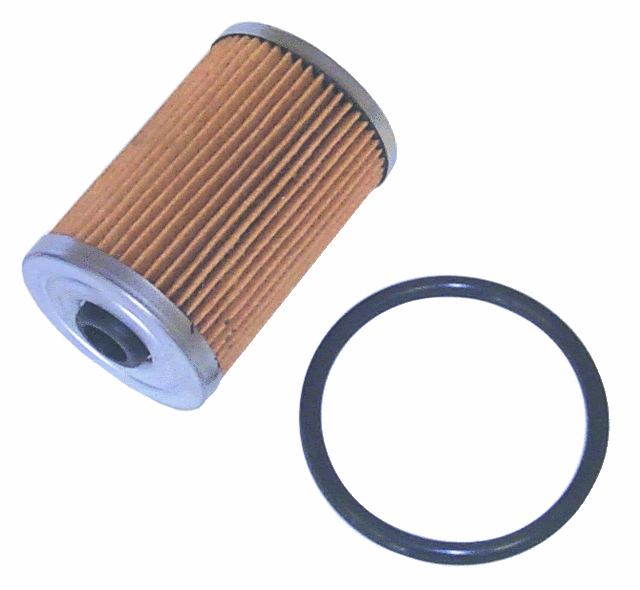
The new filter element looks like this and goes inside the Cool Fuel unit:
Installation instructions from Mercury come with a new filter element. Be sure to follow these instructions. And remember you will be working with gasoline and gasoline vapors present in the bilge the entire time you are working so take the necessary safety precautions. I further recommend leaving your bilge blower on during this process as well.
You will need the following items to do the job:

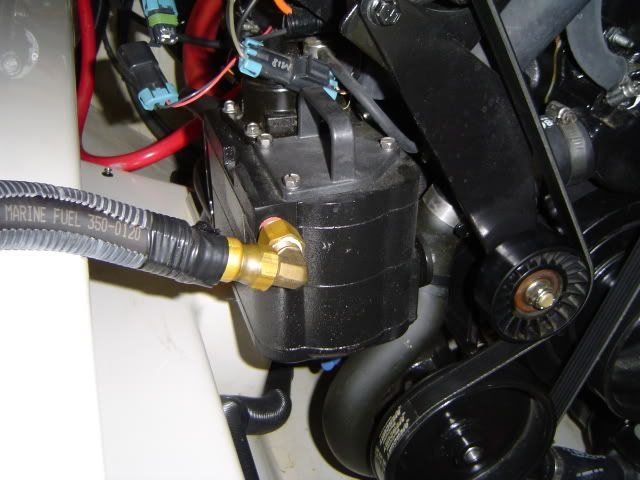
Following the instructions provided by Mercury, undo the fuel pump wiring harness on the cool fuel unit and crank the ignition for five seconds to relieve the fuel pressure. Then you can remove the top cover from the cool fuel module with the 10mm socket. No gas will spill out. Back out the bolts until they are free of the threads in the module base but do not remove the bolts from the cover. This picture shows the harness disconnected as well as the three bolts loosened on the top of the filter assembly cap.
Pull straight up on the handle of the cover and the cover and the bowl containing the filter come out as one piece as shown in this picture. Place the bowl over your container for disassembly.
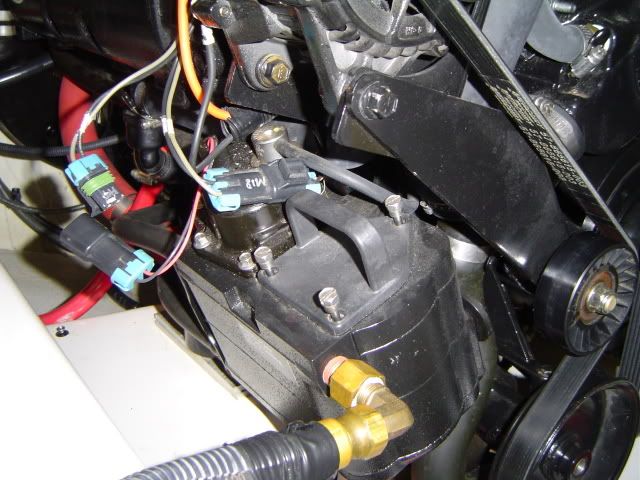
To disassemble, grab the bowl and twist it slightly to the left and it will come off. Dump the gasoline into the container along with the filter. Pour the gasoline from the container into your gas can. You will need to properly dispose of both the contaminated gasoline as well as the old filter element. Wipe out the inside of the black bowl. Install the new filter element in the bowl and reattach it to the lid. Put the cover back on the Cool Fuel Module and push the cover down and tighten the bolts. A word of caution here. The o-ring is what provides the seal so there is no reason to severely tighten those bolts or they might break. I use the term "snug" to define how tight to make them. Mercury also used a thread locker on the threads (that you can see in the picture above) so you may also want to apply some new thread locker material. Reattach the harness, turn the fuel shut off back on, and start the motor. Turn the motor off and go back and check for any leaks around the cover and you are good to go.
----------------------------------------------------------
One other thing I will mention here. There is another secondary filter in this unit that is not mentioned anyhere in Mercury's maintennce procedures. You can see that filter inside the unit in this picture.
I removed that filter from my unit. (There is a raised section in the center of the filter that you can grab with your needle nose pliers). The filter looked dirty as evidenced in this picture compared to a new one also pictured below.
Interestingly though the old filter didn't have any different "resistance" than the new one if you put it up to your mouth and blew air thru the element paper. So for now I am just keeping a spare on board "just in case". There is almost 350 hours on the old element and my dealership says they don't change these filters. So it is a bit of a mystery to me why the filter is there and why Mercury does not mention it either in their maintenance procedures.
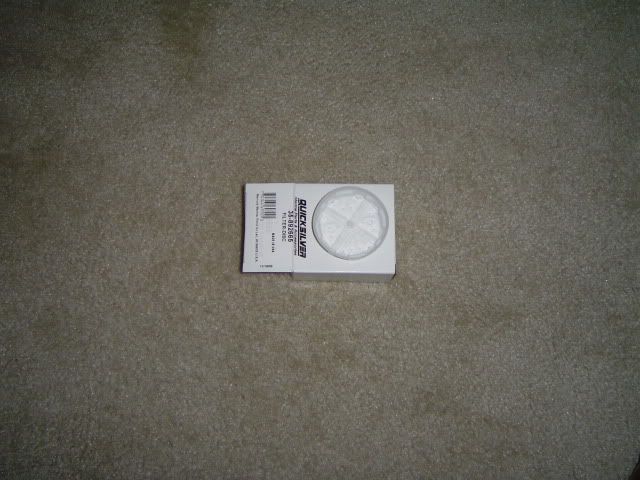
The new filter element looks like this and goes inside the Cool Fuel unit:
Installation instructions from Mercury come with a new filter element. Be sure to follow these instructions. And remember you will be working with gasoline and gasoline vapors present in the bilge the entire time you are working so take the necessary safety precautions. I further recommend leaving your bilge blower on during this process as well.
You will need the following items to do the job:
- A 10mm socket wrench with a stubby extension
- Needle nose pliers
- A small flat bladed screw driver
- A suitable gas can for disposal of gas that will be in the filter
- An empty can that will serve to catch the old filter and provide you a place to put it.
- Paper towels or rags to wipe up any spills from the work you are doing
Following the instructions provided by Mercury, undo the fuel pump wiring harness on the cool fuel unit and crank the ignition for five seconds to relieve the fuel pressure. Then you can remove the top cover from the cool fuel module with the 10mm socket. No gas will spill out. Back out the bolts until they are free of the threads in the module base but do not remove the bolts from the cover. This picture shows the harness disconnected as well as the three bolts loosened on the top of the filter assembly cap.
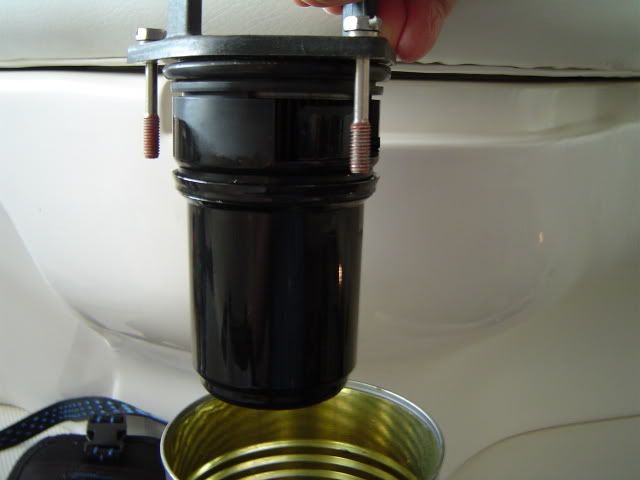
Pull straight up on the handle of the cover and the cover and the bowl containing the filter come out as one piece as shown in this picture. Place the bowl over your container for disassembly.
To disassemble, grab the bowl and twist it slightly to the left and it will come off. Dump the gasoline into the container along with the filter. Pour the gasoline from the container into your gas can. You will need to properly dispose of both the contaminated gasoline as well as the old filter element. Wipe out the inside of the black bowl. Install the new filter element in the bowl and reattach it to the lid. Put the cover back on the Cool Fuel Module and push the cover down and tighten the bolts. A word of caution here. The o-ring is what provides the seal so there is no reason to severely tighten those bolts or they might break. I use the term "snug" to define how tight to make them. Mercury also used a thread locker on the threads (that you can see in the picture above) so you may also want to apply some new thread locker material. Reattach the harness, turn the fuel shut off back on, and start the motor. Turn the motor off and go back and check for any leaks around the cover and you are good to go.
----------------------------------------------------------
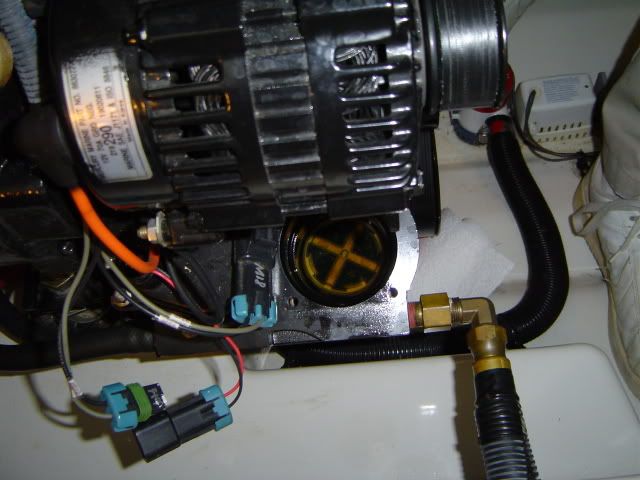
One other thing I will mention here. There is another secondary filter in this unit that is not mentioned anyhere in Mercury's maintennce procedures. You can see that filter inside the unit in this picture.
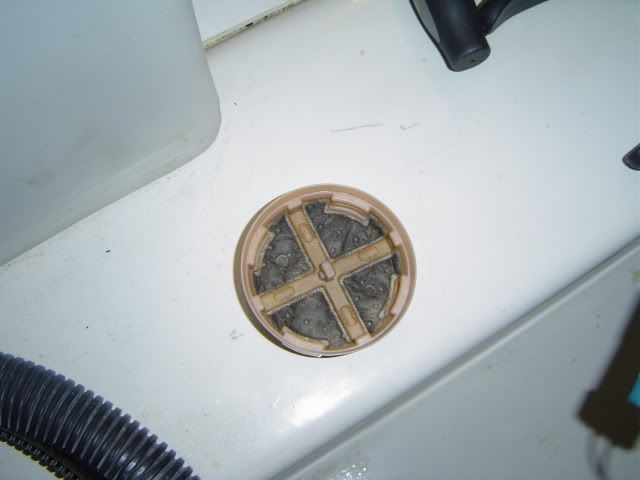
I removed that filter from my unit. (There is a raised section in the center of the filter that you can grab with your needle nose pliers). The filter looked dirty as evidenced in this picture compared to a new one also pictured below.
Interestingly though the old filter didn't have any different "resistance" than the new one if you put it up to your mouth and blew air thru the element paper. So for now I am just keeping a spare on board "just in case". There is almost 350 hours on the old element and my dealership says they don't change these filters. So it is a bit of a mystery to me why the filter is there and why Mercury does not mention it either in their maintenance procedures.
Last edited: