Cutting Vitricore

Oct 24, 2007
486
Sandusky Bay, Ohio
Boat Info
2018 Sabre 38 SE
2019 Blackfin 272CC
Engines
VP IPS400's
300 Merc Verado's
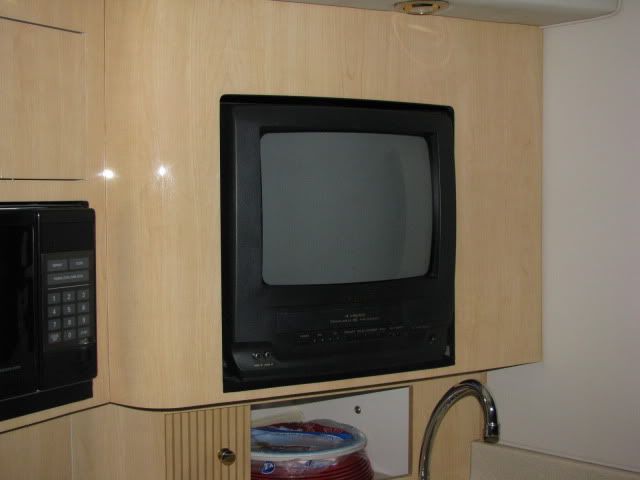
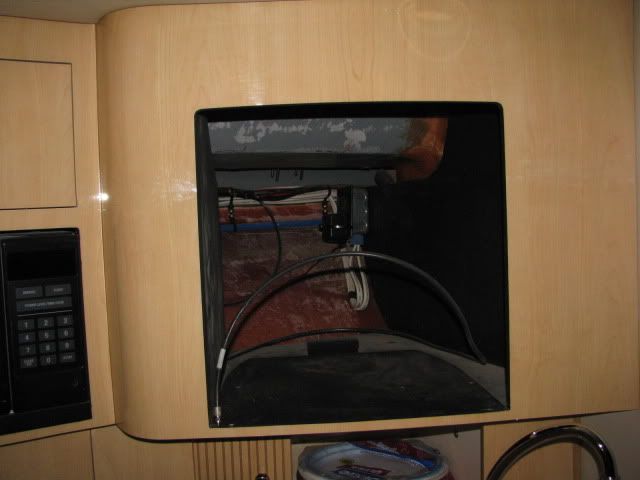
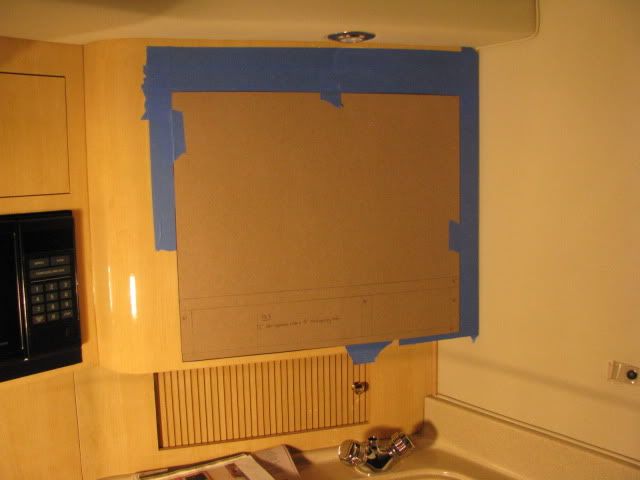
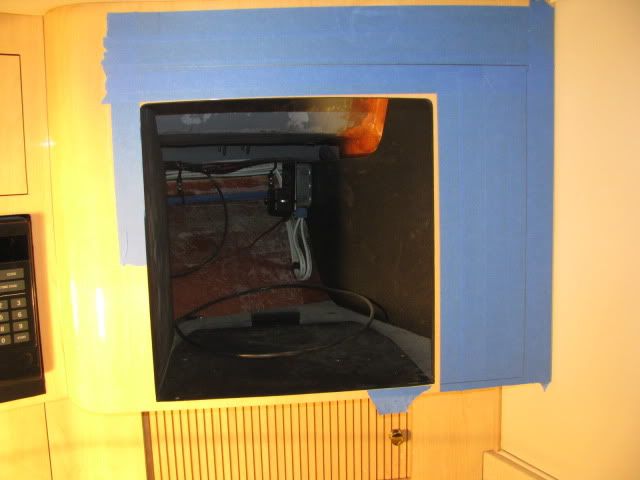
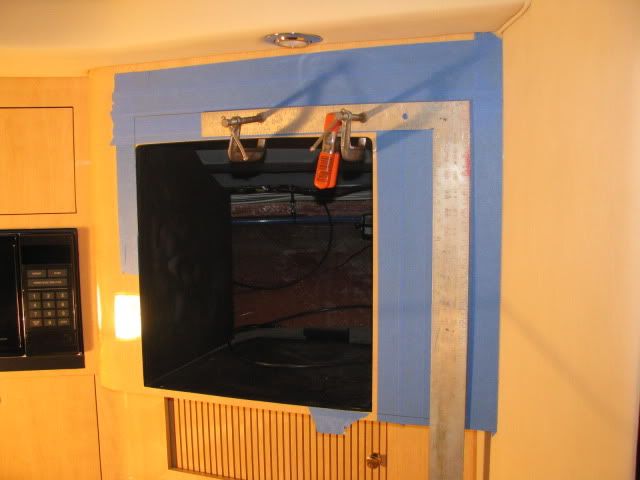
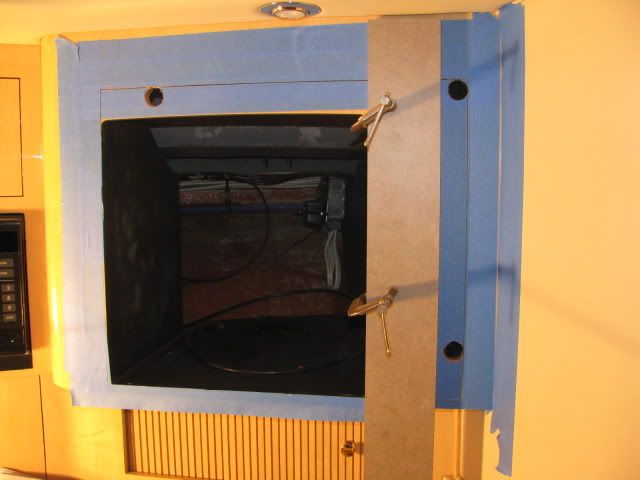
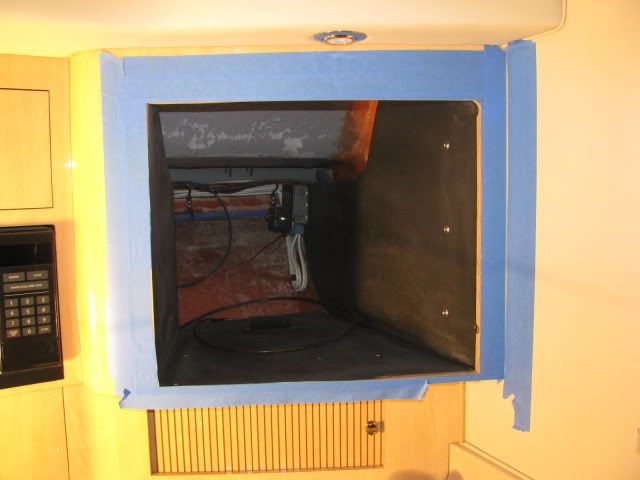
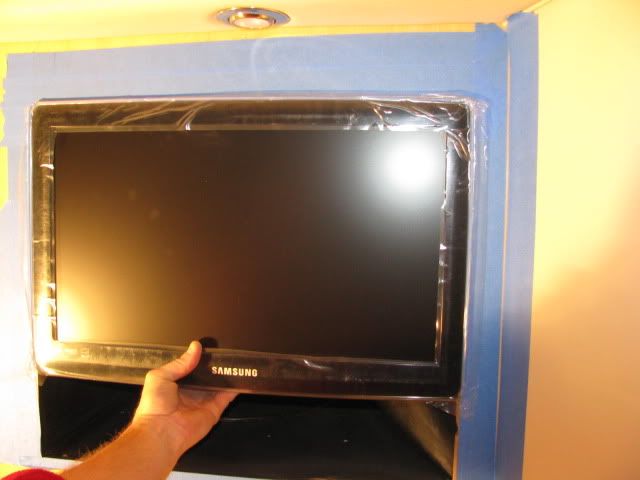
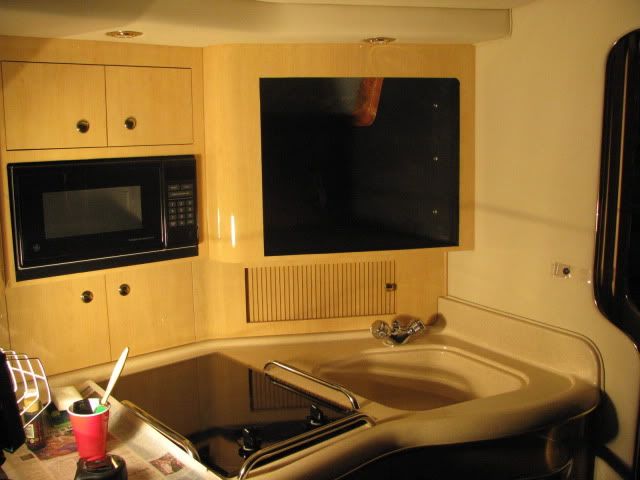
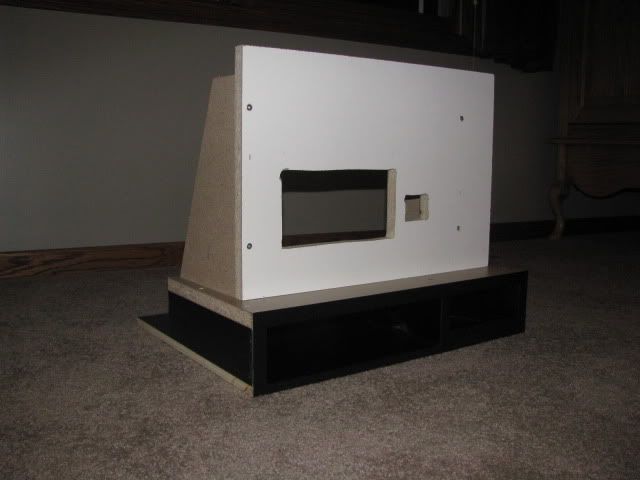
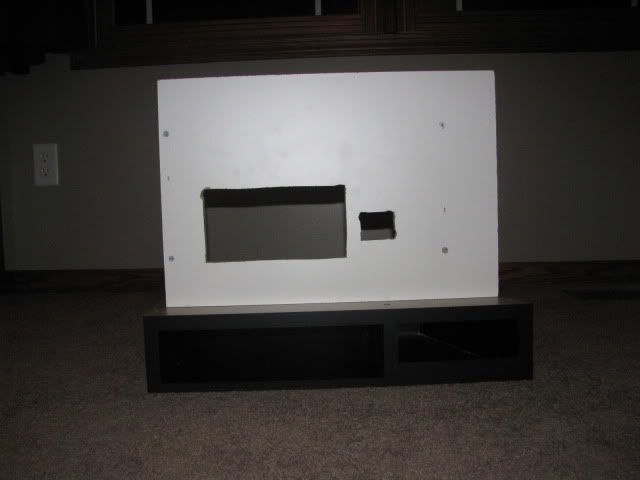
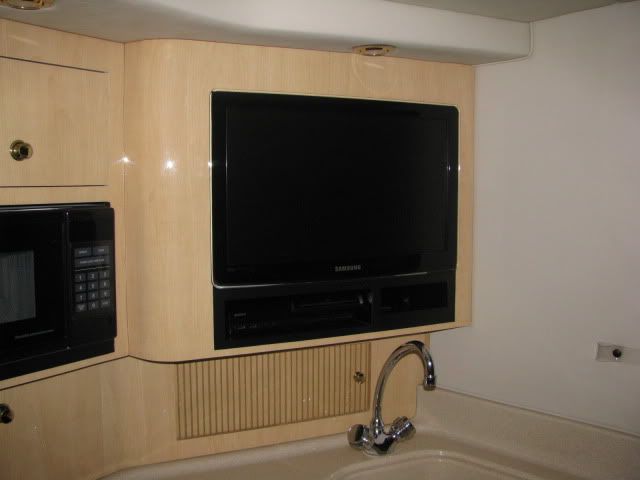
Like so many on this forum, I want to replace my existing TV/VCR unit with a flat screen. To do so will require enlarging the opening. My boat has what I believe was called the Vitricore product and I have verified that there is plenty of room behind the panel for the wider screen.

Has anyone worked with this product as it appears to have a clear type veneer over the colored laminate? What does it take to cut it such that you end up with a nice "Factory" look once completed?

Any pointers or cautions would be appreciated.

Thanks in advance.
 
Last edited:
The picture of wood is a thin multi layer film. To cut it, is a very fine recipricating saw blade. Apply high quality masking tape, 3M Blue masking tape pressed hard on the finished side and then mark your cuts, Measure twice, cut once. The tape prevents the blade from shredding the film edge. Remove the tape promptly avoiding as much sheer as possible to avoid stripping off the film.

PLEASE take before, progress and final work photos ... we all need encouragement!
 
Last edited:
Using Chad's method I would add that you could score the cutout line first with a sharp utility blade. I have used black electric tape , and when done use a fine metal file to blend in the edges. Ric ( your cut with the jigsaw blade would be on the "otherside" or "outboard-side ofthe score line, and they make blades designed for laminates)
 
Guys,

The best tool to use for the job is a router. I know it makes a mess but the up and down motion from a jigsaw or reciprocating saw will lift the original material and cause it to separate creating a bigger problems.

Once you have roughed out the hole with a straight bit, you can finish the edge of orgiinal laminate with a 45 degree bit on a shallow setting.

-John
 
Thanks for all of the info guys.

By the way Jacob, your link and the associated project just looks "awesome" inside your cabin.

The TV has been ordered, now looking into a DVD player and a mounting arm.
 
Let me first thank ALL of you for the EXCELLENT advice on this board. I thought I would give a play by play here for others to use as well. This project is really not as bad to accomplish as I feared.


JanFeb2010002.jpg


Above is the before photo showing the "Original Setup."


JanFeb2010004.jpg


Here is the panel opening to be enlarged with the TV/VCR now removed. Note: Sea Ray had the old unit attached to a 1/2" piece of plywood that slid along the floor of the in place cabinet and engaged the cleat at the back. It was then held in place by 2 screws at the front installed from under the soffit. I thought it best to duplicate their good idea for the new TV/DVD assembly. Simple and effective, (more of that to follow).


2010-02-21001.jpg


Following the advice here, I installed a good blue masking tape and placed a template over the opening to markout the newly required size. (Sorry for the "yellowed" photos. With no internal lighting on the boat as the batteries are all disconnected, the work light put a weird color on the shots.)


2010-02-21004.jpg


With the template removed you can see the new outline required. Here's where I began to hold my breath as it was time to "Go for Broke!"


2010-02-21005.jpg


As suggested, I clamped a straight edge and carefully "scored" the Vitricore with a sharp razor knife. Take your time on this, the material is quite hard and you don't want the knife to get away from you.


2010-02-21007.jpg


There wasn't sufficient room to use a router, so I was forced to use a jig saw for most of the job. I purchased blades that had 20 teeth per inch and used a new blade with each long cut. Maybe overkill, but why not. They are cheap compared to the boat being operated on. The surface of the Vitricore never splintered or lifted and using the straight edge to guide the jig saw put the Sea Ray level of quality in the finished cuts.


2010-02-21010.jpg


Here you can see the results of the effort as the blank has now been removed. Boy did that feel good to know that all went well. Again, THANKS to those of you who previously posted with your suggestions.


2010-02-21014.jpg


The above photo gives you a feel for what I am going for. The TV will sit at the top of the opening and I will be making a combination TV bracket/cabinet to hold a Sony PS3 Slim which will be used as a Combo DVD player and gaming system for those rainy days. It will slide into the new opening along the floor of the in-place cabinet just like the original did.


2010-02-21016.jpg


I then proceeded to make more cardboard templates for use in fabricating the cabinet/bracket, cleaned up the mess and painted the newly exposed edges flat black (as Sea Ray originally had it. Total time in the boat was about 4 hours.


2010-02-21019.jpg

2010-02-21018.jpg


Today I went to a buddies cabinet shop and we built the TV/DVD cabinet/bracket. As you can see, the white panel has been cut out to allow all of the cable and power connections. The TV will be directly bolted to that panel which should provide a strong and stable mounting platform. Underneath it is the actual exposed cabinet. While a bit hard to see, the opening on the left will house the PS3. There is no back to the PS3 opening and holes are drilled in the top to allow for air movement (another CSR member(s) suggestion). The opening on the right has a lip on the front of it and is to hold the 2 remotes. Once the assembly is slid into place, all you should see is the TV's face sitting flush against the Vitricore and underneath it the black facing of the cabinet. I hope to finish the installation on Saturday with pics to follow.
 
Last edited:
Here's the finished product.


2010-02-21120.jpg


The PS3 Slim is in the lower left corner and the lower right holds the remotes.
 
Very nice - great job!
 

Forum statistics

Threads
113,253
Messages
1,429,324
Members
61,129
Latest member
MinecraftRuSwilm
Back
Top