Porthole leak? How to fix

johna

New Member
Dec 5, 2008
14
Chicago
Boat Info
2004 390
Engines
8.1
Hi Everyone,
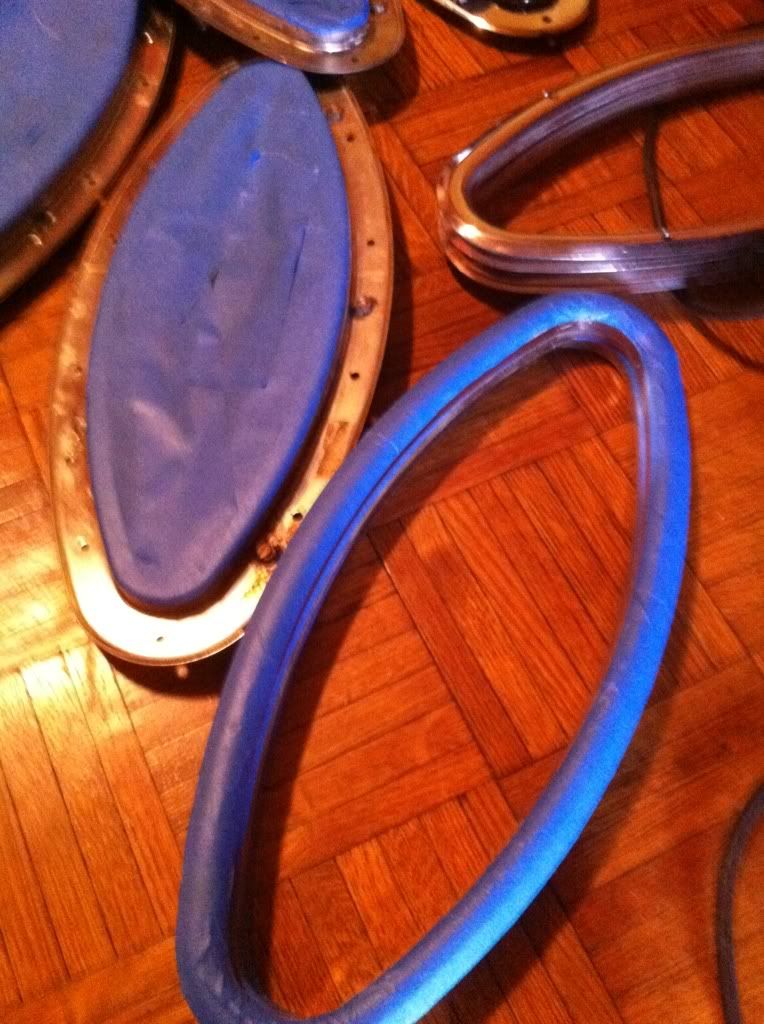
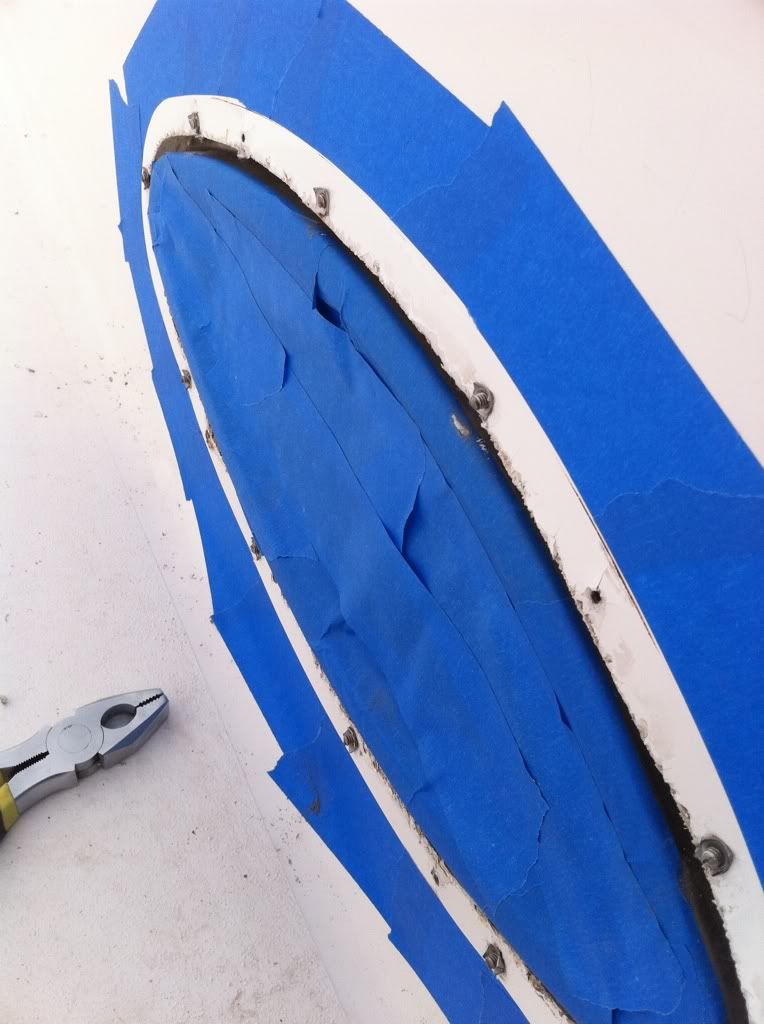
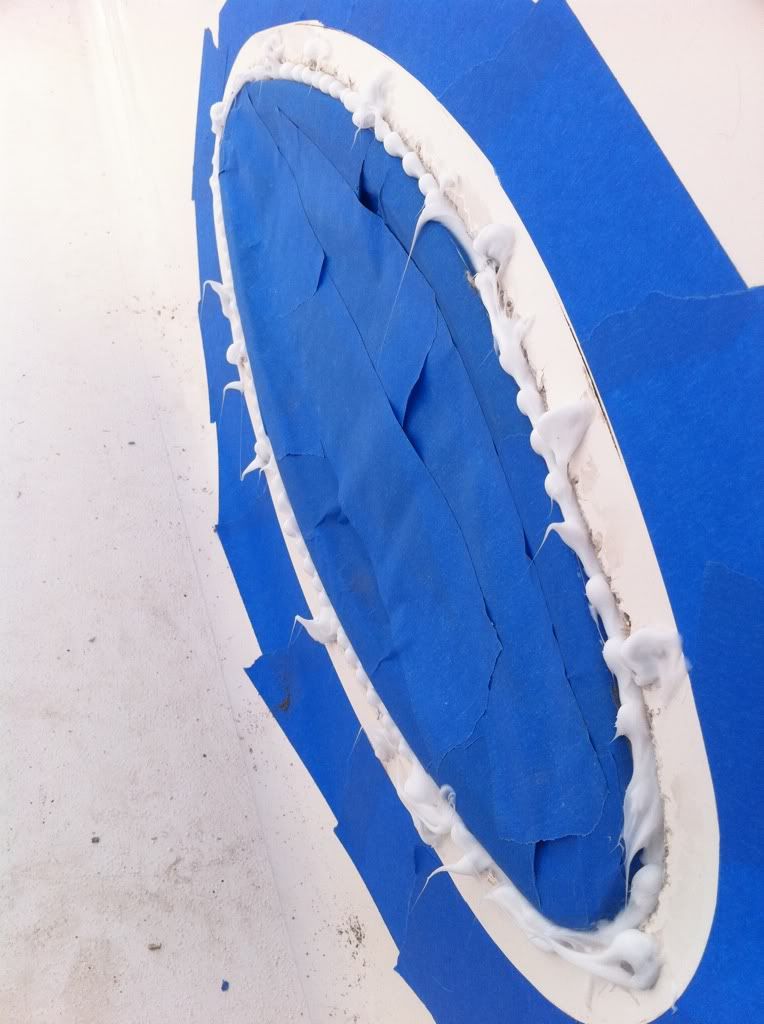
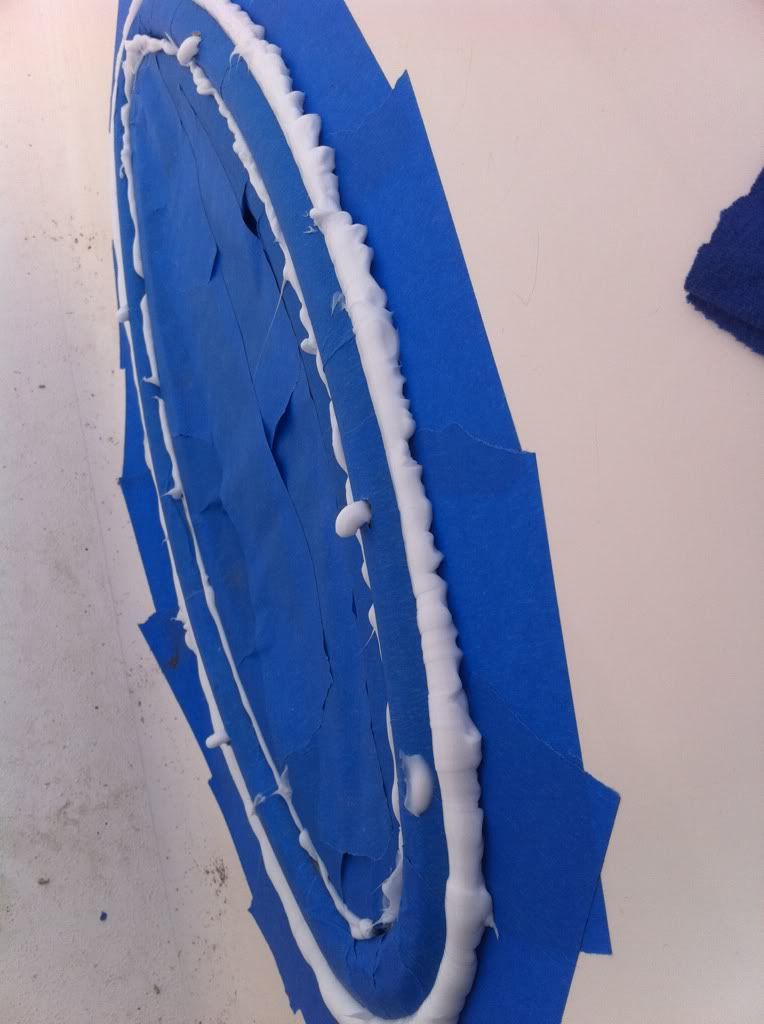
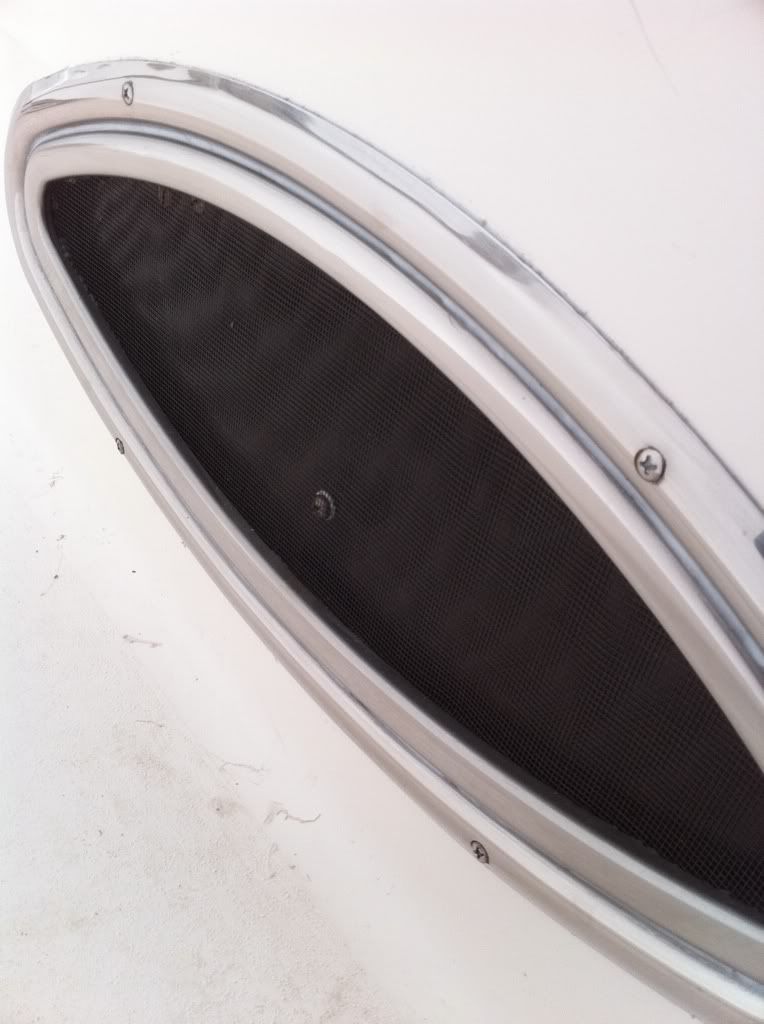
I have a 1998 330 SD and recently after rainstorms, I have been getting water in the aft cabin carpet. I believe I have traced the water from the aft carpet to originate from the starboard side porthole window that is above the couch. I found the carpet to be damp under the couch cushions (at the bottom of the starboard hull where carpet meets the hull its wet - although I can't get behind the hull or under the window to visually confirm this) the water then runs to the closet carpet then down to the aft carpet in the back. I am concerned that I will get mildew and mold smell too. I was searching the site and it appears these four windows; two port side and two starboard side should be rebedded every 6 or 7 years. I have owned the boat for about 6 years and I have never done this. Has anyone ever had this problem or reseated these windows. Is there instructions on how to do this? Or do I simply unscrew the screws on the inside and out and remove the window and then recaulk and reseat? Or should I have my boat mechanic do this?

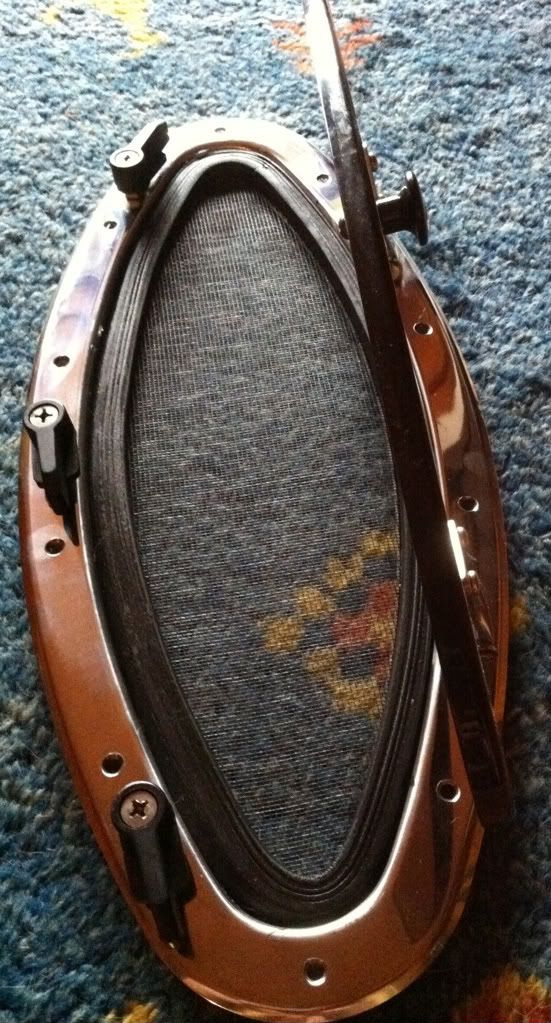
As well, could the water be entering because the black window tabs pushing against the rubber seal needs to be tightened. The black tabs don't seem very tight, but it does appear to create a seal on the black rubber ring as I do see water sitting in it (after a rain storm). Can you tighten these?

Any help would be appreciated.
 
I would hit the porthole with a hose first to determine where it is actually leaking. The gaskets are pretty easy to replace if that turns out to be the problem. Did you try to tighten the tabs? One of my hatches was leaking a couple of weeks ago and that fixed the problem. I hope it turns out to be one of these easy fixes!
 
Your windows and hatches are overdue to be re-bedded. The vinyl in the boat is foam backed and will mold if it isn't already. Not sure if your windows are in a cored part of the boat. Usually when you see a leak, it's already bad. It's easy to re-bed the windows. The window consists of two parts. The outer ring and the inner assembly. First you have to take off the outer ring, 4 screws and then take a couple of putty knifes and slowly work your way around the frame until it comes free. Once you have the outer ring off, you have to cut away the old silicone to get to the nuts holding the inner frame in. Keep track of which screw came from which hole on which window, they've all been cut to size. The inner assembly is a 2 man job, one to hold the nut and the other to unscrew inside. Once you have the window out, you can put new gaskets in and re-screen if you want. The gasket is held in by a little glue, just keep pulling and it'll come out. You can use the outer frame ring as a template to cut new screens. Then a little silicone, put the screen in, then push in the gasket to tighten up the screen.

e8b2157f.jpg


Now is also a good time to polish up the window. Make sure you clean off all the old silicone from the windows and fiberglass. this is the hardest part of the job.

Next, tape off the windows. This is the messy part. You're going to need about 1 tube of silicone per window.

I taped off both the frame and the screen so as not to get them all gooped up.

021a3ca7.jpg


Tape off the window opening (you can use the outer frame ring as a template to cut around)

f743c230.jpg


Back to the 2 man part, install the inner assembly with the screws and nuts. (hopefully you kept track of what goes where)

d4bb0e25.jpg


squirt Silicone inbetween the window and fiberglass.

Then Flip the outer frame upside down and fill it with silicone. You're going to pretty much use a whole tube of silicone per window so use that as a gauge to make sure you're using enough. Once you have the frame ring filled, push it in place. Silicone should push out everywhere.

bd6cde73.jpg


take the 4 outer ring screws and screw the frame in. Clean up the excess silicone and then peel off the tape. You want to work fastish because as the silicone cures, it gets hard to clean up. Have a rag and acetone near by to help with the cleanup.

869182d9.jpg


Now you're done, hopefully. Make sure you also have a good bead of silicone between the outer ring and inner assembly. If you don't, go ahead and add some more and push it in with your finger or something. Then wipe up the excess with acetone and a rag. It's easy to clean up the silicone when it's wet with acetone.
 
Last edited:
Wow Turtle, Great pictorial and directions. I'm definitely saving this page for the time I have to tackle this job. Thanks for the post!
 
No problem, Frank walked me through it and i'm just passing it forward.

I should also note that if you wait until it's "needed", cleaning off the old silicone takes about 10 times longer than if you do it before it's leaking. once that silicone gets dried out and starts leaking, it becomes like shoe leather.
 
Last edited:
The new style gasket has a groove around the inner circumference. The screen is basically encompassed by a plastic oval ring that just sits in the groove. I have heard others here say that they even just trimmed the old screen out and pressed the new style right into the old gasket stating that there was enough tension to hold it in.
 
Sure, if you push it hard from the inside. I had no problem popping all of mine in and you have a significant ledge created by the outer bezel that would stop it. If you punched it I think it would cost you another 8 bucks, which is the cost of a new screen!!
 
I had a similar leak with one window read in a post to check all the interior and exterior screws 3 of the interior screws were loose and 2 of the latch screws were loose after tightening them I sprayed some silicone spray lube on a rag and wiped it on the interior gasket it solved the problem ran a water hose on it for a couple minutes no leak at all. I have ordered all new gaskets and screens for this fall. Might get you through till fall.

Here's the post,
http://clubsearay.com/showthread.php/14285-Leaking-Port-windows?highlight=leaking+window
 
Last edited:
tightening screws from the inside is not going to stop leaking windows. the only thing that stops water from getting into your boat through the porthole windows is silicone. if your gasket is bad, that's one thing, but all the screws on the inner assemble just hold it to the hull, they will not stop water from coming into the porthole frame. tightening the screws on the inside will probably spin the nuts on the outside and chew up your silicone, causing more of a leak.
 
Yes, If you take the outer ring of the porthole window and lay it down on top of the screen material, trace around the inside of the ring and that's the correct size for the screen.
 
Or you can contact Pompanette/Bomar and order the plastic framed screen that is on the newer models for 8 bucks and pop it in. I am told the old gaskets create enough surface tension to hold it in place but, I put the new style gaskets in myself.
 

Forum statistics

Threads
113,117
Messages
1,426,458
Members
61,032
Latest member
Brock340
Back
Top